
Want gorgeous nails without spending hours at the salon? You’re in the right place. Simple nail art is proof that you don’t need advanced skills or fancy tools to create something beautiful. With a little creativity and a steady hand, you can turn your nails into mini works of art right at home.
Why Simple Nail Art Is Perfect for Beginners
If you’re new to nail art, starting simple is the best way to build confidence. Basic designs are:
- Easy to learn and quick to apply
- Budget-friendly (no expensive tools needed)
- Versatile enough for everyday wear or special occasions
Plus, simple designs often look more elegant and minimal—perfect for that effortless Pinterest aesthetic.
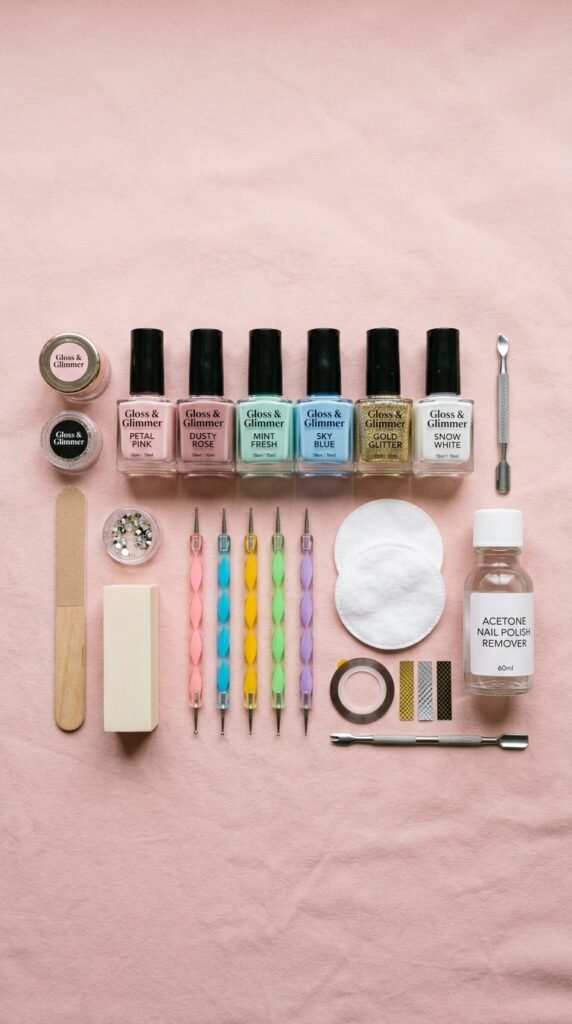
Tools You’ll Need to Get Started
Before you begin, gather a few essentials. You likely already have most of these at home:
- Base coat and top coat
- 2–3 nail polish colors
- A dotting tool (or a toothpick/bobby pin)
- Thin nail art brush (optional)
- Tape or stickers for clean lines
- Cotton pads and nail polish remover
Step-by-Step: Prep Your Nails Like a Pro
Great nail art starts with proper prep. Don’t skip this step!
- Clean your nails
Remove old polish and wash your hands thoroughly. - Shape and buff
File your nails into your preferred shape and lightly buff the surface. - Apply a base coat
This protects your nails and helps polish last longer. - Add your base color
Choose a neutral or light shade for simple designs. Let it dry completely.
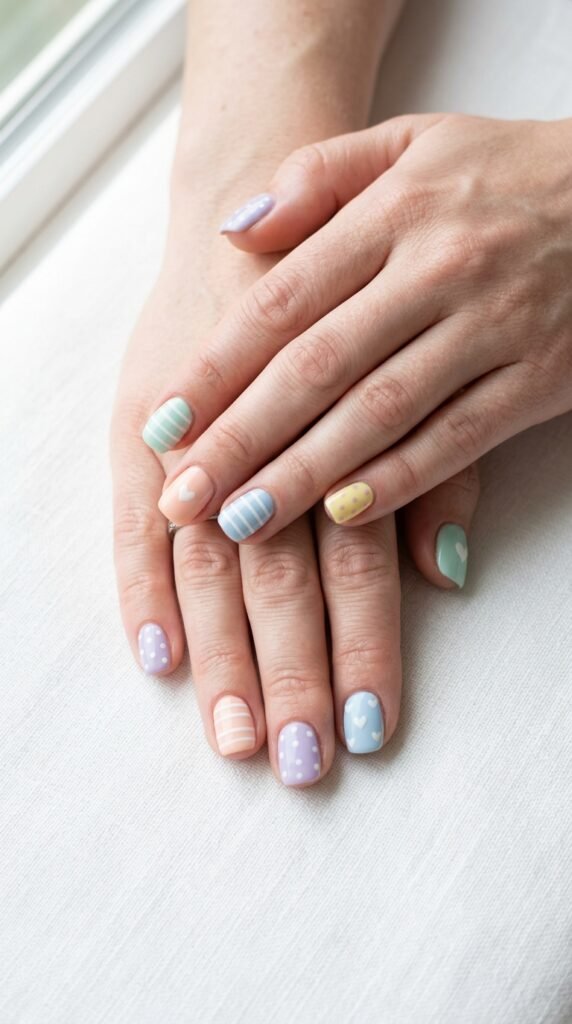
Easy Nail Art Designs You Can Try
Now comes the fun part. These beginner-friendly designs are quick, stylish, and totally doable.
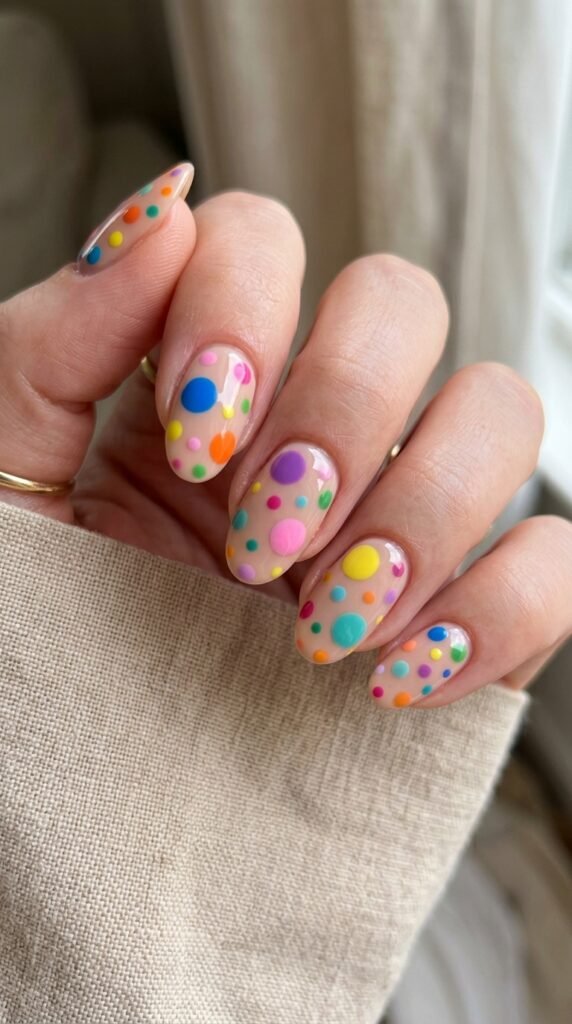
1. Polka Dots
Polka dots are one of the easiest designs to master.
- Dip a dotting tool or toothpick into polish
- Gently press dots onto your nails
- Use one or multiple colors for variety
Tip: Keep dots evenly spaced for a clean look.
2. Minimal Stripes
Stripes add a chic, modern vibe.
- Use thin tape to section off parts of your nail
- Paint over with a contrasting color
- Carefully remove the tape while polish is still slightly wet
You can go for vertical, horizontal, or even diagonal lines.
3. Accent Nail
If you want something subtle, try an accent nail.
- Paint all nails in one color
- Choose one nail (usually the ring finger) for a simple design
- Add glitter, dots, or a tiny pattern
This keeps things stylish without too much effort.
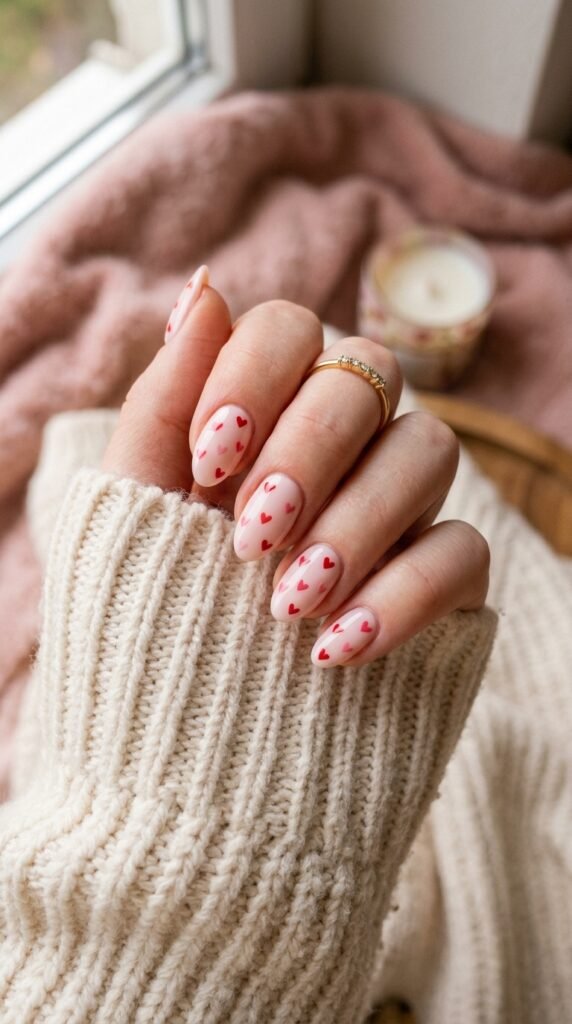
4. Tiny Hearts
Perfect for a soft, cute look.
- Use a dotting tool to make two small dots close together
- Drag them slightly downward to form a heart shape
Practice on paper first if you’re unsure—it’s easier than it looks!
Tips for Clean and Professional Results
Even simple designs can look salon-quality with these tricks:
- Work in thin layers: Thick polish smudges easily
- Let each layer dry: Patience makes a big difference
- Use cleanup tools: Dip a small brush in remover to fix edges
- Seal with a top coat: Adds shine and prevents chipping
Common Mistakes to Avoid
It’s normal to make mistakes when you’re starting out. Here are a few to watch for:
- Rushing the drying process
- Using too much polish on tools
- Skipping the base or top coat
- Overcomplicating your design
Keep it simple—less is often more when it comes to nail art.
How to Make Your Nail Art Last Longer
You’ve put in the effort, so let’s make it last:
- Reapply a top coat every 2–3 days
- Avoid harsh chemicals or wear gloves when cleaning
- Keep your nails hydrated with cuticle oil
Final Thoughts
Simple nail art is all about creativity, not perfection. Whether you’re adding tiny dots or subtle stripes, each design is a chance to express your style in a fun, low-pressure way.
Start small, experiment often, and don’t be afraid to try new ideas. The more you practice, the better your designs will become.
Save this guide for later and try one of these easy nail art ideas the next time you want a quick beauty upgrade!

Leave a Reply