
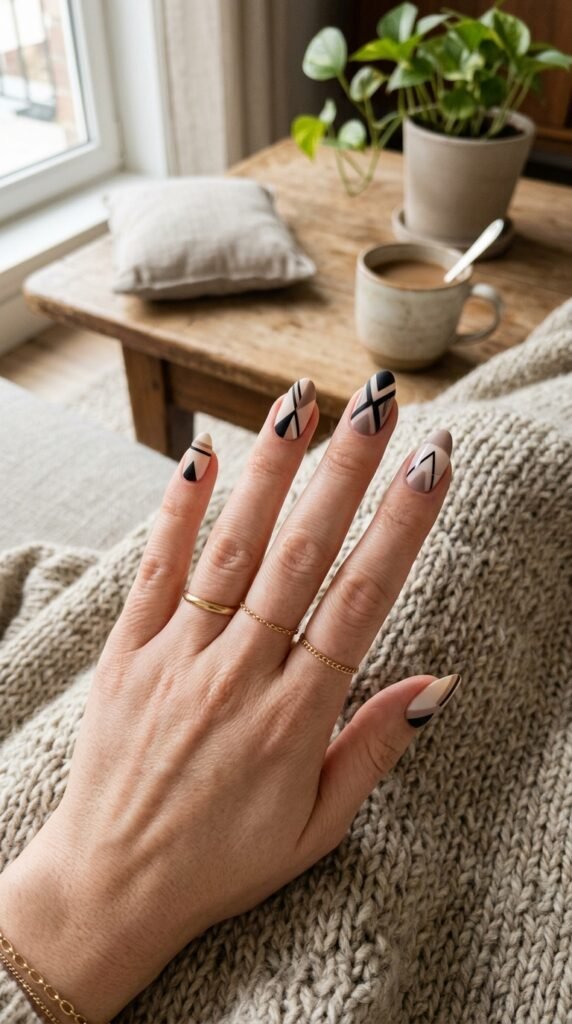
Geometric nail art is one of the easiest ways to make your nails look instantly modern, chic, and Instagram-worthy—without needing professional skills. Clean lines, bold shapes, and contrasting colors can turn even the simplest manicure into a statement look. Whether you love minimal designs or eye-catching patterns, geometric nail art gives you endless creative freedom.
Let’s break it down step-by-step so you can create stunning geometric designs right at home.
What You’ll Need to Get Started
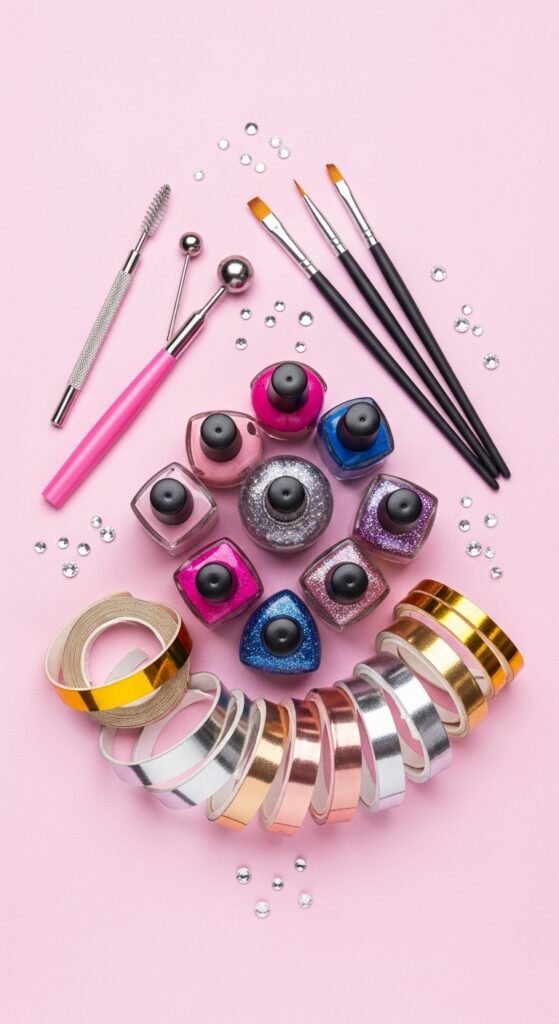
Before you begin, gather a few essential tools. Having the right items makes the process smoother and your designs more precise.
Basic supplies:
- Base coat and top coat
- Nail polish in 2–4 contrasting colors
- Nail art brushes (thin liner brushes work best)
- Striping tape or nail tape
- Dotting tool or toothpick
- Nail polish remover + cotton swabs (for cleanup)
Optional tools:
- Makeup sponge (for gradients)
- Nail vinyls or stencils
Prep Your Nails Like a Pro
Good nail prep is the secret behind long-lasting, clean-looking designs.
Steps to prep:
- Remove old polish completely
- Trim and shape your nails (square or almond shapes work great for geometric designs)
- Gently push back cuticles
- Buff the nail surface lightly
- Apply a base coat to protect your nails
Let your base coat dry completely before moving on. This helps prevent smudging and gives your design a smooth canvas.
Start with a Base Color
Choose a base color that complements your design. Neutral shades like nude, white, or soft pink are perfect if you want your geometric shapes to stand out.
Tips for choosing colors:
- Use high contrast (e.g., black + white) for bold looks
- Try pastels for soft, trendy vibes
- Mix metallics with matte shades for a modern twist
Apply 1–2 coats and let it dry fully before adding any design elements.
Create Clean Lines with Tape
Striping tape is your best friend when it comes to geometric nail art. It helps create sharp, precise lines without much effort.
How to use it:
- Cut thin strips of tape
- Place them on your nails to form shapes (triangles, squares, diagonals)
- Press the edges down firmly
- Paint over or between the tape with another color
- Carefully remove the tape while the polish is still slightly wet
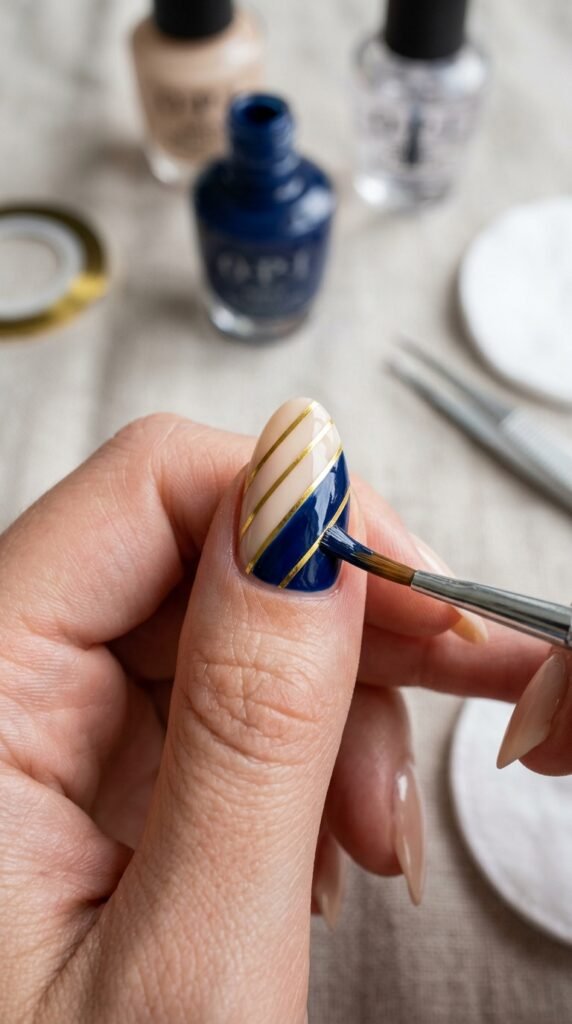
This method is perfect for beginners because it eliminates shaky lines.
Try Simple Geometric Designs
If you’re new to nail art, start with easy patterns and build your confidence.
Beginner-friendly ideas:
- Diagonal color blocks: Split your nail into two sections using tape
- Triangle tips: Create small triangles near the cuticle or tip
- Striped nails: Use parallel lines for a clean, modern look
- Half-and-half nails: Paint each half a different color
Pro tip: Stick to 2–3 colors at first to avoid overwhelming the design.
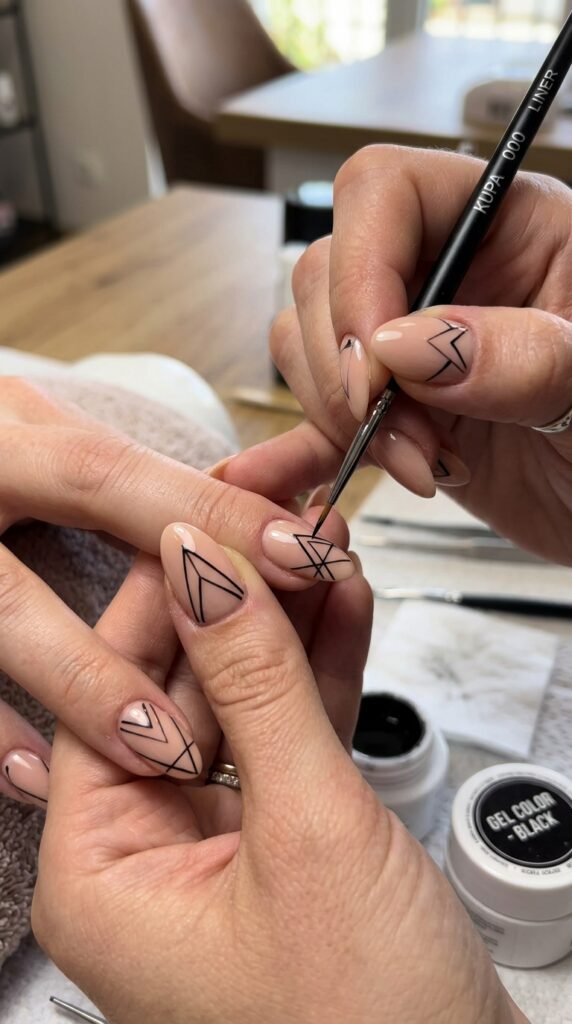
Add Details with a Nail Art Brush
Once you’re comfortable, switch to a thin brush for more intricate designs.
What you can create:
- Intersecting lines
- Abstract shapes
- Minimalist grids
- Tiny squares or rectangles
Keep your hand steady by resting your elbow on a flat surface. Work slowly—precision is key here.
Play with Negative Space
Negative space designs are trendy and surprisingly easy. They involve leaving parts of your natural nail exposed to form shapes.
How to achieve this look:
- Apply tape in your desired pattern
- Paint over it with your chosen color
- Remove the tape to reveal bare nail underneath
This creates a clean, airy look that feels modern and stylish.
Seal Your Design
Once your design is completely dry, finish with a top coat. This step is crucial.
Why it matters:
- Smooths out the surface
- Adds shine or matte effect
- Protects your design from chipping
Apply gently to avoid dragging the design. A quick-dry top coat can save you time and prevent smudges.
Common Mistakes to Avoid
Even simple designs can go wrong if you rush. Here’s what to watch out for:
- Not letting layers dry: This leads to smudging
- Using too much polish: Thick layers can bleed under tape
- Skipping base/top coat: Your manicure won’t last as long
- Rushing tape removal: Always peel slowly and carefully
Take your time—neatness makes all the difference with geometric styles.
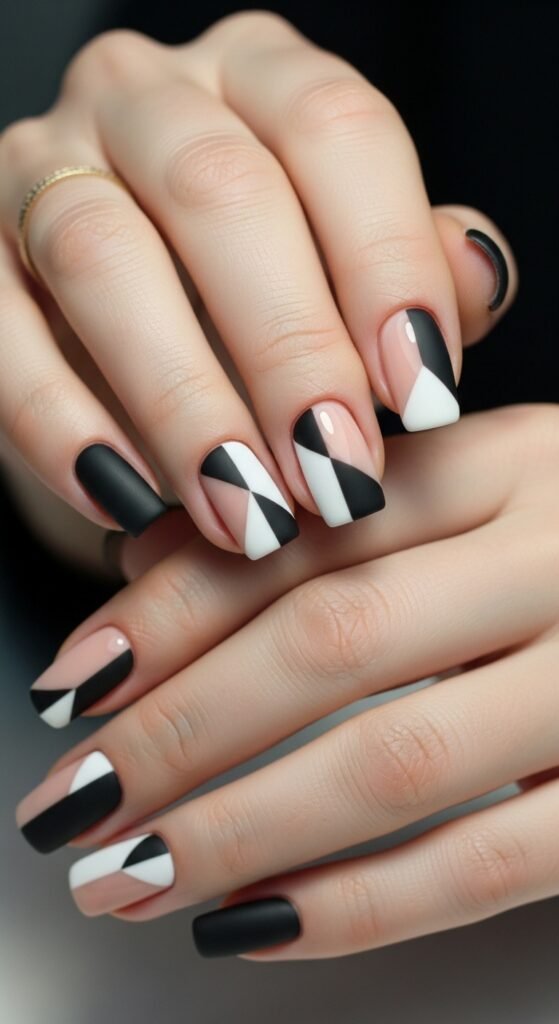
Final Look Inspiration
Geometric nail art can be as subtle or bold as you want. From monochrome minimalism to colorful abstract designs, the possibilities are endless.
Final Thoughts
Geometric nail art proves that you don’t need complicated techniques to create something stunning. With a little patience, the right tools, and a touch of creativity, you can achieve salon-worthy nails at home.
Start simple, experiment with shapes, and don’t be afraid to mix colors and styles. The more you practice, the better your designs will become.
Save this guide for later and try your first geometric nail look today!

Leave a Reply