
There’s something undeniably charming about heart nail art. Whether you’re getting ready for a date, celebrating self-love, or just want a cute everyday look, heart designs instantly add a playful and romantic touch to your nails. The best part? You don’t need to be a professional nail artist to create them.
Let’s walk through simple, stylish ways to create heart nail art at home—no stress, just creativity and fun.
Tools You’ll Need for Heart Nail Art
Before diving in, gather a few basic tools. You likely already have most of these at home.
- Nail polish (base color + heart color)
- Thin nail art brush or toothpick
- Dotting tool (or bobby pin as an alternative)
- Clear top coat
- Nail polish remover + cotton swabs for cleanup
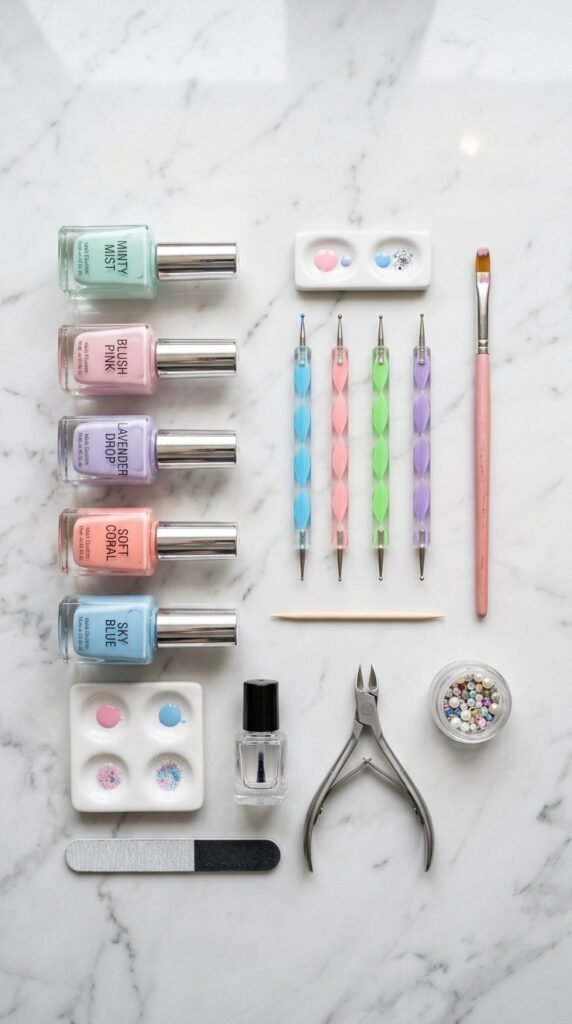
Tip: If you’re a beginner, choose contrasting colors like white and red or pink and black to make your hearts stand out.
Step-by-Step: Classic Heart Design
This is the easiest method and perfect if you’re just starting out.
1. Prep Your Nails
- Clean and shape your nails
- Apply a base coat to protect them
- Add your base color and let it dry completely
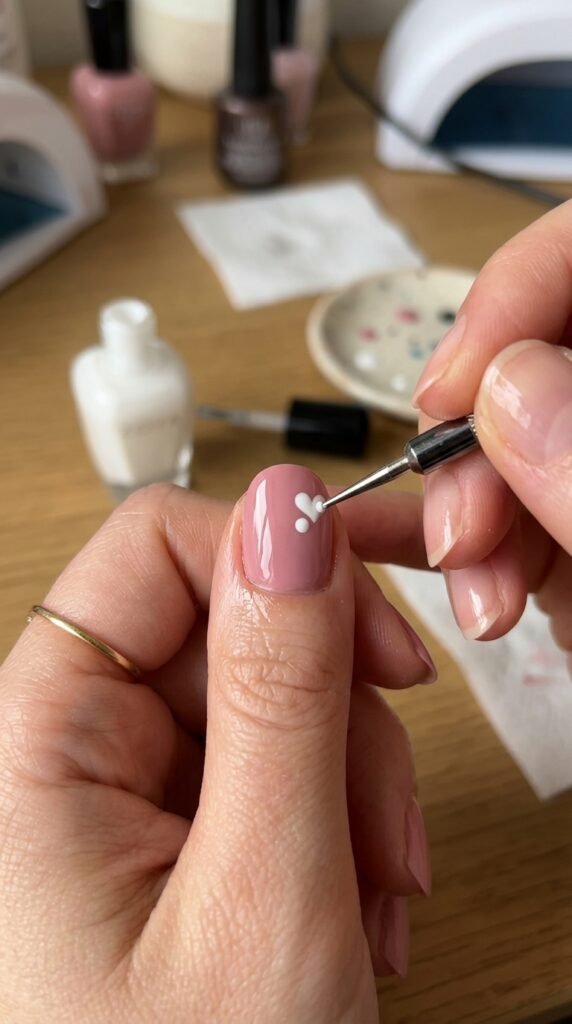
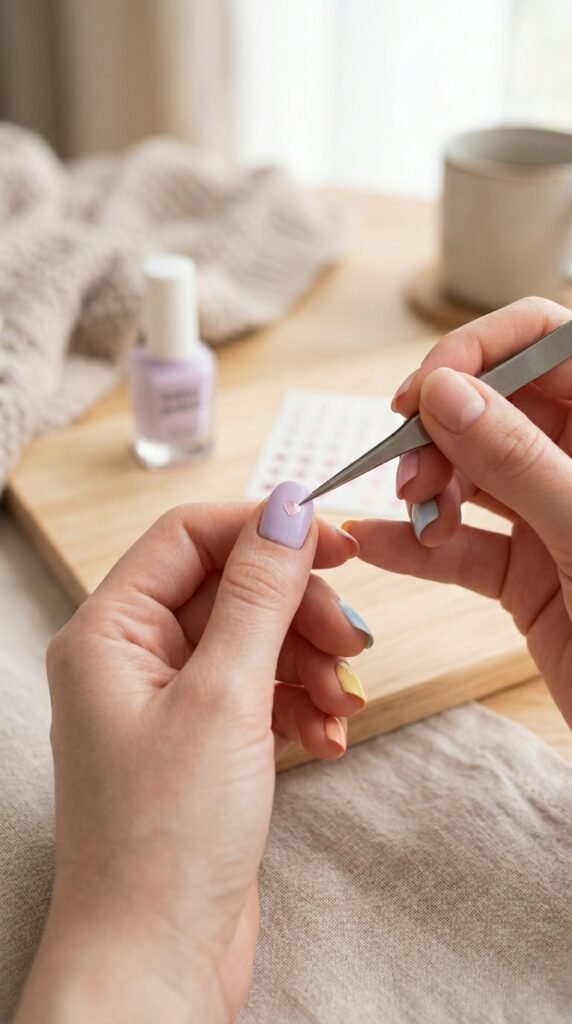
2. Create the Heart Shape
- Use a dotting tool (or toothpick) to make two small dots close together
- Drag each dot downward to meet at a point
This forms a simple heart shape—easy and effective.
3. Seal the Design
- Let the hearts dry
- Apply a glossy top coat to lock everything in place
Pro Tip: Don’t rush drying time. Smudged hearts can ruin the whole look.
Cute Variations to Try
Once you’ve mastered the basic heart, you can experiment with different styles.
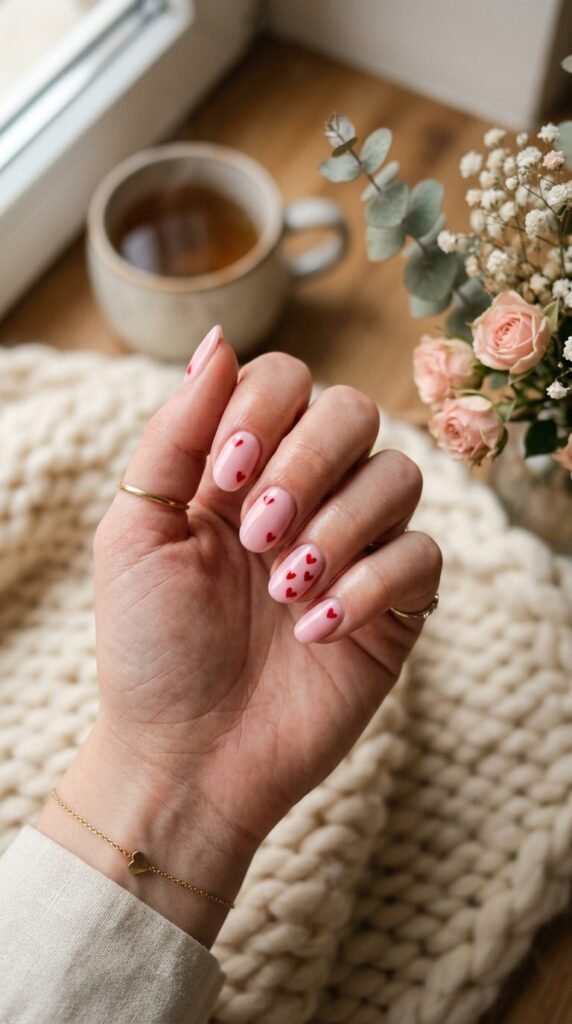
Mini Hearts All Over
- Create tiny hearts scattered across the nail
- Use a neutral base like nude or soft pink
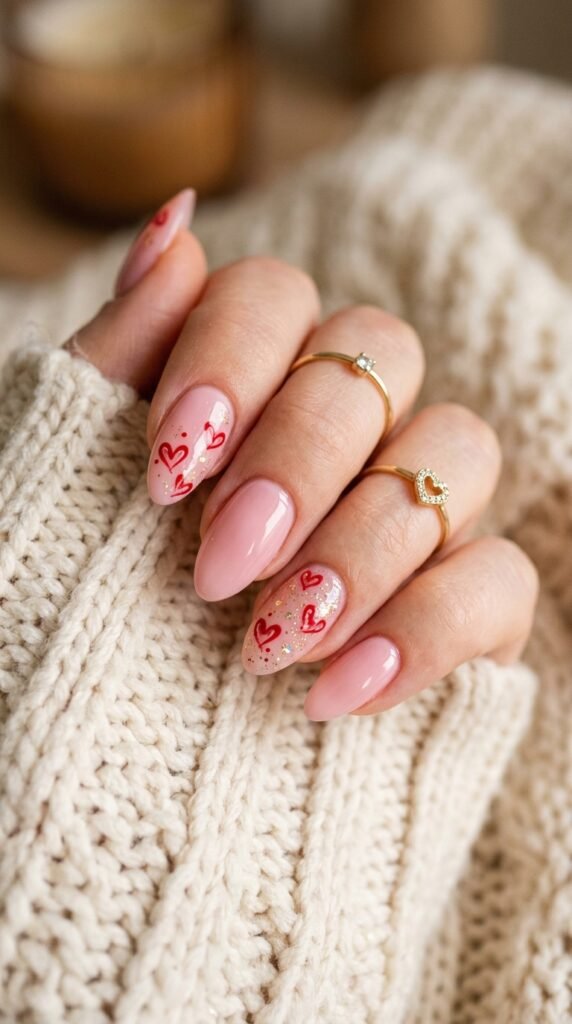
Accent Nail Hearts
- Paint hearts only on one or two nails
- Keep the rest of the nails solid for a balanced look
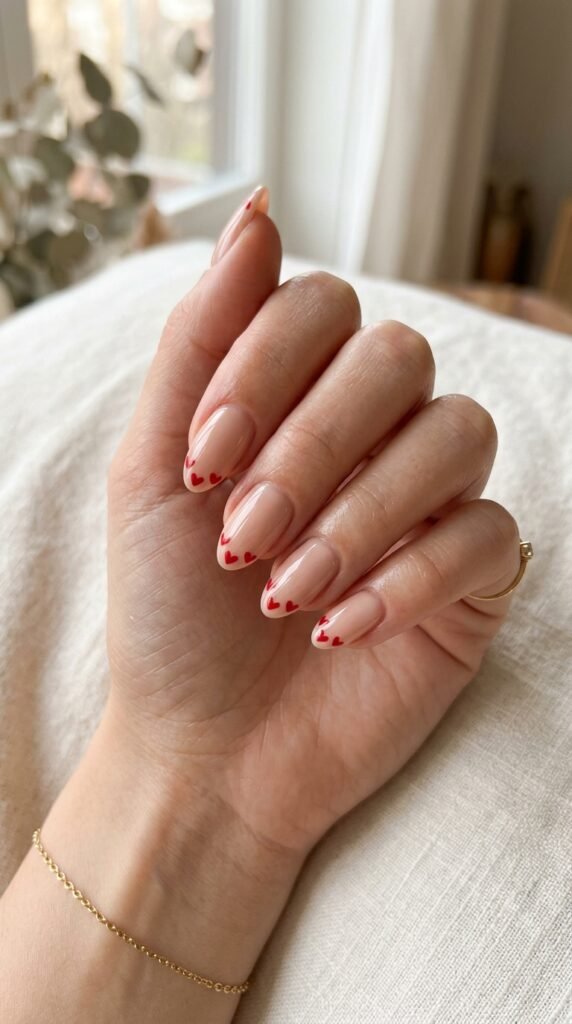
French Tip Hearts
- Replace the traditional French tip with a row of mini hearts
- Use white or red for a chic finish
Ombre Heart Nails
- Blend two colors for a gradient base
- Add small hearts on top for a dreamy effect
Easy Hack: Using Tape or Stickers
If freehand drawing feels tricky, don’t worry—there are shortcuts.
Method 1: Tape Trick
- Cut a small heart shape from tape
- Stick it onto your nail after applying base color
- Paint over it, then peel off for a clean heart outline
Method 2: Nail Stickers
- Use pre-made heart stickers
- Apply them after your base polish dries
- Seal with a top coat
These methods are beginner-friendly and give super neat results.
Color Combinations That Always Work
Choosing the right colors can elevate your heart nail art from basic to stunning.
Try these combinations:
- Red + White – classic and bold
- Pink + Gold – soft and elegant
- Black + Nude – modern and chic
- Pastel Mix – playful and trendy
Tip: Matte top coats can give your hearts a unique, velvety finish.
Common Mistakes to Avoid
Even simple designs can go wrong—here’s how to avoid that:
- Using too much polish: Thick layers make hearts look messy
- Skipping drying time: Leads to smudging
- Uneven dots: Makes the heart shape look off
- No top coat: Your design won’t last as long
Keep your hand steady and take your time. Nail art is all about patience.
Final Touches for a Polished Look
Once your hearts are done, elevate the look with a few finishing details:
- Add tiny rhinestones near the hearts
- Use glitter polish for a subtle sparkle
- Try a matte top coat for contrast
These little extras can make your nails look salon-worthy without extra effort.
Conclusion: Let Your Nails Show Some Love
Heart nail art is one of the easiest ways to express creativity while keeping things cute and stylish. Whether you go for tiny scattered hearts or bold accent designs, there’s no wrong way to do it.
Start simple, experiment with colors, and most importantly—have fun with it.
Save this idea for your next nail day and try a new heart design each time. Your nails deserve a little love too.

Leave a Reply