
Ever stared at beautifully designed nails and thought, “I wish I could do that myself”? Good news—you absolutely can. Nail art at home isn’t just budget-friendly, it’s also a relaxing, creative hobby you can enjoy anytime. With a few basic tools and a little patience, even beginners can create stunning designs.
Let’s walk through everything you need to know to get started, step by step.
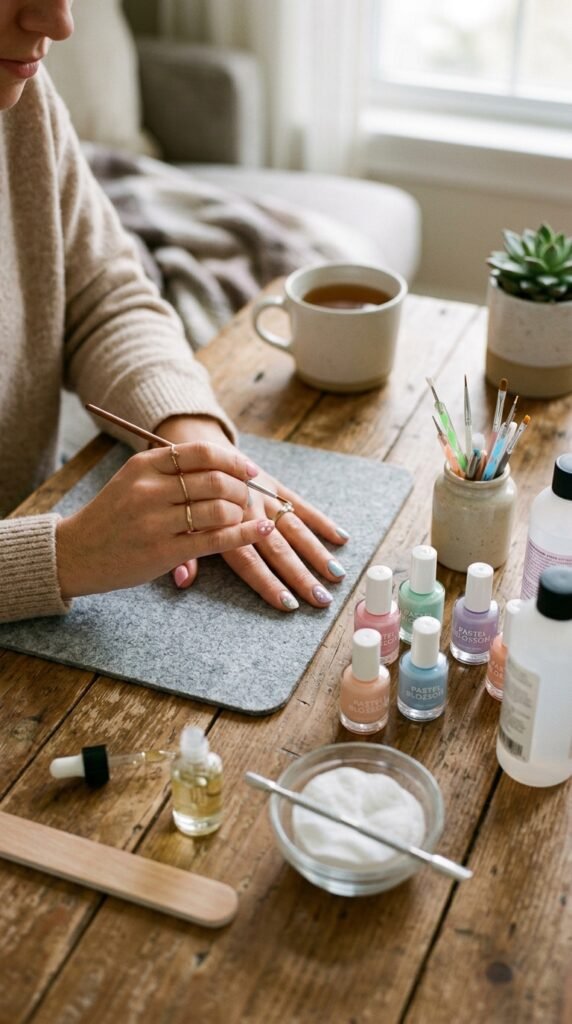
What You Need to Get Started
Before diving into designs, gather a few essentials. You don’t need a professional kit—just a few basics will do.
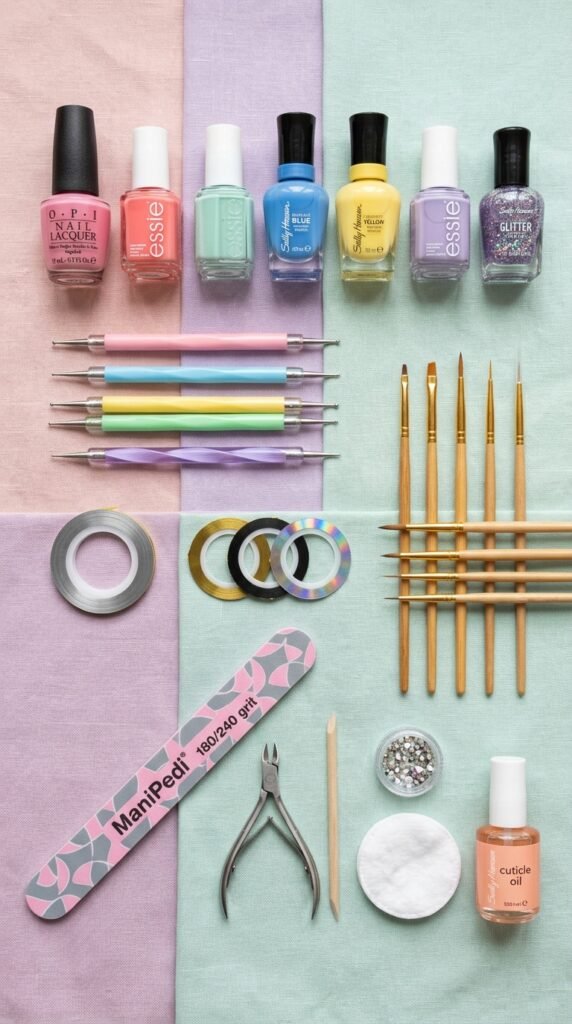
Must-have tools:
- Nail polish (2–3 colors to start)
- Base coat and top coat
- Nail polish remover
- Cotton pads or balls
- Nail file and buffer
- Toothpicks or bobby pins (for DIY dotting tools)
- Small brush (or eyeliner brush for details)
Optional but helpful:
- Nail tape or stickers
- Dotting tools
- Cuticle oil
Step 1: Prep Your Nails Like a Pro
Great nail art starts with clean, well-prepped nails. Skipping this step can make even the best designs look messy.
Follow these steps:
- Remove any old nail polish
- Trim and file your nails to your desired shape
- Gently push back cuticles
- Buff the surface lightly for smoothness
- Wash hands to remove dust and oils
Then apply a base coat. This protects your nails and helps polish last longer.
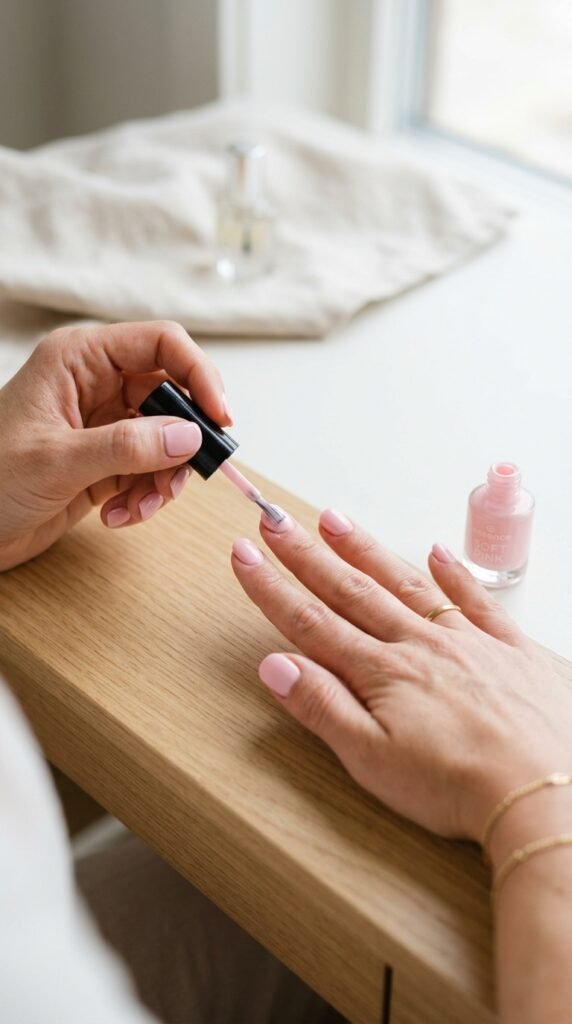
Step 2: Apply Your Base Color
Your base color sets the stage for your design. Choose something simple if you’re just starting—like nude, pink, or white.
Tips for smooth application:
- Apply thin layers (2 coats max)
- Let each coat dry completely
- Clean edges with a small brush dipped in remover
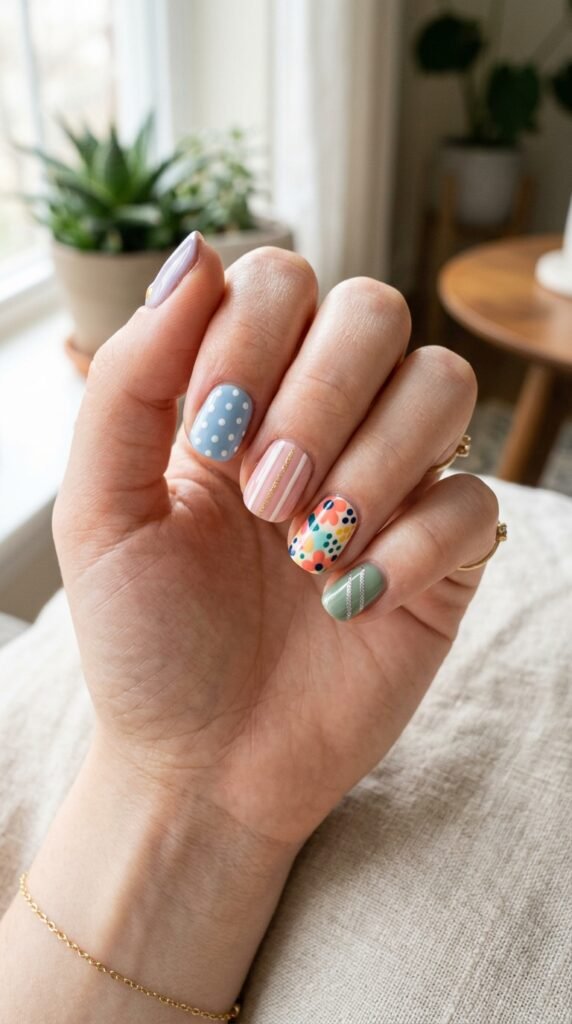
Step 3: Start with Simple Designs
As a beginner, stick to easy designs that don’t require too much precision.
1. Polka Dots
- Dip a toothpick or dotting tool into polish
- Gently dot onto nails
- Use contrasting colors for a fun look
2. Accent Nail
- Paint one nail differently (glitter, bold color, or design)
- Keep the rest simple
3. Stripes
- Use tape or a thin brush
- Create horizontal or vertical lines
4. French Tips (Modern Style)
- Use a different color instead of white
- Try angled or double tips
Step 4: Let It Dry (Seriously!)
One of the biggest mistakes beginners make is rushing. Nail art smudges easily if layers aren’t dry.
Quick drying tips:
- Wait at least 2–3 minutes between layers
- Use a fan or cool air (avoid heat)
- Try quick-dry top coats if you’re impatient
Step 5: Seal with a Top Coat
A top coat is the secret to making your nail art look polished and last longer.
Why it matters:
- Adds shine
- Prevents chipping
- Smooths out uneven designs
Apply a thin, even layer and let it fully dry.
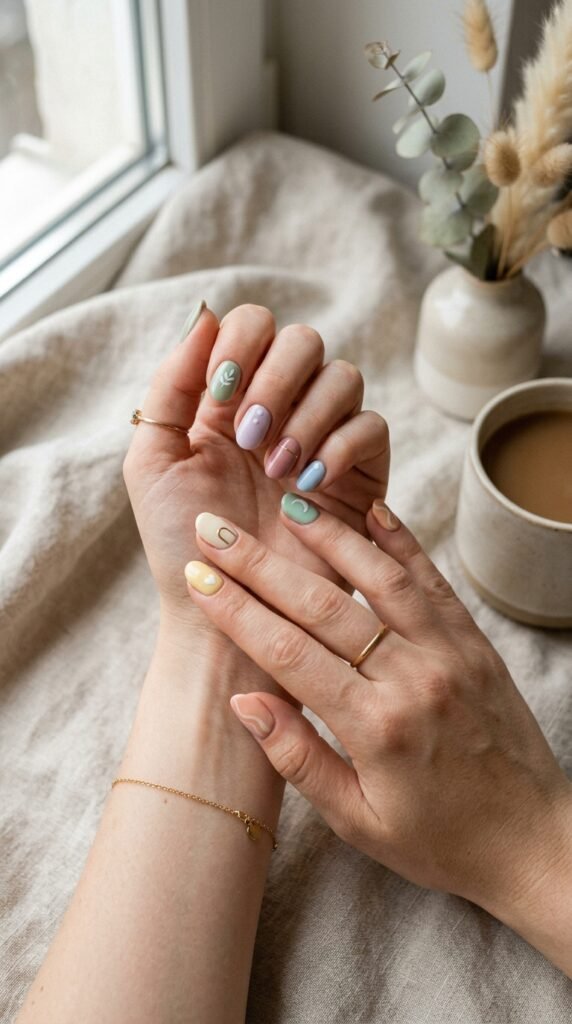
Beginner-Friendly Nail Art Ideas to Try
If you’re feeling inspired, here are a few easy ideas you can recreate right away:
- Minimal dots on nude base
- Pastel mismatched nails
- Tiny hearts using a toothpick
- Diagonal color blocks with tape
- Glitter tips for a subtle sparkle
Common Mistakes to Avoid
Even simple nail art can go wrong if you’re not careful. Here’s what to watch out for:
- Applying thick polish layers (leads to smudging)
- Skipping base or top coat
- Not letting layers dry properly
- Using too much polish on tools
- Rushing the process
Take your time—it makes all the difference.
Final Tips for Success
- Start simple and build your skills gradually
- Practice on paper or fake nails first
- Keep cotton swabs handy for quick fixes
- Don’t aim for perfection—have fun with it
Nail art is all about creativity and self-expression. The more you practice, the better (and faster) you’ll get.
Your Turn to Create
Now that you know the basics, it’s time to try it yourself. Pick your favorite colors, put on some music, and enjoy the process. You might surprise yourself with how good your nails turn out.
Save this guide for later and come back whenever you need inspiration!

Leave a Reply