
Nail art doesn’t have to be complicated or expensive. Even with just a few basic supplies, you can create beautiful designs that look professional. Whether you’re a beginner or someone who loves experimenting at home, this guide will show you how to make your nails pop without breaking the bank.

What You’ll Need: Basic Nail Art Supplies
You don’t need a ton of fancy tools to create stunning nail art. Start with these essentials:
- Nail polish: A few colors of your choice. A neutral base and 2–3 fun shades work well.
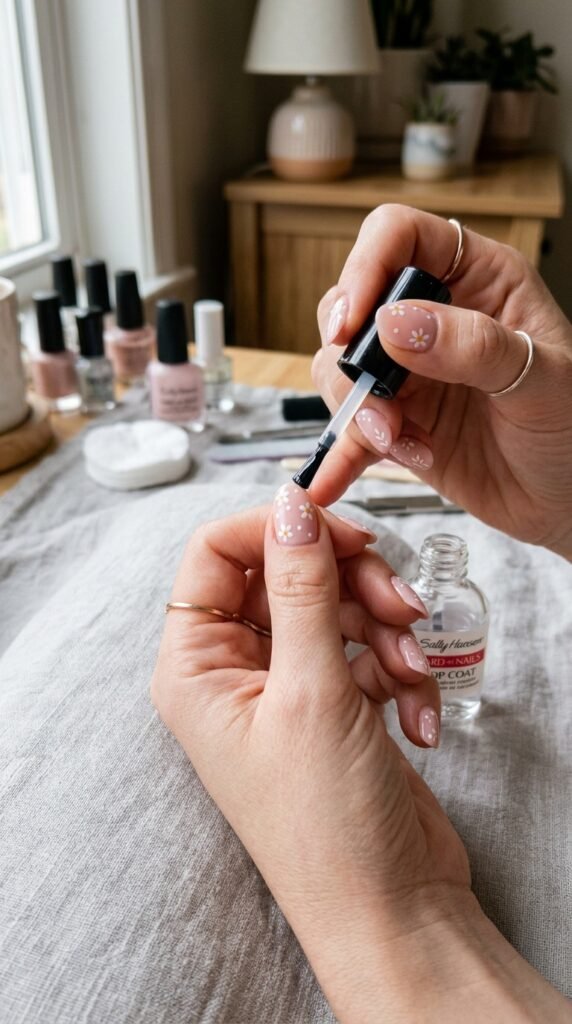
- Top coat: Protects your design and adds shine.
- Base coat: Helps polish stick better and prevents staining.
- Cotton balls or pads: For cleaning up mistakes.
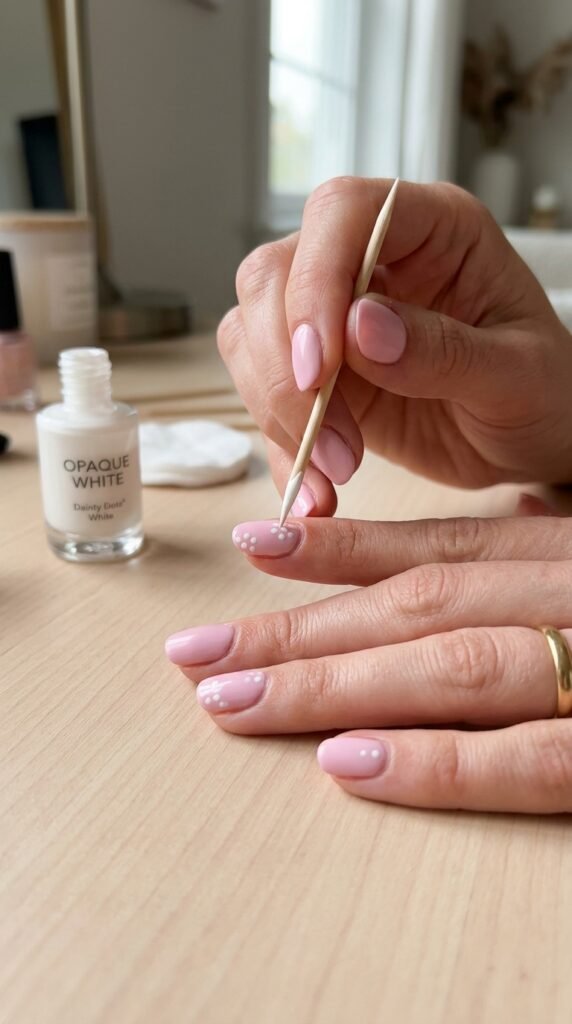
- Toothpick, bobby pin, or paper clip: Perfect for drawing dots, lines, or patterns.
- Scotch tape or stickers: For clean, straight lines or shapes.
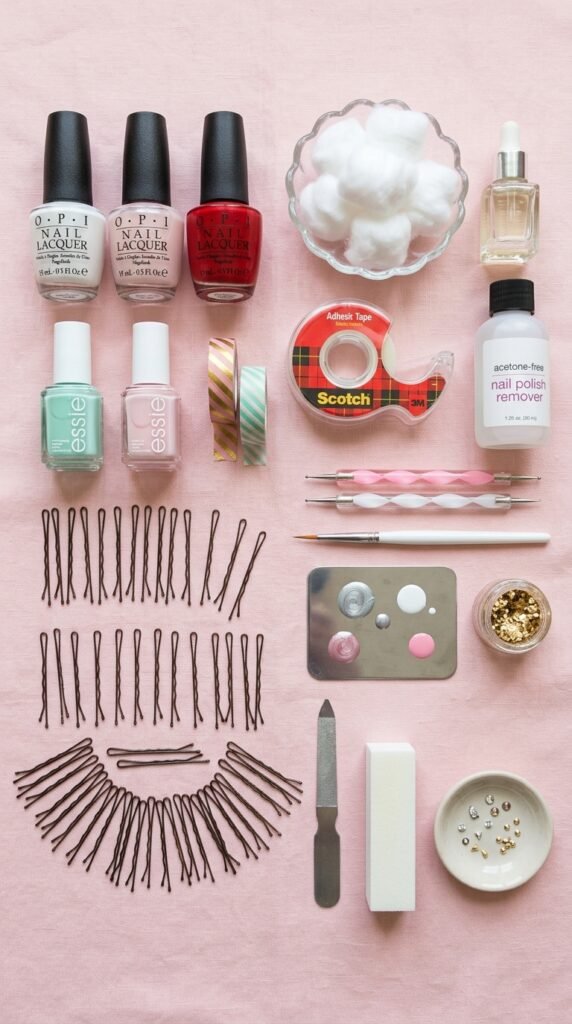
These items are inexpensive and easy to find at any local store. Once you have them, you’re ready to get creative.
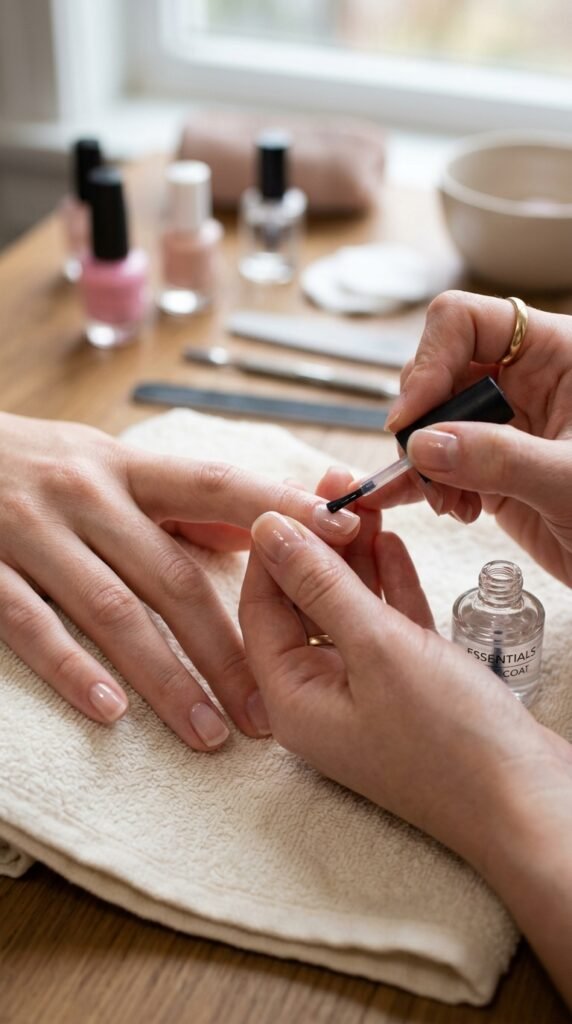
Step 1: Prep Your Nails
Clean, healthy nails are the best canvas.
- Remove old polish: Use nail polish remover and cotton pads.
- Shape nails: Trim and file to your preferred length and shape.
- Buff gently: Smooth the surface for an even polish application.
- Apply base coat: This protects your nails and gives the polish something to stick to.
Step 2: Choose Your Design
Start simple. Some beginner-friendly ideas include:
- Polka dots: Use a bobby pin or toothpick to create dots.
- Stripes: Apply tape in straight lines and paint over it.
- Accent nail: Paint one nail in a contrasting color or pattern.
- Half-moon manicure: Use tape to cover the base of the nail and paint over the rest.
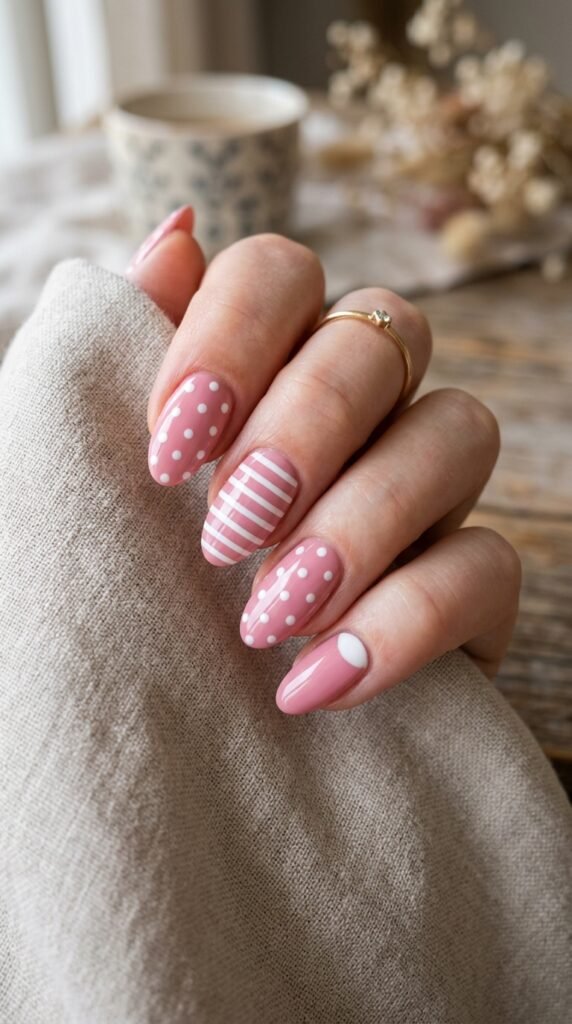
Pick one or two ideas to avoid feeling overwhelmed. Less is often more when it comes to nail art.
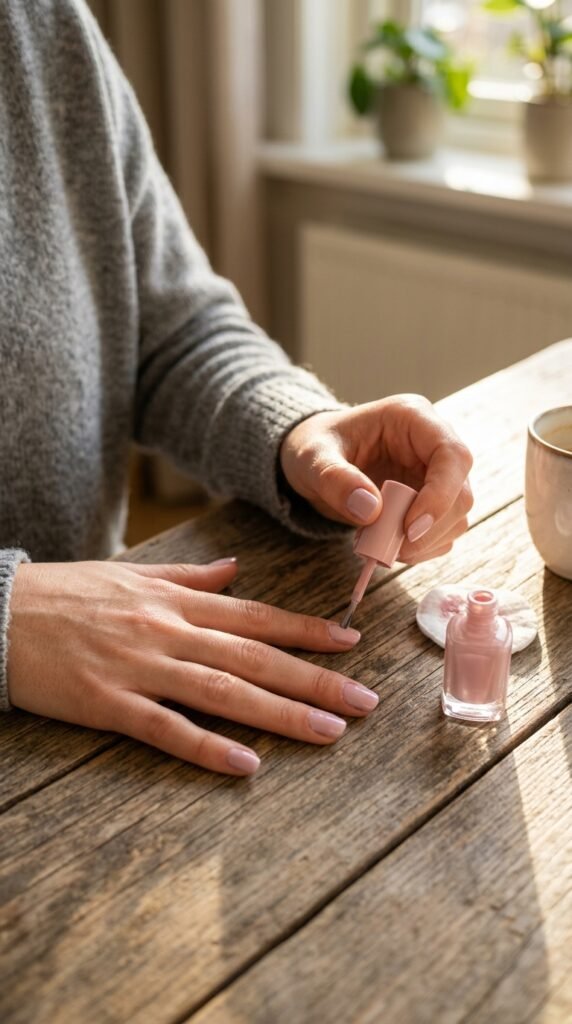
Step 3: Apply Your Base Color
Once your nails are prepped, it’s time to paint:
- Shake your nail polish gently.
- Apply 1–2 thin coats, allowing each coat to dry completely.
- Avoid thick layers, as they can smudge easily.
Tip: A light hand ensures a smooth finish and makes it easier to add designs on top.
Step 4: Create Your Design With Basic Tools
This is where the fun begins. Use your toothpick, bobby pin, or tape to make patterns:
- Polka dots: Dip the tip of your tool into polish and gently touch your nail.
- Stripes: Stick tape onto your nail, paint over, and remove carefully.
- Tiny hearts or stars: Use a toothpick to draw small shapes freehand.
Remember to be patient. Mistakes happen—simply wipe and try again!
Step 5: Seal the Design
After your art is complete:
- Let your design dry for a few minutes.
- Apply a top coat to protect the polish and make it shine.
- Clean up edges with a cotton swab dipped in polish remover.
Tip: A quick-dry top coat can save you time and prevent smudges.
Extra Tips for Beginners
- Work on one hand at a time to avoid smudging.
- Keep nail polish remover and cotton pads nearby for corrections.
- Don’t worry about perfection—nail art is about creativity, not perfection.
- Experiment with different color combinations to find your favorite style.
- Practice often; your skills will improve with each attempt.
Final Thoughts
Creating stunning nail art with basic supplies is easier than you think. With just a few polishes, a toothpick, and some patience, you can make your nails look trendy and fun. Once you get the hang of it, you’ll be able to try more complex designs and express your personal style.
Save this guide for your next nail session and share it with friends who want to try DIY nail art at home!


Leave a Reply