
Nail art doesn’t have to be complicated or expensive to look stunning. Even the simplest lines can transform your nails into miniature works of art! Whether you’re a beginner or just looking for a quick way to jazz up your manicure, simple line designs are elegant, trendy, and surprisingly easy to achieve.
Let’s dive into how you can master this chic look at home with just a few basic tools and a little creativity.
Why Simple Lines Are Perfect for Beginners
Simple line designs are ideal if you’re new to nail art. Here’s why:
- Minimal tools needed – All you really need is a thin brush or even a toothpick.
- Quick to do – Perfect for busy schedules or last-minute plans.
- Customizable – Horizontal, vertical, diagonal, or crisscross lines; the options are endless.
- Trendy and timeless – Clean, minimalistic designs never go out of style.
Even if you’ve never tried nail art before, lines are forgiving and easy to fix if you make a mistake.
Tools and Materials You’ll Need
Before starting, gather these essentials:
- Base coat and top coat
- Nail polish in your favorite colors
- Thin nail art brush or toothpick
- Nail polish remover and cotton swabs for cleanup
- Optional: striping tape for perfectly straight lines
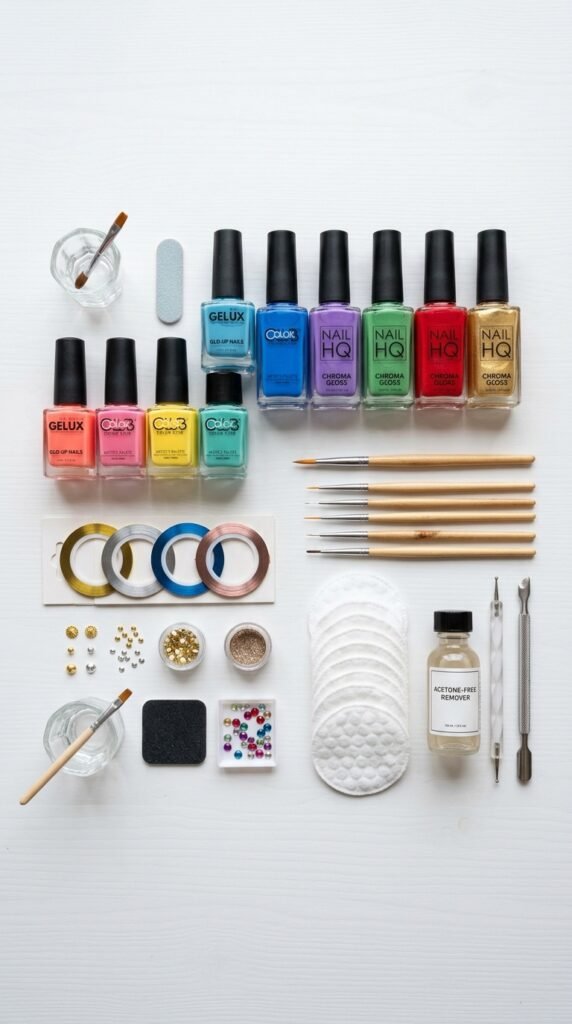
Having everything ready makes the process smoother and more enjoyable.
Step-by-Step Guide to Nail Art With Simple Lines
1. Prep Your Nails
Start with a clean canvas:
- Remove old polish and file your nails to your preferred shape.
- Apply a base coat to protect your nails and make the polish last longer.
- Let it dry completely before adding color.
2. Apply Your Base Color
Choose a neutral or pastel shade as your background. This makes your line designs pop.
- Apply 1–2 coats depending on the opacity of your polish.
- Wait until each coat dries thoroughly to avoid smudging.
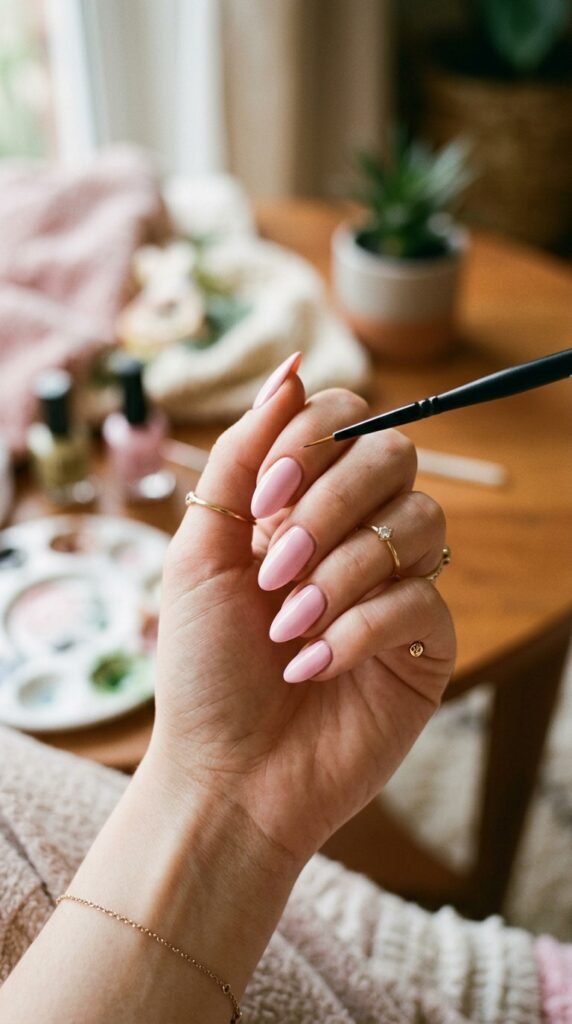
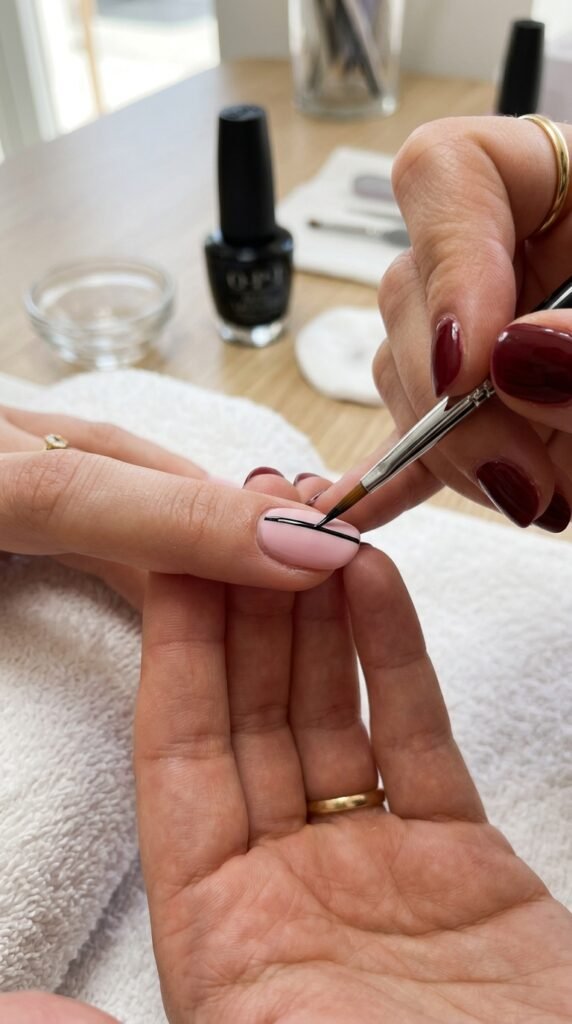
3. Create the Lines
Now comes the fun part! There are several ways to add lines:
- Freehand lines – Use a thin brush or toothpick to draw horizontal, vertical, or diagonal lines.
- Striping tape – Stick the tape on your nail in the desired pattern, paint over it, and remove carefully for crisp lines.
- Layered lines – Mix different colors and directions for a modern geometric effect.
Pro tips:
- Keep a steady hand by resting your elbow on a table.
- If a line isn’t perfect, dip a cotton swab in remover and gently fix it.
- Start with one accent nail per hand if you’re nervous—it looks stylish and less overwhelming.
Finishing Touches
Once your lines are done:
- Let the design dry completely to prevent smudging.
- Apply a top coat to seal the design and add a glossy finish.
- Clean up around the edges with a small brush or cotton swab dipped in remover for a polished look.
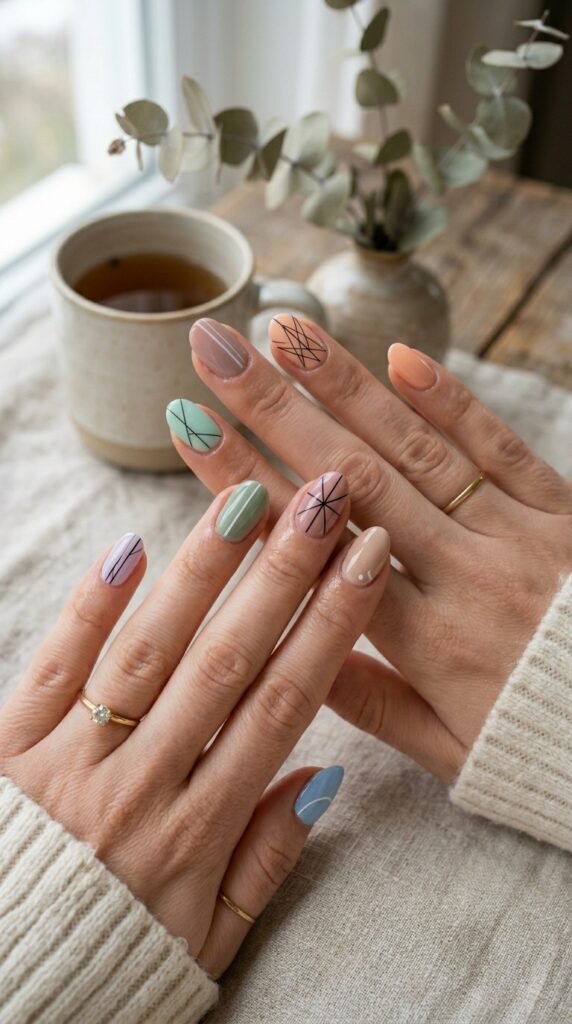
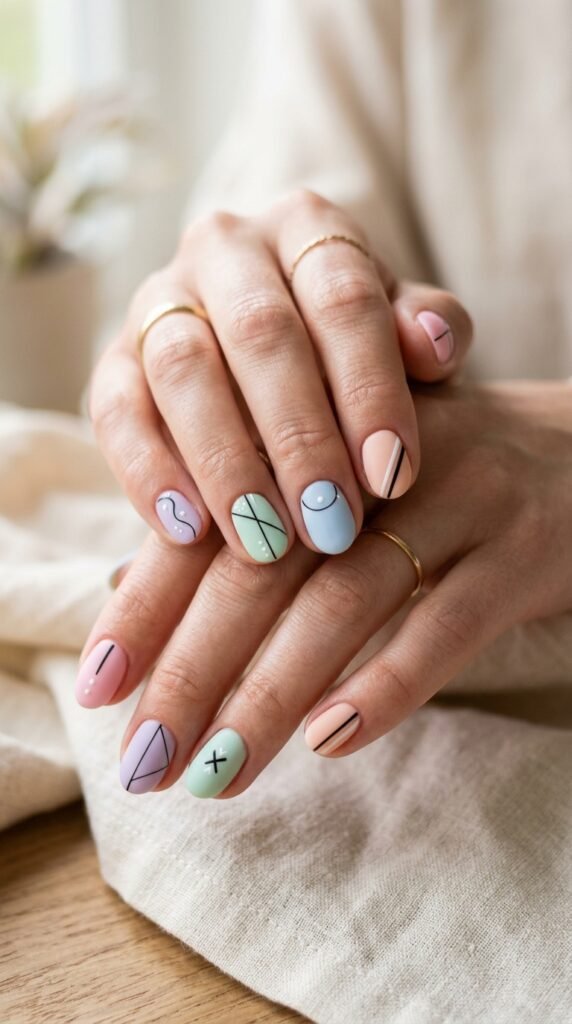
Creative Variations to Try
- Diagonal lines – Make your nails appear longer and more elegant.
- Chevron or zig-zag – Adds a playful geometric vibe.
- Mix colors – Combine bold and neutral shades for contrast.
- Minimal dots with lines – Pairing dots and lines makes the design more dynamic.
Experimenting is half the fun! Don’t be afraid to mix different patterns on each nail.
Takeaway
Simple line nail art proves that less is definitely more. With minimal tools, a steady hand, and a bit of practice, you can create stunning designs that look professional. Perfect for beginners or anyone who loves chic, modern nails.
Save this guide for your next manicure session and let your creativity shine!


Leave a Reply