
Ready to turn your nails into tiny works of art—without stepping foot in a salon? Nail art at home is easier than you think, and honestly, way more fun. Whether you’re going for minimal chic or bold patterns, all you need is a little patience, a few tools, and a splash of creativity.
Let’s walk through it step by step so you can create beautiful nail art right from your own space.
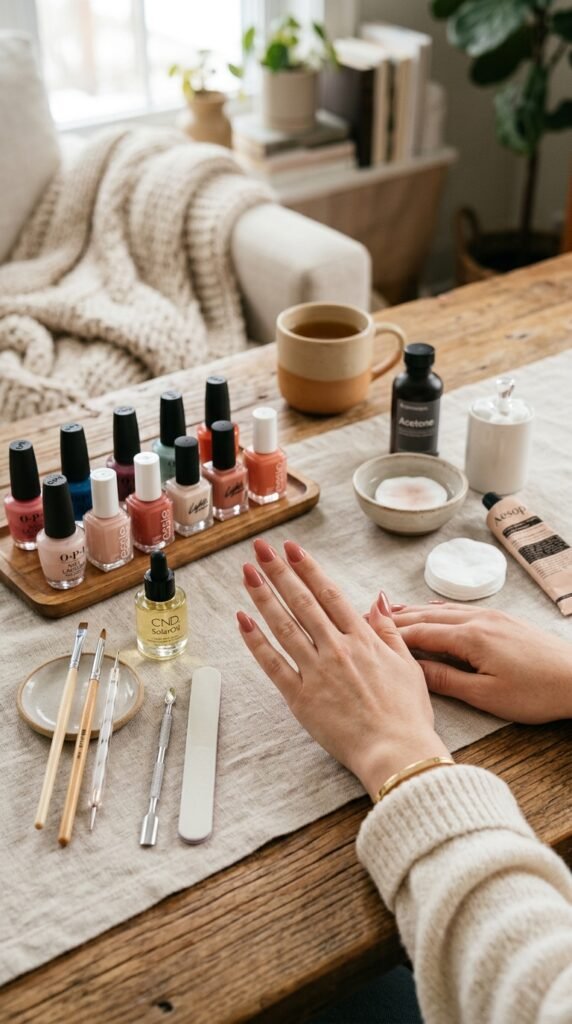
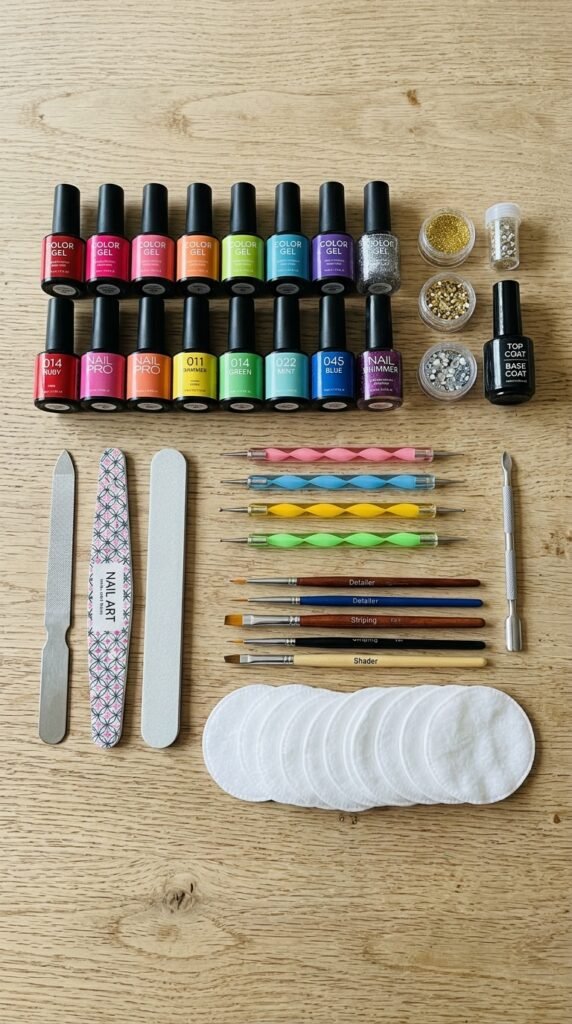
Gather Your Nail Art Essentials
Before you start, having the right tools makes everything smoother (and less messy).
Here’s what you’ll need:
- Nail polish (2–3 colors of your choice)
- Base coat and top coat
- Nail file and buffer
- Cuticle pusher
- Cotton pads and nail polish remover
- Thin nail art brush or toothpick
- Optional: tape, dotting tools, or stickers
You don’t need professional tools right away—many designs can be done with everyday items like toothpicks.
Step 1: Prep Your Nails
Good nail art starts with clean, well-prepped nails. Don’t skip this part—it makes a huge difference in how long your design lasts.
Here’s how to prep:
- Remove any old polish
- Trim and file your nails to your desired shape
- Gently push back your cuticles
- Buff the surface lightly for smoothness
- Wash and dry your hands thoroughly
Apply a base coat once your nails are clean. This protects your nails and helps the polish stick better.
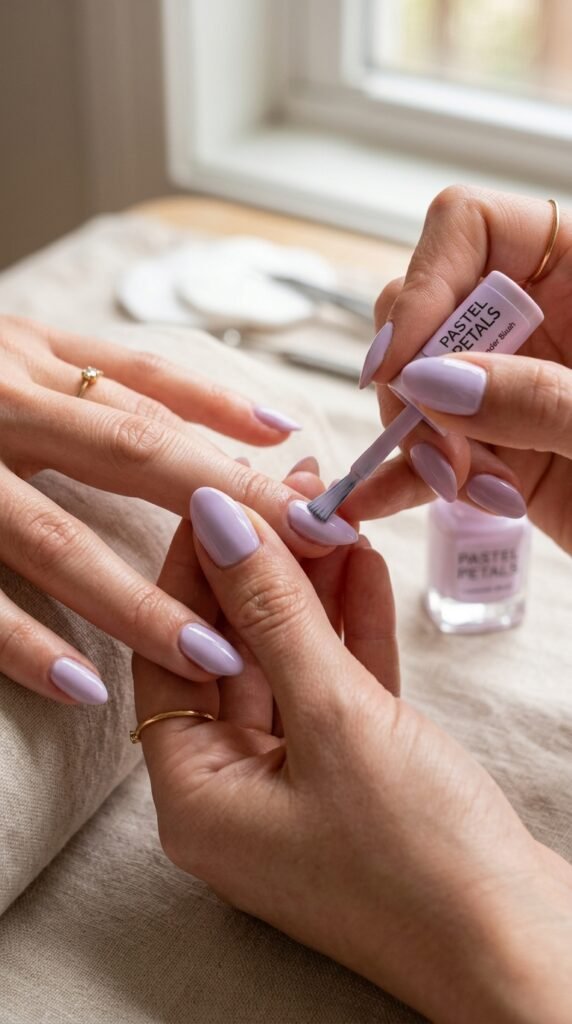
Step 2: Apply Your Base Color
This is the foundation of your nail design. Choose a color that complements your planned art.
Tips for applying polish:
- Apply thin layers (thick coats take longer to dry)
- Use 2 coats for full coverage
- Let each layer dry before applying the next
Neutral shades are great for beginners, while bold colors can make simple designs pop.
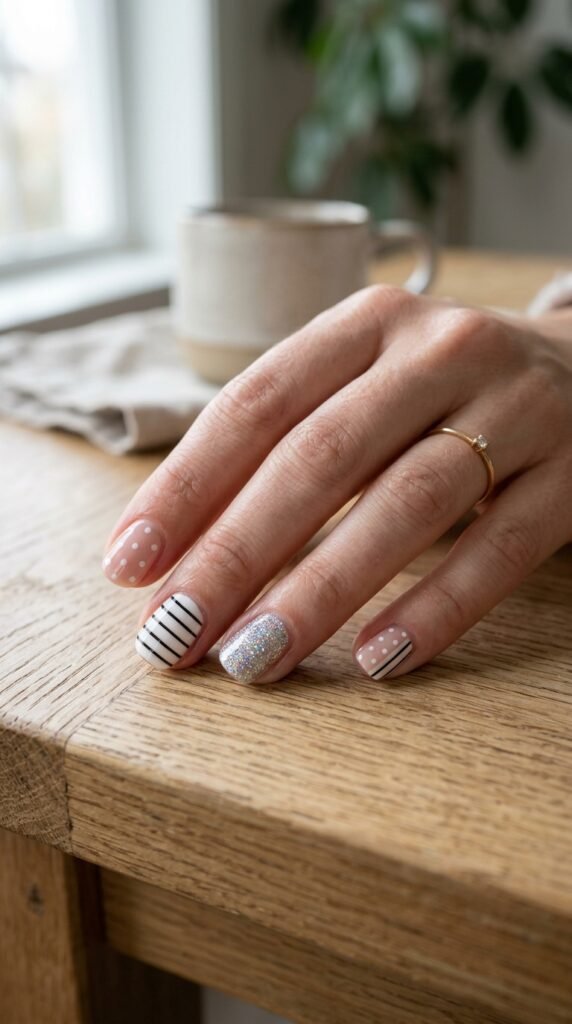
Step 3: Create Simple Nail Art Designs
Now comes the fun part—designing! If you’re new, start with simple patterns and build your skills over time.
Easy beginner designs:
1. Polka Dots
- Dip a toothpick or dotting tool into polish
- Gently press dots onto your nails
2. Stripes
- Use tape or a thin brush to create clean lines
- Try vertical, horizontal, or diagonal patterns
3. Accent Nail
- Paint one nail differently (glitter, pattern, or contrasting color)
4. French Tip Twist
- Instead of white tips, try colors or glitter
Take your time—there’s no rush. Nail art is all about experimenting.
Step 4: Clean Up the Edges
Even the pros don’t get it perfect on the first try. Cleaning up makes your nails look polished and neat.
Quick clean-up method:
- Dip a small brush or cotton swab in nail polish remover
- Carefully clean around the edges of your nails
This step instantly elevates your manicure from “DIY” to “salon-like.”
Step 5: Seal with a Top Coat
Once your design is completely dry, lock it in with a top coat.
Why it matters:
- Adds shine
- Prevents chipping
- Smooths out your design
Apply a thin, even layer and let it dry fully. You can even reapply every few days to extend the life of your nail art.

Tips for Better Nail Art at Home
Want your designs to look even better? Keep these tips in mind:
- Work in a well-lit space for precision
- Be patient with drying time to avoid smudges
- Use thin layers instead of thick ones
- Practice on paper first if you’re trying a new design
- Keep your tools clean for better results
Remember, even imperfect designs can look beautiful—it’s all part of the charm.
Common Mistakes to Avoid
A few small mistakes can affect your final look. Here’s what to watch out for:
- Skipping the base coat (can stain nails)
- Applying thick polish layers
- Not letting each layer dry properly
- Overcomplicating designs as a beginner
Keep it simple at first, then gradually try more detailed designs as you gain confidence.
Final Thoughts
Doing nail art at home isn’t just about saving money—it’s about expressing your style in a fun, creative way. With a little practice, you’ll be able to create designs that look just as good as salon manicures.
Start simple, enjoy the process, and don’t be afraid to experiment with colors and patterns.
Save this guide for later and try your first nail art design today!

Leave a Reply