
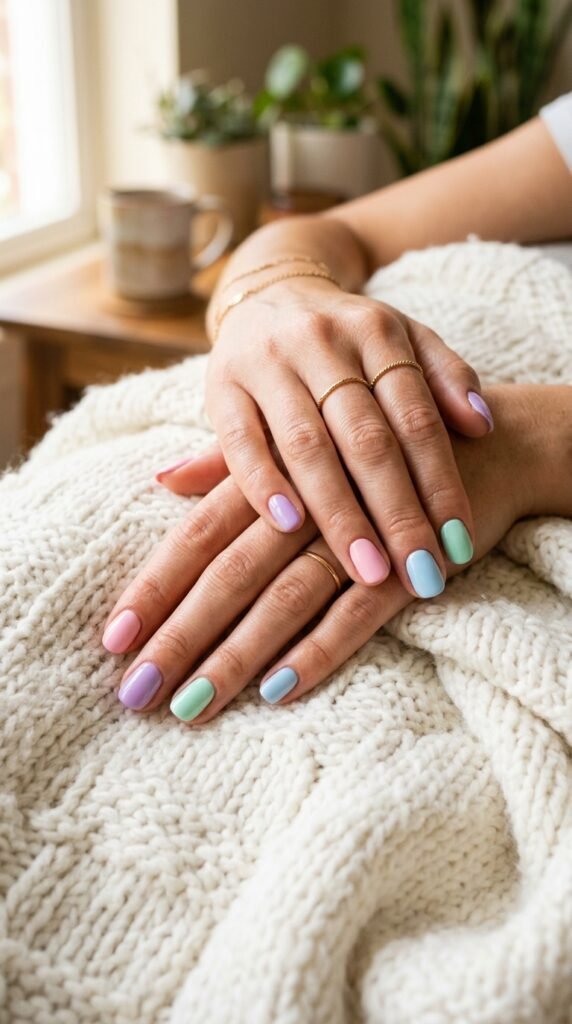
Soft, dreamy, and effortlessly chic—pastel nails never go out of style. Whether you love subtle elegance or playful designs, pastel shades offer the perfect balance between minimal and eye-catching. The best part? You don’t need to be a professional nail artist to create stunning pastel nail art at home.
Let’s walk through everything you need to know to create beautiful pastel nail art, step by step.
Why Choose Pastel Shades?
Pastels are versatile and flattering on all skin tones. They’re perfect for:
- Spring and summer vibes
- Soft, feminine aesthetics
- Minimal yet stylish nail looks
- Everyday wear or special occasions
Unlike bold or neon colors, pastel shades feel calm and sophisticated—making them ideal for beginners experimenting with nail art.
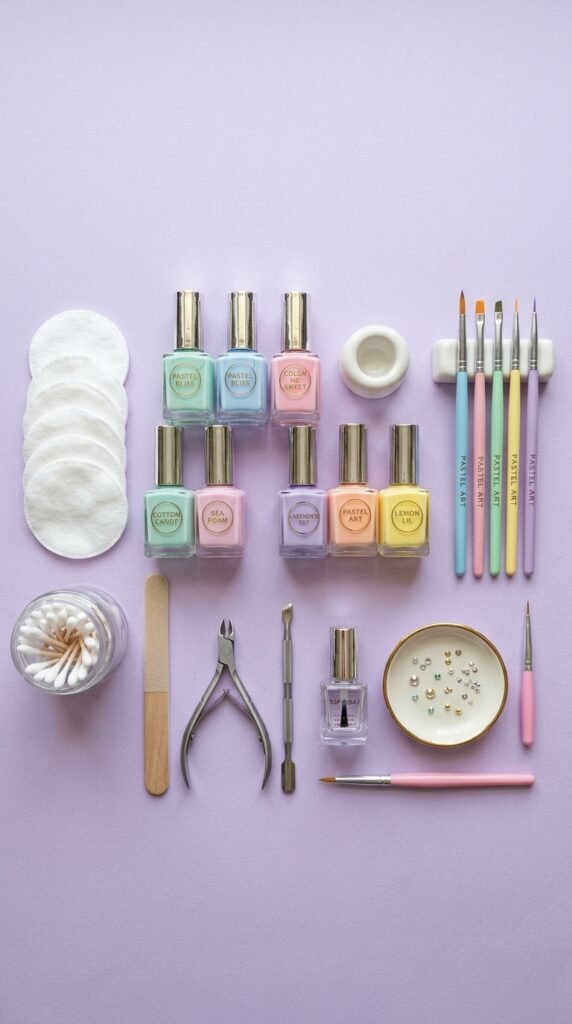
What You’ll Need
Before you begin, gather your tools. Having everything ready makes the process smoother.
- Pastel nail polishes (pink, lilac, mint, baby blue, peach)
- Base coat
- Top coat
- Nail art brushes or dotting tools
- Toothpicks (great for beginners)
- Nail polish remover and cotton pads
- Tape (optional for clean lines)
Step 1: Prep Your Nails
Good nail prep is the secret to long-lasting nail art.
- Clean your nails thoroughly
- Trim and shape them evenly
- Push back cuticles gently
- Apply a base coat to protect your nails
Let the base coat dry completely before moving on. This helps your pastel colors apply smoothly and prevents staining.
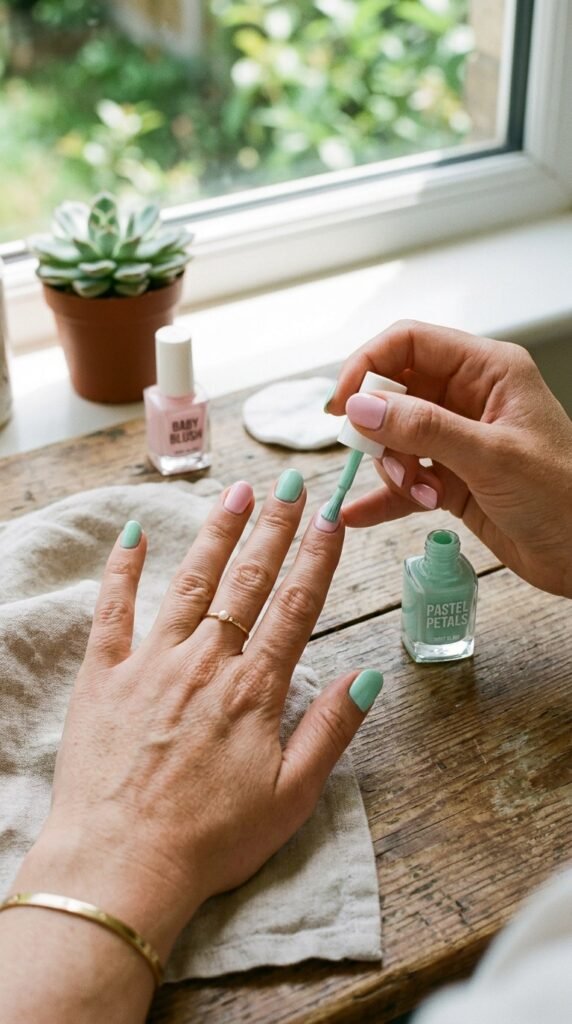
Step 2: Apply Your Pastel Base Colors
Now comes the fun part—color!
- Choose one pastel shade or mix multiple colors
- Apply 1–2 thin coats (pastels often need layering)
- Let each coat dry before adding another
For a trendy look, try different pastel shades on each nail (also known as a “skittle manicure”).
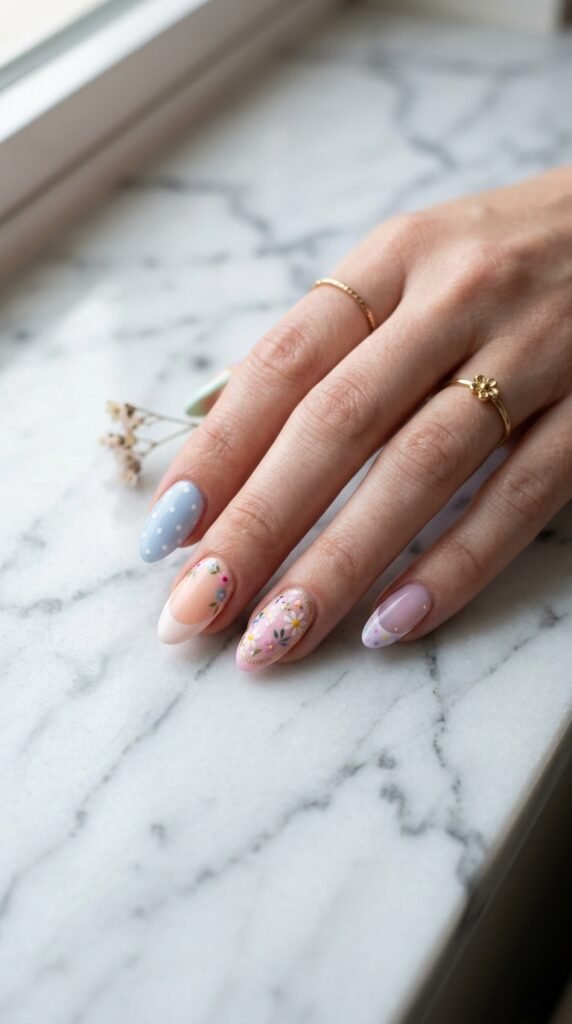
Step 3: Try Simple Pastel Nail Art Designs
You don’t need complex techniques to create beautiful designs. Start with these beginner-friendly ideas:
1. Polka Dots
- Use a dotting tool or toothpick
- Dip into a contrasting pastel shade
- Gently dot onto your nails
2. French Tips (Pastel Edition)
- Use pastel shades instead of white
- Apply a soft lavender or baby blue tip
3. Minimal Lines
- Use a thin brush to draw lines
- Try vertical, diagonal, or abstract shapes
4. Floral Accents
- Create tiny flowers using dots
- Add a small center dot for detail
Step 4: Add Layers and Details
Once your base design is dry, you can elevate your look:
- Add tiny rhinestones for sparkle
- Use white polish for highlights
- Create gradient (ombre) effects using a sponge
- Mix matte and glossy finishes
Keep it subtle—pastel nail art shines best when it’s not overcrowded.
Step 5: Seal With a Top Coat
This step locks everything in place and gives your nails a polished finish.
- Apply a thin, even layer of top coat
- Make sure it covers the edges
- Let it dry completely
A glossy top coat enhances pastel colors, while a matte top coat gives a soft, velvety look.
Tips for Perfect Pastel Nails
Want salon-quality results? Keep these tips in mind:
- Use thin layers: Thick coats can look streaky
- Be patient: Let each layer dry properly
- Choose quality polish: Pastels can be tricky—better formulas make a difference
- Clean edges: Use a small brush dipped in remover for neat lines
- Practice designs: Start simple and build confidence
Common Mistakes to Avoid
Even simple nail art can go wrong—here’s what to watch out for:
- Applying polish on wet layers (causes smudging)
- Using too much polish on tools
- Skipping base or top coat
- Overcomplicating designs too early
Keep it clean and minimal for the best results.
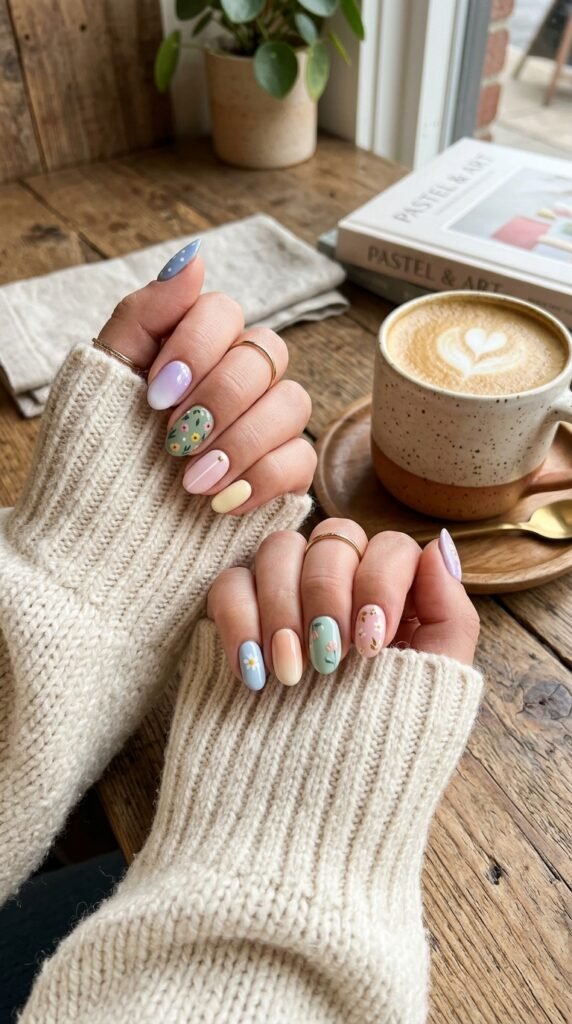
Easy Pastel Nail Ideas to Try
If you’re feeling stuck, here are some quick ideas:
- Baby pink nails with white dots
- Mint green with gold accents
- Lavender ombre fade
- Peach nails with tiny floral art
- Mixed pastel rainbow nails
Final Thoughts
Pastel nail art is all about creativity, softness, and having fun with colors. Whether you go for simple dots or delicate florals, these shades make every design look effortlessly beautiful.
Don’t worry about perfection—each attempt helps you improve your skills and discover your style.
Save this guide for later and try your favorite pastel nail design today!

Leave a Reply