
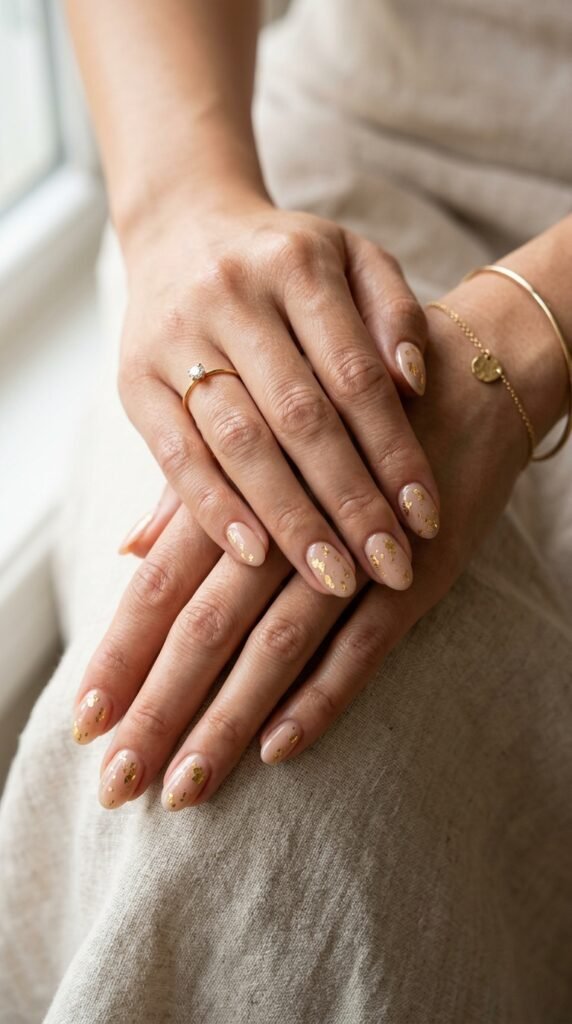
Gold foil nails have that instant wow factor—luxurious, eye-catching, and surprisingly easy to create at home. Whether you’re going for subtle shimmer or bold metallic drama, gold foil can transform even the simplest manicure into something that looks straight out of a salon.
The best part is that you don’t need to be a professional nail artist to master this look. With a few tools and a little patience, you can create stunning designs that feel modern, chic, and Pinterest-worthy.
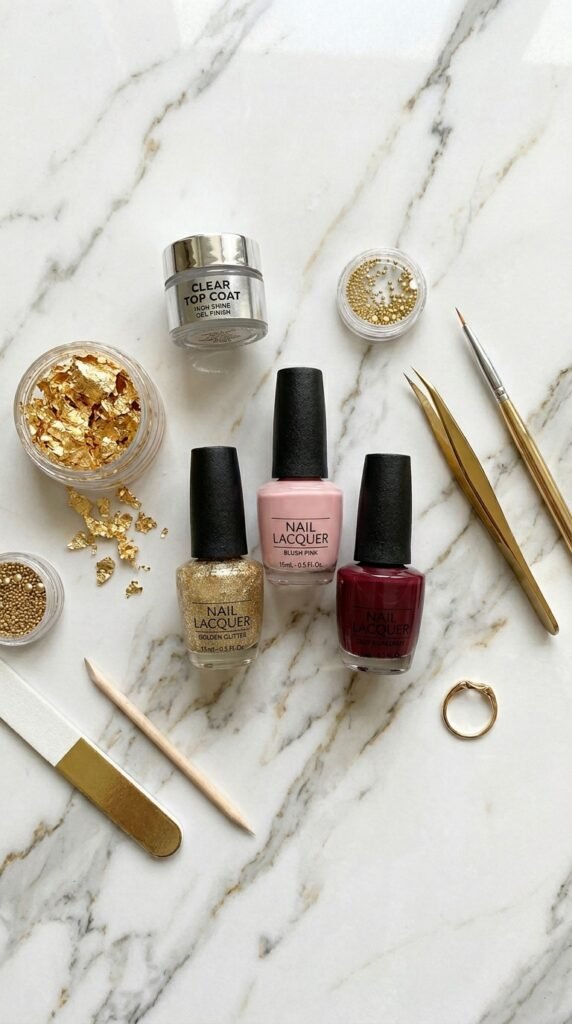
What You’ll Need to Get Started
Before diving in, gather your supplies. Having everything ready makes the process smoother and more enjoyable.
Essentials:
- Gold nail foil flakes or sheets
- Base coat
- Nail polish (any color you love—nude, black, or pastel works beautifully)
- Nail foil adhesive or nail glue
- Tweezers or a small brush
- Top coat (preferably gel-like for a glossy finish)
Optional but helpful:
- Cuticle pusher
- Nail buffer
- Cleanup brush or cotton swabs
Prep Your Nails Like a Pro
Great nail art always starts with good prep. Don’t skip this step—it makes a big difference in how long your design lasts.
Steps to prep:
- Remove old polish and clean your nails
- Shape your nails using a file
- Push back cuticles gently
- Buff the surface lightly for better polish grip
- Apply a thin layer of base coat
Let the base coat dry completely before moving on.
Tip: Smooth nails help the foil stick better and look more polished.
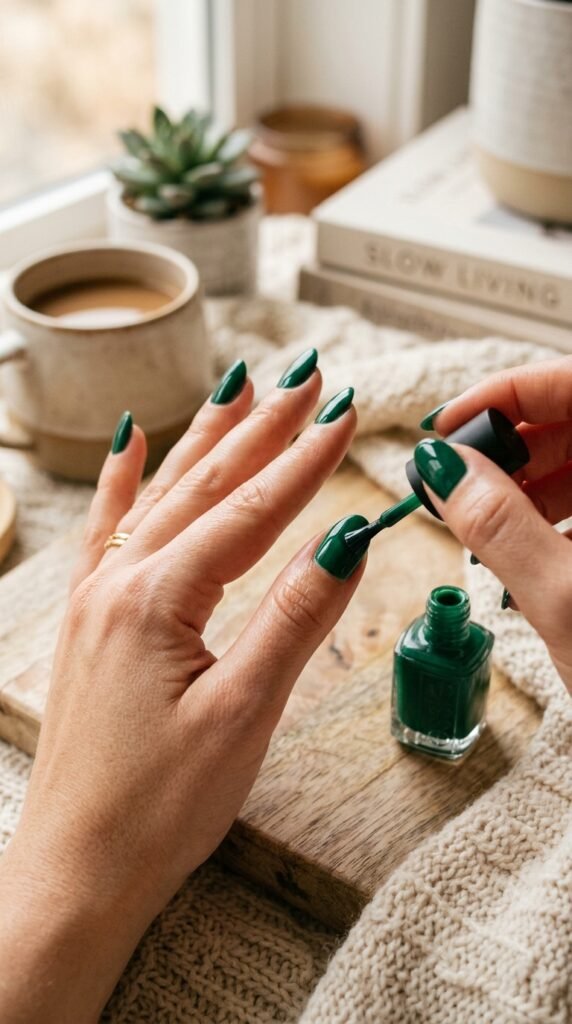
Apply Your Base Color
This is where your creativity begins. Gold foil pairs beautifully with almost any shade, so choose a base color that fits your style.
Popular combinations:
- Nude + gold for a soft, elegant look
- Black + gold for bold contrast
- Blush pink + gold for a romantic feel
- Emerald green + gold for a rich finish
Apply one to two coats of your chosen polish and let it dry completely.
Add the Gold Foil
Now for the most exciting part—applying the gold foil.
There are two common methods depending on what you have available:
Method 1: Using Nail Foil Adhesive
- Apply a small amount of adhesive where you want the foil
- Wait until it becomes tacky rather than wet
- Use tweezers or your finger to gently press foil pieces onto the nail
- Tap lightly to secure, then lift away excess foil
Method 2: Using Slightly Wet Polish
- While your second coat of polish is still slightly wet, place foil pieces on top
- Press gently so they stick
Less is more here. Random, uneven placement often looks more natural and stylish than trying to be too precise.

Seal It In for a Smooth Finish
Once your foil is in place, sealing everything properly is essential.
How to finish:
- Apply a generous layer of top coat
- Cover all edges of the foil to prevent lifting
- Let it dry completely or cure if using gel polish
For extra shine, you can apply a second layer of top coat.
Tip: A thicker top coat helps smooth out the foil texture and gives a glossy, glass-like finish.
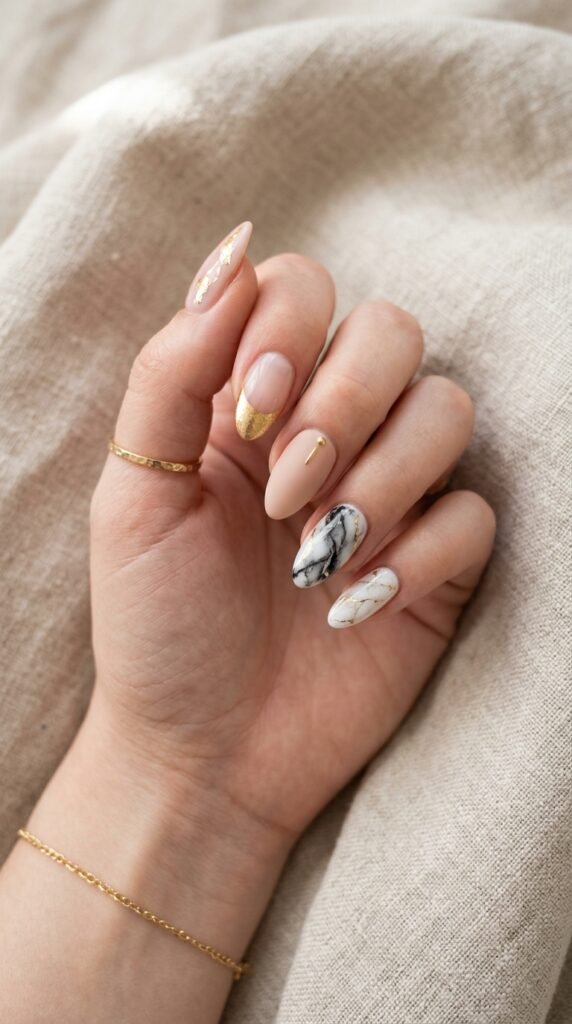
Easy Gold Foil Design Ideas
If you’re unsure how to style your gold foil, try these beginner-friendly ideas:
Minimal Accent Nail
- Keep most nails plain
- Add foil to one or two nails
Gold Foil French Tips
- Replace the classic white tip with gold foil
Marble Effect
- Combine white polish with soft gray swirls and touches of foil
Abstract Look
- Scatter foil pieces randomly over a sheer or nude base
Common Mistakes to Avoid
Gold foil nail art is simple, but small mistakes can affect the final result.
Watch out for:
- Applying foil before adhesive becomes tacky
- Using too much foil, which can look bulky
- Skipping top coat, leading to peeling
- Not allowing layers to dry between steps
Taking your time will help you achieve a cleaner, longer-lasting finish.
How to Make Your Design Last Longer
To keep your nails looking fresh:
- Reapply top coat every 2–3 days
- Avoid water exposure immediately after application
- Wear gloves while cleaning
- Keep cuticles moisturized
Final Thoughts
Gold foil nail art is a simple way to elevate your manicure without needing advanced skills. It allows you to experiment with textures and finishes while creating something that feels unique and polished.
Try it out with different color combinations and placement styles until you find your favorite look.
Save this guide for later and use it the next time you want salon-style nails at home.

Leave a Reply