
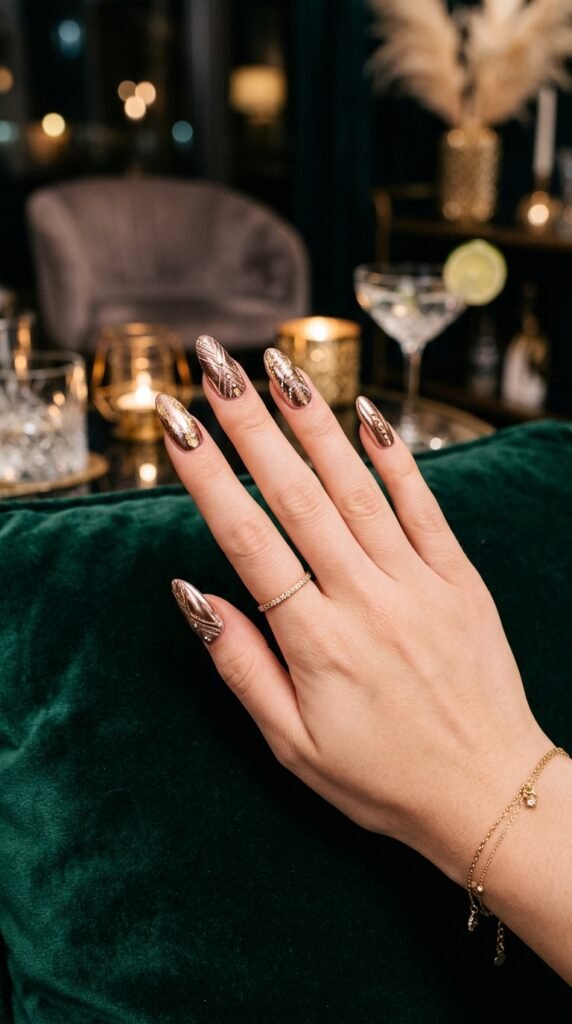
Nail art is one of the best ways to express creativity and elevate your style, and when it comes to metallics, the possibilities are endless. Whether you’re going for a subtle shimmer or a bold, dramatic look, metallic colors are the perfect way to add a pop of glam to your nails. If you’re new to metallic nail art or looking to add some fresh ideas to your collection, this guide will walk you through the process step by step. Get ready to shine like never before!
Step 1: Gather Your Supplies
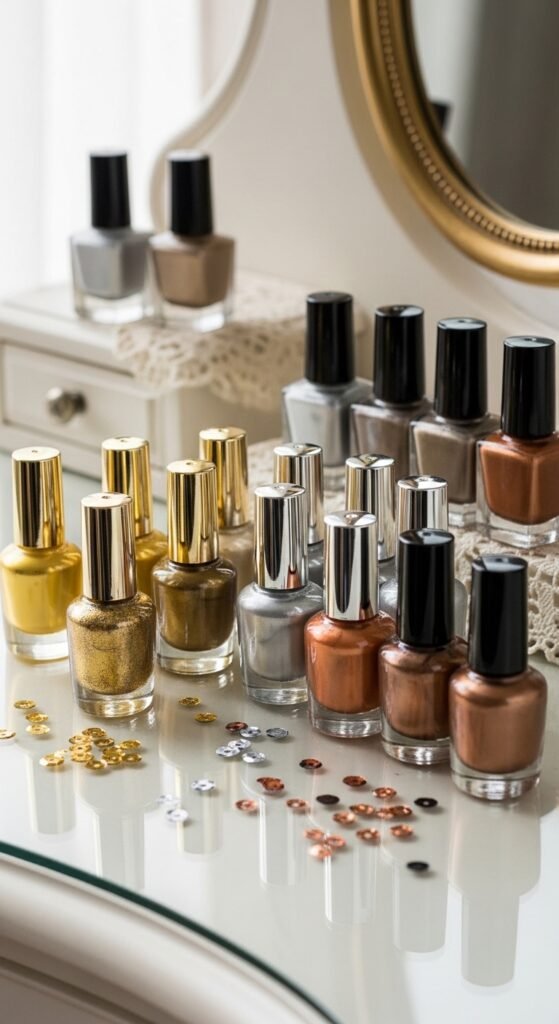
Before diving into metallic nail art, it’s essential to have everything you need in front of you. Here’s a quick checklist to get started:
- Metallic Nail Polishes: Choose your favorite metallic shades like gold, silver, copper, or holographic colors.
- Base Coat: Protect your nails with a clear base coat to prevent staining.
- Top Coat: Add a glossy finish with a top coat to make your design last longer.
- Nail Tools: Brushes, dotting tools, or stamping kits to create detailed designs.
- Nail Strips or Tape (optional): For clean, sharp lines.
Make sure to select high-quality products for the best results. Your metallic nails deserve the best!
Step 2: Prep Your Nails
A good manicure starts with well-prepped nails. Here’s what to do:
- Remove Old Polish: If you have any leftover polish, start by removing it with a gentle nail polish remover.
- Trim and Shape Nails: Cut your nails to your desired length and file them into your favorite shape—square, round, or almond.
- Buff and Smooth: Lightly buff your nails to remove any rough spots or ridges.
- Apply a Base Coat: Always use a base coat to protect your nails from the metallic pigments, which can stain over time.
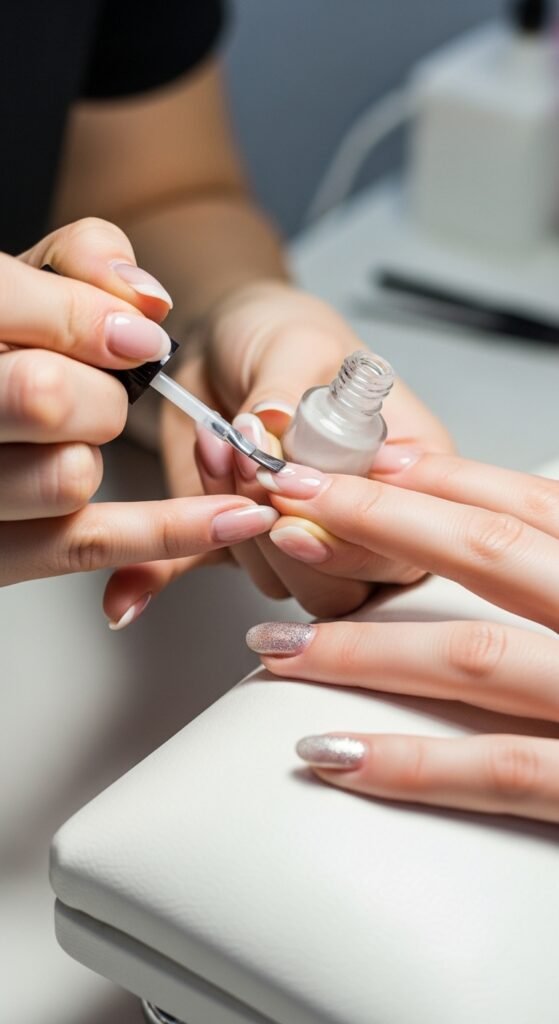
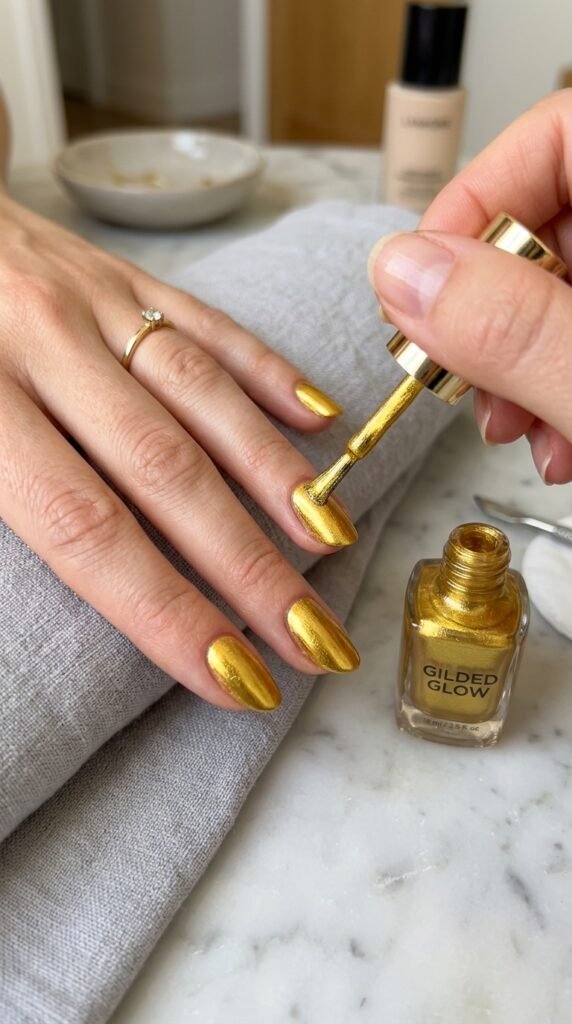
Step 3: Apply the Metallic Color
The fun part begins! Here’s how to get a smooth, stunning metallic finish:
- Choose Your Metallic Color: Start by picking a metallic shade that fits your mood. Gold is perfect for a luxurious look, while silver or chrome creates a futuristic vibe.
- Apply the First Coat: Gently paint the first layer of the metallic polish onto your nails. Let it dry completely before adding a second coat for fuller opacity.
- Allow to Dry: Always let the first coat dry completely to prevent smudging when applying the second coat.
Metallic polishes can be a little thick, so take your time for an even application.
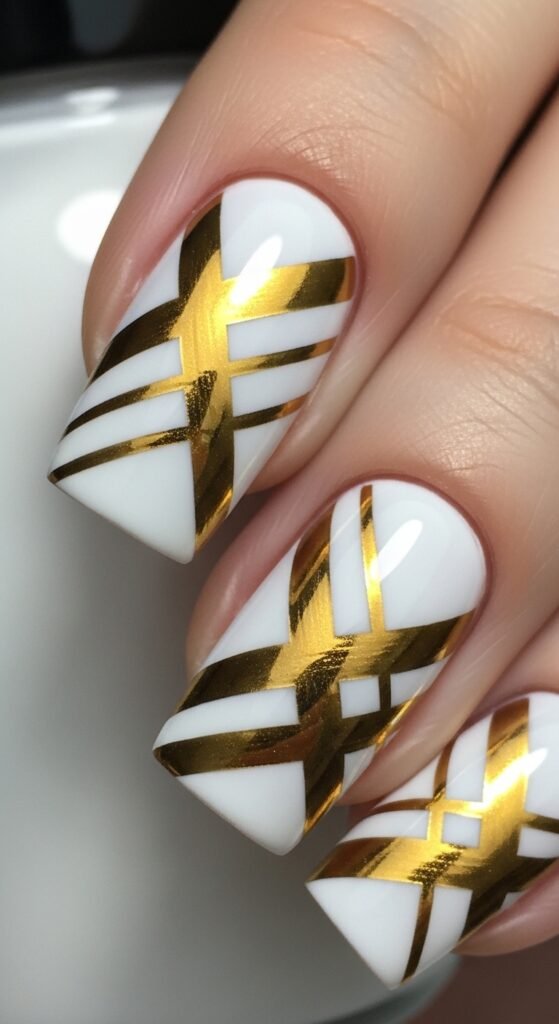
Step 4: Add Designs and Details
Once your base coat of metallic color is dry, it’s time to get creative. There are many ways you can elevate your metallic nails with cool designs.
- Stripes: Use nail tape to create thin, crisp metallic stripes. Apply a different metallic color or go for a matte finish for contrast.
- Geometric Patterns: Create chic triangles, squares, or lines using metallic shades. A nail art brush or dotting tool is perfect for this.
- Gradient Effect: Apply a different metallic color at the tip of your nails and gently blend it toward the base for an ombre effect.
- Nail Stamping: For intricate designs, try using a stamping kit with metallic polish. This will give your nails a professional, detailed look.
Step 5: Seal the Deal with Top Coat
No nail art is complete without a top coat to add shine and longevity. Apply a generous layer of a clear top coat over your metallic designs to protect them from chips and enhance the overall shine.
- Tip: If you’re using a matte top coat for contrast, make sure the metallic colors are completely dry before applying.
Let the top coat dry fully to lock everything in place. You’ll be amazed at how stunning your nails look with that perfect, glossy finish.

Step 6: Show Off Your Metallic Nails!
Once your nails are completely dry, it’s time to flaunt them! Whether you’re heading to a night out or just want to add a little extra flair to your day, your metallic nails are sure to turn heads. Take a few photos, share them on your socials, and get ready to receive compliments on your bold, shiny new look!
Conclusion: Shine On!
Metallic nail art is all about experimenting and having fun with different colors and designs. From simple metallic tips to intricate geometric shapes, the possibilities are endless. With the right tools, a little creativity, and some patience, you can create stunning, head-turning nails.
Save this guide for your next nail art session and shine on! Whether it’s gold, silver, or a multi-metallic mix, the world of metallic nail art is at your fingertips.

Leave a Reply