
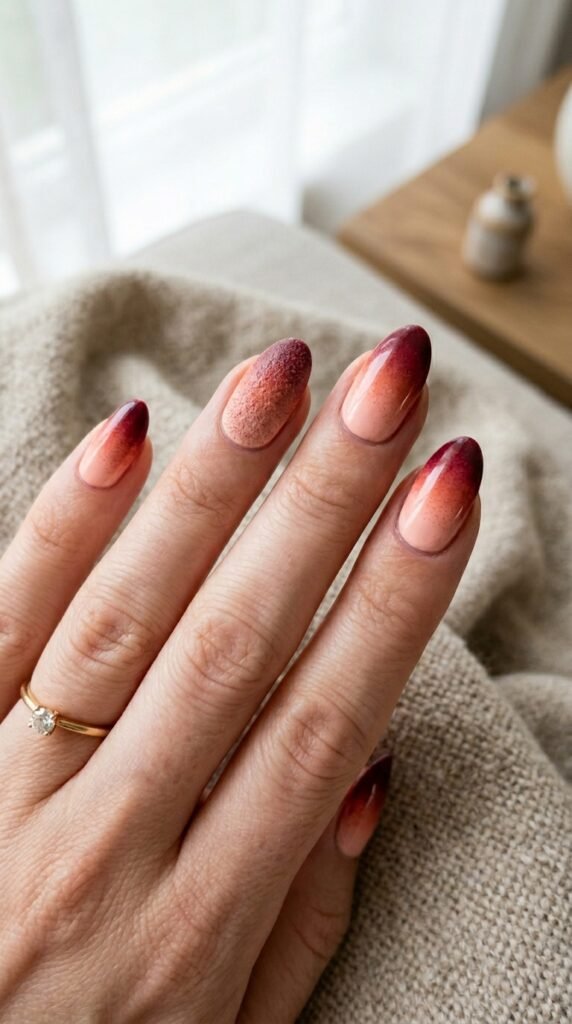
Nail art has become an exciting way to express creativity, and one of the easiest and most fun techniques to try is sponging. Using a sponge for nail art creates a smooth, gradient effect, which can range from simple ombré designs to complex multi-colored masterpieces. Whether you’re a beginner or an expert, sponging offers endless possibilities for experimenting with colors and patterns. Let’s dive into the step-by-step process of how to do stunning nail art using sponges!
What You’ll Need
Before you start creating beautiful nail designs, gather the following materials:
- Nail polishes: Choose at least two colors, but feel free to get creative with your palette!
- Makeup sponges: The kind you use for blending makeup works best, but any sponge with a soft texture will do.
- Base coat: Protects your nails and ensures the polish lasts longer.
- Top coat: Adds a glossy finish and helps seal in the design.
- Tape: Optional, for easy cleanup around your nails.
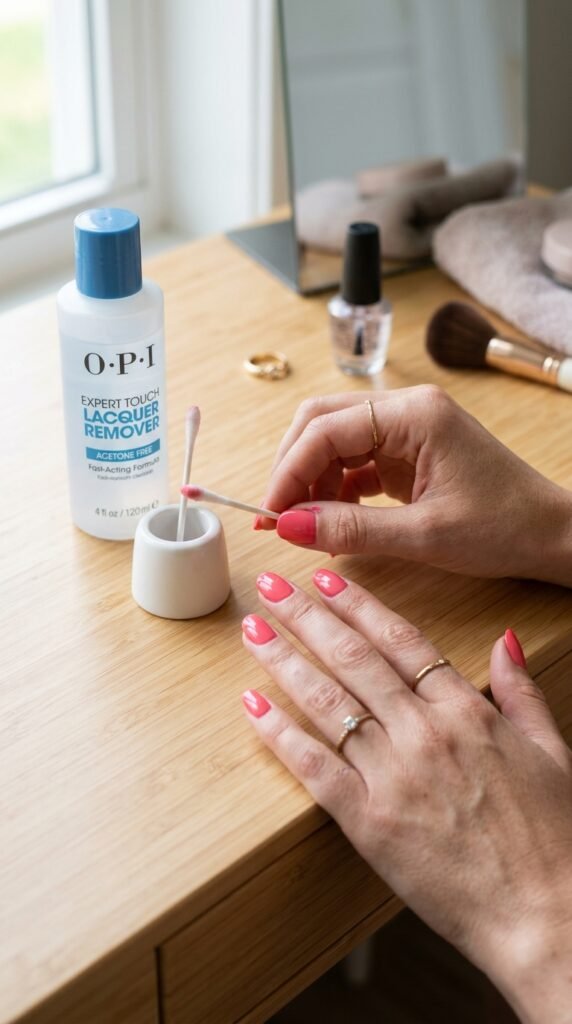
- Cotton swabs or nail polish remover: To clean up any mess around the nails.

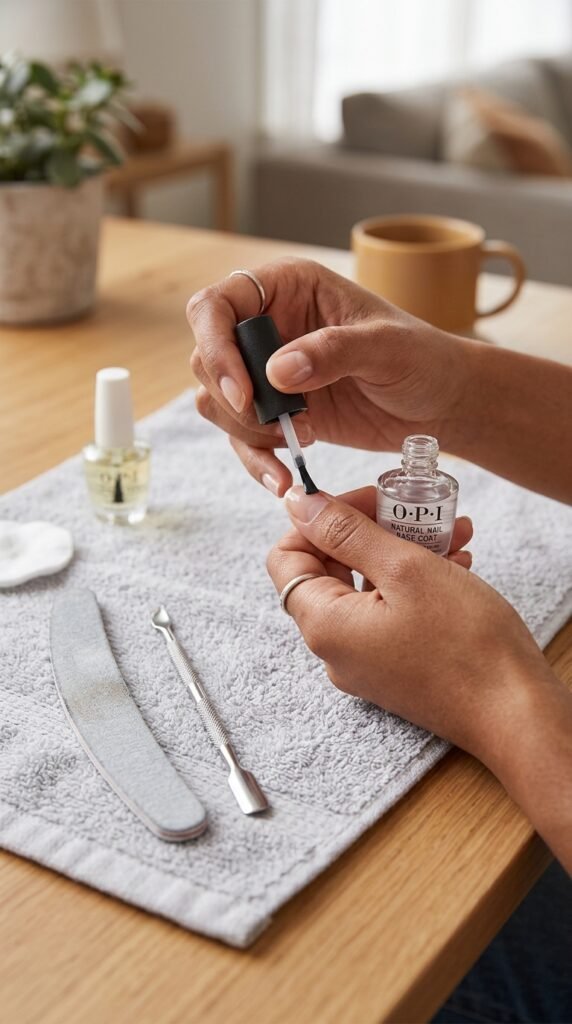
Step 1: Prep Your Nails
The first step in any nail art process is proper nail preparation. Start by filing your nails to your desired shape and pushing back your cuticles. Then, apply a layer of base coat to protect your nails from staining and ensure your design adheres better.
- Tip: If you’re using multiple colors, consider applying a neutral base color first. It will give your design a cleaner, more cohesive look.
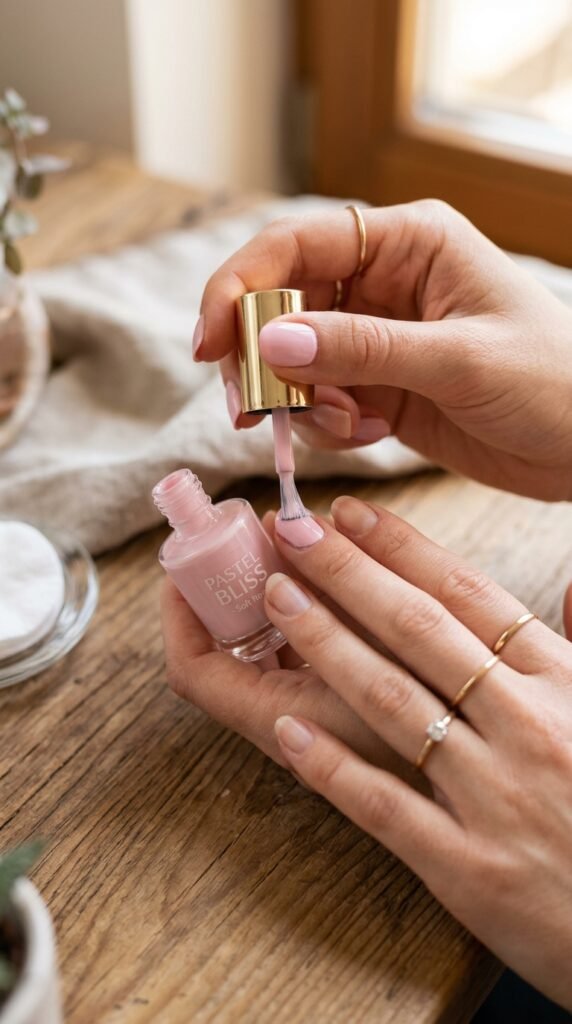
Step 2: Apply Your First Color
Now it’s time to add the first color. Choose the lightest shade for the base of your design and apply one or two coats to your nails. Let it dry completely before moving on to the next step.
- Tip: Use a color that contrasts well with your second color to create a striking gradient effect.
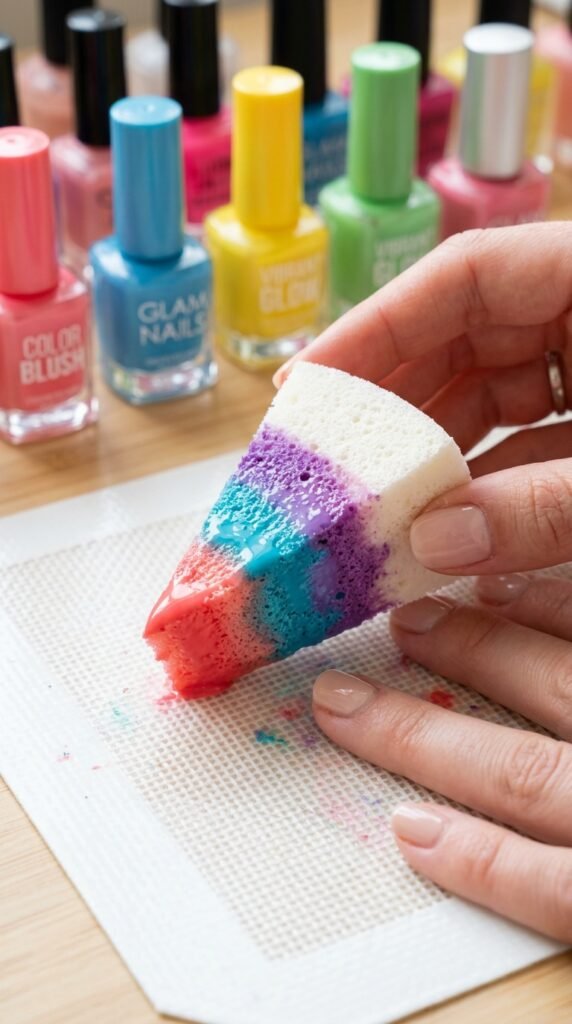
Step 3: Prepare the Sponge
Cut the makeup sponge into a small, manageable piece that fits comfortably over your nails. Dab your sponge into the first nail polish color you’re using. Gently press the sponge against a piece of paper or foil to remove any excess polish—this ensures the sponge doesn’t get too soaked.
- Tip: You can apply two or more colors onto the sponge for a layered effect. Layering colors is the key to creating vibrant, stunning designs!
Step 4: Sponge on the Color
Now for the fun part! Press the sponge onto your nails using a gentle tapping motion. Start at the tip of your nail and work your way down to the cuticle, or if you’re going for an ombré look, lightly tap from one side to the other. Keep repeating this process until you get the intensity you desire.
- Tip: Don’t press too hard. Let the sponge do the work to avoid smudging the color underneath.
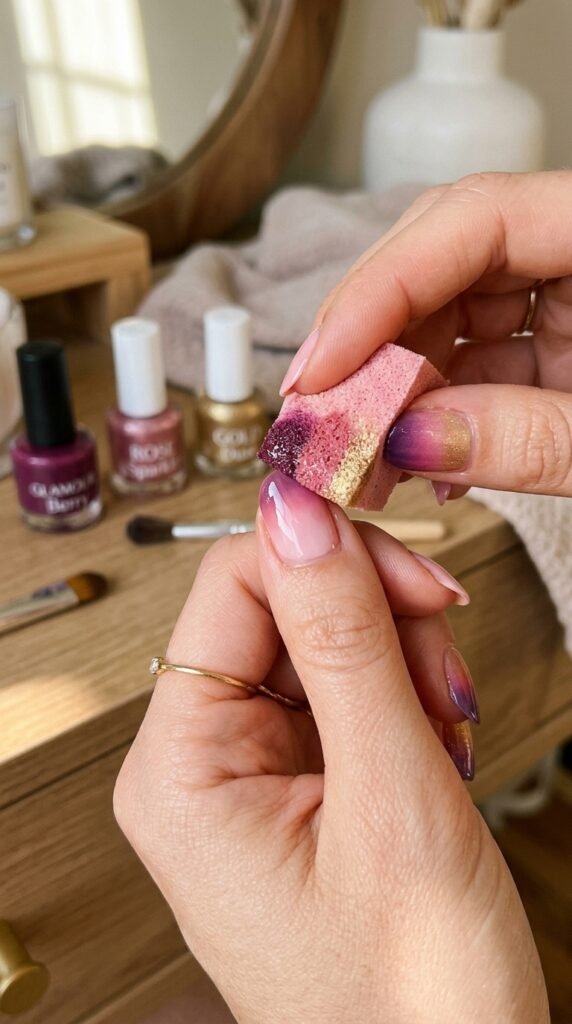
Step 5: Repeat the Process
For a more intense gradient effect, repeat the sponging process. Each time you tap the sponge onto your nails, the color will get more defined and vibrant. You can layer different shades for an even more complex look.
- Tip: Allow each layer to dry for a few minutes before adding more color to prevent smearing.
Step 6: Clean Up
Once you’re satisfied with the design, it’s time to clean up the excess polish around your nails. Use tape to protect the skin around your nails or dip a cotton swab in nail polish remover to clean up any mess.
- Tip: Don’t forget to give your nails a final touch with a top coat to seal in the design and add a glossy finish.
Final Thoughts
Sponging is a simple yet effective way to create beautiful and intricate nail art designs. With just a few basic tools, you can easily create stunning gradients, ombré effects, or even multi-colored nail designs. The possibilities are endless! So, grab your sponges and start experimenting with new looks.
Save this guide for later and don’t forget to try it out next time you want a pop of color on your nails!

Leave a Reply