
When it comes to nail art, many people assume it has to be bold, flashy, or over-the-top. But the truth is, office-appropriate nail art can be just as stylish, professional, and fun—without raising any eyebrows at work. Think subtle elegance, muted tones, and simple patterns that show off your personality while keeping your look polished. In this guide, we’ll explore how to create chic nail art designs perfect for any corporate or professional setting.

Choosing the Right Colors
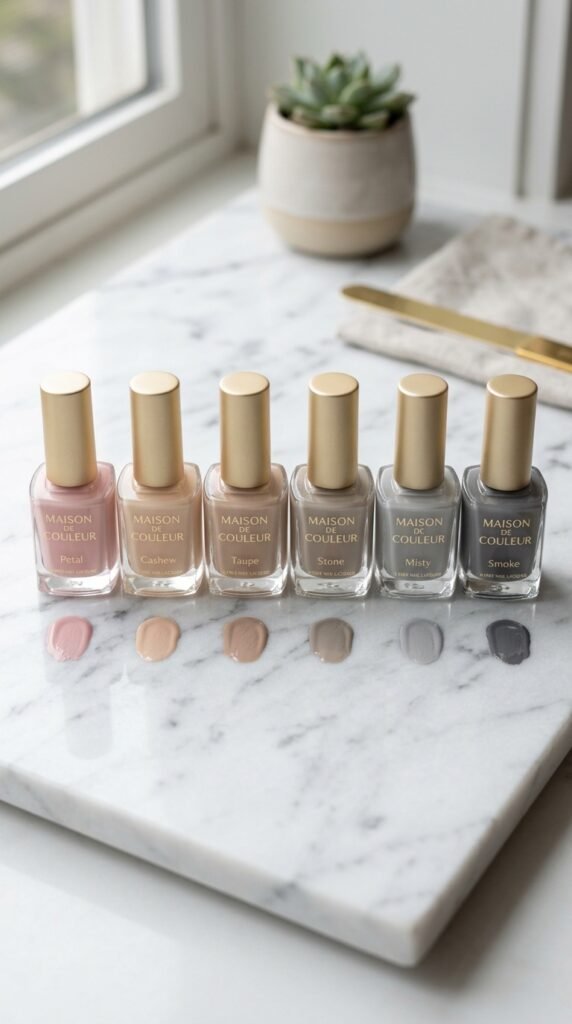
The first step to office-friendly nail art is selecting the right palette. You want colors that are sophisticated yet versatile.
- Neutral shades: Beige, taupe, soft pink, and light gray are safe bets.
- Classic tones: Deep red, muted burgundy, or navy can add a pop of color without being too flashy.
- Accent colors: If you love a touch of sparkle, choose subtle metallics or a single glitter nail.
Tip: Stick to 1–2 accent nails per hand for a modern, understated look.
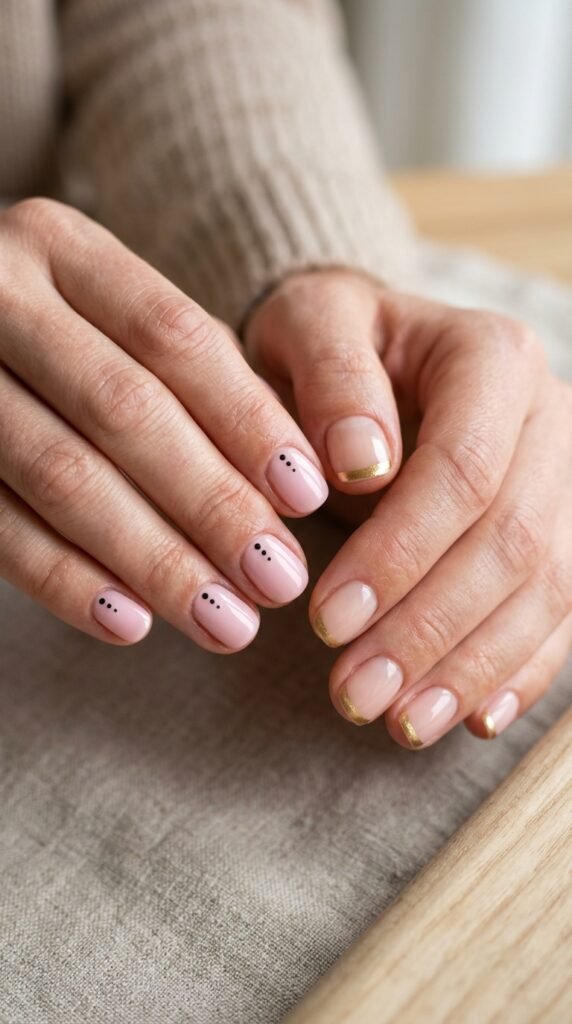
Simple Patterns That Work
You don’t need intricate designs to make a statement. Some simple patterns are perfect for office wear:
- French tips with a twist: Instead of the classic white, try a thin metallic or pastel line.
- Dots and stripes: Small dots along the nail edge or a single vertical stripe down the center.
- Geometric shapes: Triangles or diagonal lines in neutral colors keep nails professional yet stylish.
- Minimalist art: Tiny icons like a leaf, a star, or a heart on one accent nail.
Tip: Avoid designs that are too busy or neon—they can feel distracting in a professional environment.
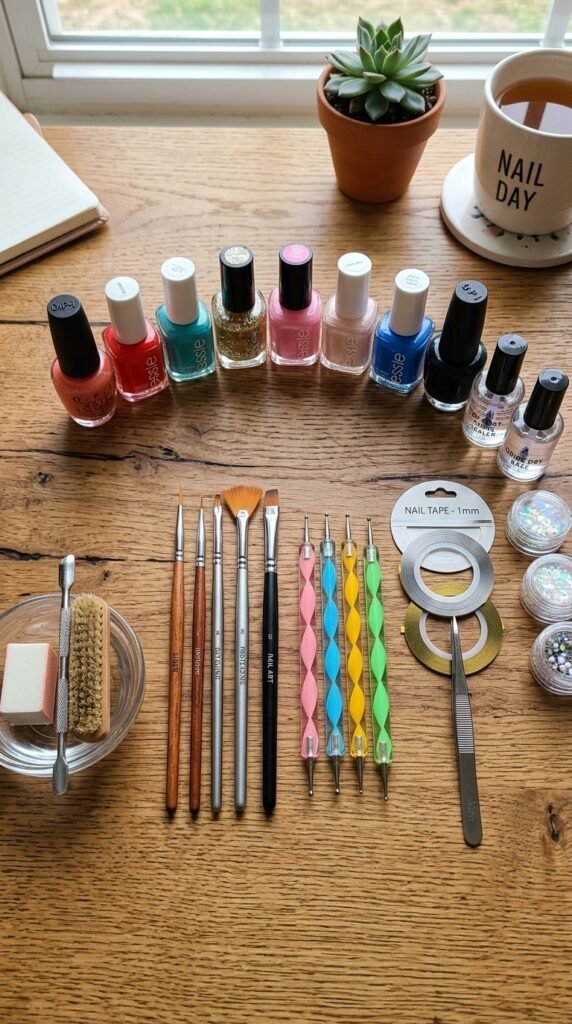
Tools and Materials You’ll Need
To get started, gather some basic supplies. You don’t need a professional kit, just a few essentials:
- Base coat and top coat for long-lasting shine.
- Neutral and accent nail polishes.
- Thin nail art brushes or a dotting tool for precision.
- Nail tape for clean lines.
- Small nail stickers (optional) for quick designs.
Tip: Always finish with a top coat to protect your art and add a polished finish.
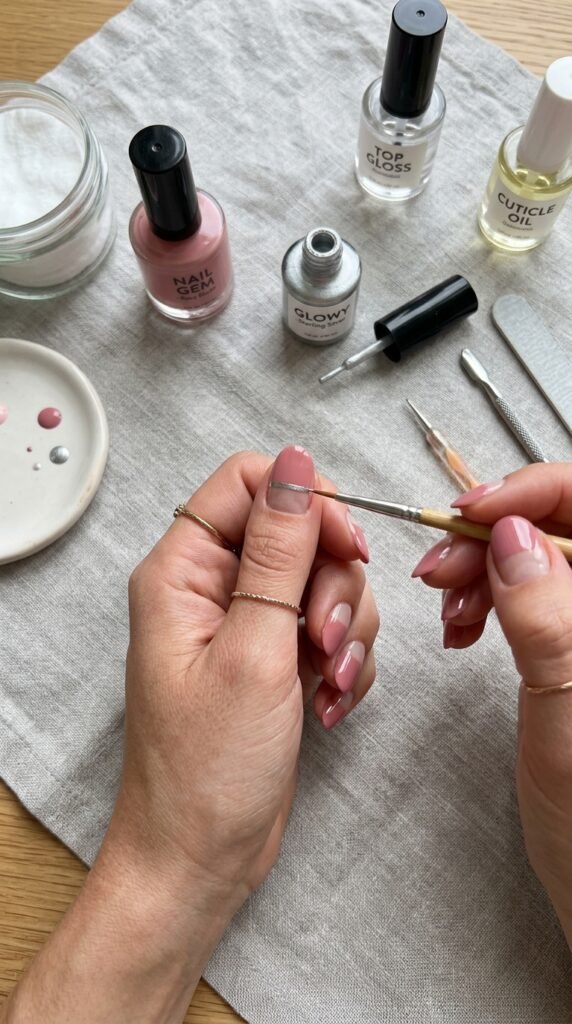
Step-by-Step Office Nail Art
Here’s a simple routine to achieve chic office-appropriate nails:
- Prep your nails: Trim, file, and gently push back cuticles.
- Apply a base coat: This protects your nails and ensures smooth polish application.
- Add your base color: Two thin layers work best for opacity.
- Create your design: Use thin brushes, dotting tools, or nail tape for stripes, dots, or subtle accents.
- Seal with a top coat: This adds shine and prevents chipping.
- Clean up edges: Use a small brush dipped in nail polish remover to fix any mistakes.
Tip: Practice makes perfect! Start with simpler designs and gradually try more intricate ones as you gain confidence.
Maintaining Your Nail Art at Work
Even subtle nail art needs a little TLC to stay looking fresh:
- Keep a mini nail polish or top coat in your desk drawer for touch-ups.
- Moisturize your cuticles daily for a clean and professional appearance.
- Avoid using nails as tools—they chip easily, which can ruin the design.
Tip: If your office has strict rules, stick to shorter nail lengths and neutral shades to maintain a professional image.

Final Thoughts
Office-friendly nail art proves that you can be stylish and professional at the same time. By sticking to muted shades, simple designs, and minimal accents, your nails become a subtle statement of your personality. Next time you prep for a meeting or client call, let your nails reflect the same polished confidence you carry in your work.
Save this guide for your next manicure session and experiment with elegant, office-appropriate designs that make your hands stand out—without ever feeling over the top.

Leave a Reply