
Nail art doesn’t have to be complicated or time-consuming. If you love pretty nails but struggle with freehand designs, nail decals are your secret weapon. They’re quick, beginner-friendly, and can instantly transform plain polish into salon-worthy nails at home.
Whether you’re getting ready for a special event or just want everyday glam, this step-by-step guide will show you exactly how to do nail art using decals like a pro.
What Are Nail Decals?
Nail decals are thin decorative designs that stick onto your nails. Think of them as stickers for your manicure. They come in many styles, including:
- Floral patterns
- Minimalist lines
- Glitter accents
- Cartoon or themed designs
- Metallic foils
Why people love them:
- No artistic skills needed
- Budget-friendly
- Quick application
- Huge design variety
- Perfect for beginners
Tools and Supplies You’ll Need
Before you start, gather everything so the process goes smoothly.
Basic nail decal kit:
- Nail polish (base color)
- Base coat
- Top coat
- Nail decals
- Tweezers
- Small scissors (optional)
- Nail file and buffer
- Cuticle pusher
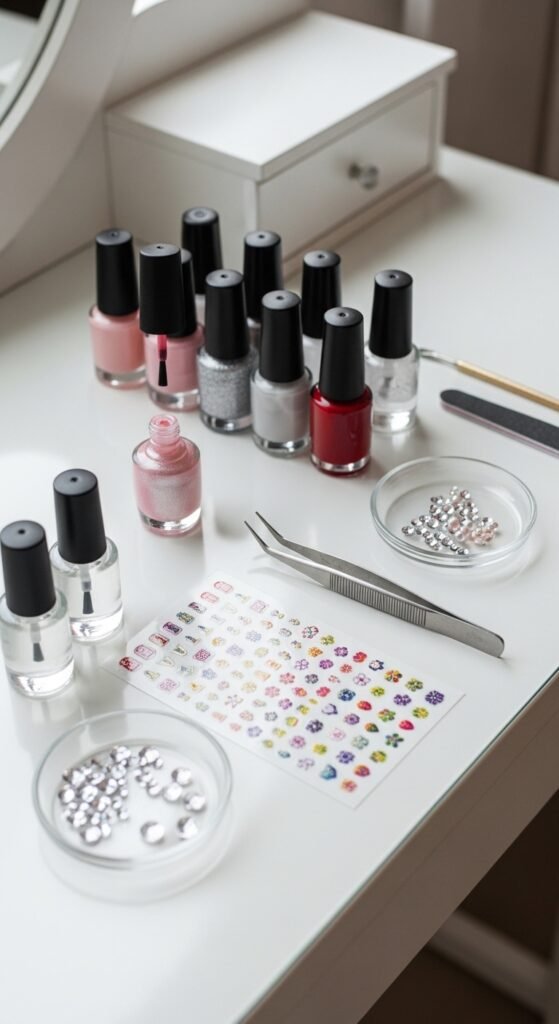
Pro tip: Choose decals that match your nail size for the cleanest look.
Step 1: Prep Your Nails Properly
Great nail art always starts with proper prep. Skipping this step is the number one reason decals don’t last.
Follow these prep steps:
- Remove old polish completely
- Trim and file nails to your desired shape
- Gently push back cuticles
- Buff the nail surface lightly
- Wash hands and dry thoroughly
Apply a thin layer of base coat and let it dry fully.
Why this matters:
A smooth, clean surface helps decals stick better and last longer.
Step 2: Apply Your Base Color
Now it’s time to create the perfect background for your decals.
How to do it:
- Apply your chosen nail polish color
- Use thin, even coats
- Let each coat dry before the next
- Wait until nails are mostly dry but slightly tacky
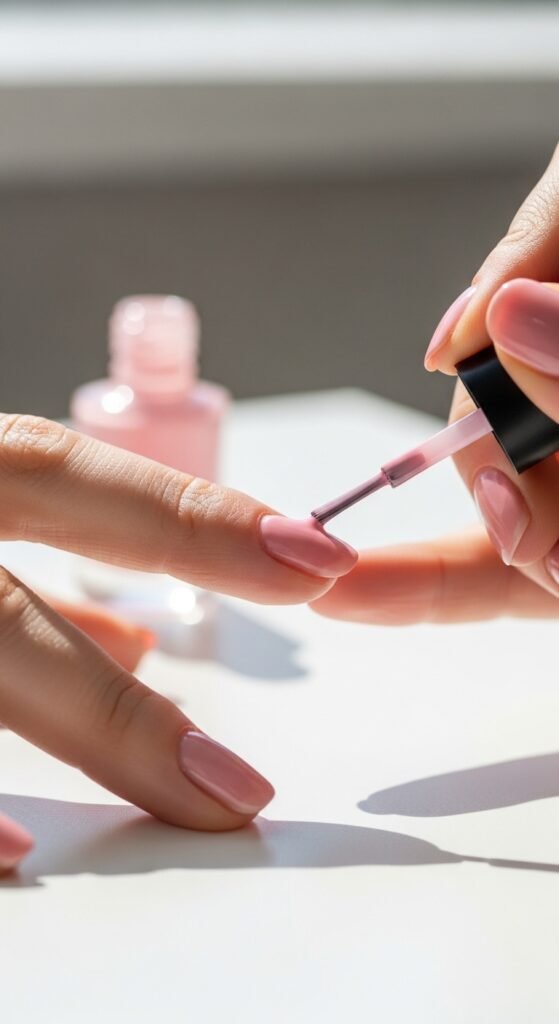
Best colors for decals:
- Nude shades for elegant looks
- Pastels for cute styles
- Black or dark tones for bold contrast
- Milky white for minimalist vibes
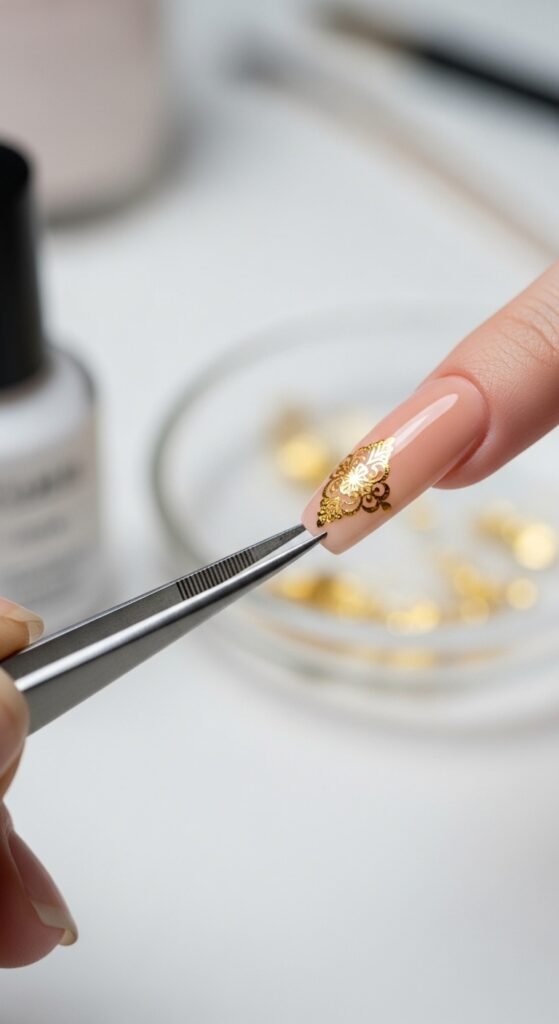
Step 3: Apply the Nail Decals
This is where the magic happens. Take your time for the best results.
Step-by-step application:
- Use tweezers to gently lift the decal
- Carefully place it on your nail
- Position it before pressing down
- Smooth from center outward to remove air bubbles
- Trim excess if needed
Helpful tips:
- Work on one nail at a time
- Don’t rush placement
- Use a silicone tool or finger to press gently
- If it wrinkles, lift and reposition quickly
Step 4: Seal Everything with Top Coat
Never skip the top coat. This step locks your design in place and adds shine.
How to seal properly:
- Apply a generous but controlled layer
- Float the brush over the decal (don’t drag)
- Cover the nail edges
- Let dry completely
For extra durability:
- Apply two thin layers of top coat
- Use a gel top coat if available
- Reapply top coat every 2–3 days
This is the secret to long-lasting decal nail art.
Common Mistakes to Avoid
Even beginners can get flawless results if they avoid these pitfalls.
Watch out for:
- Applying decals on wet polish
- Skipping nail prep
- Using thick polish layers
- Not sealing edges
- Rushing the drying time
Quick fix:
If a decal lifts, gently press it down and reseal with top coat.
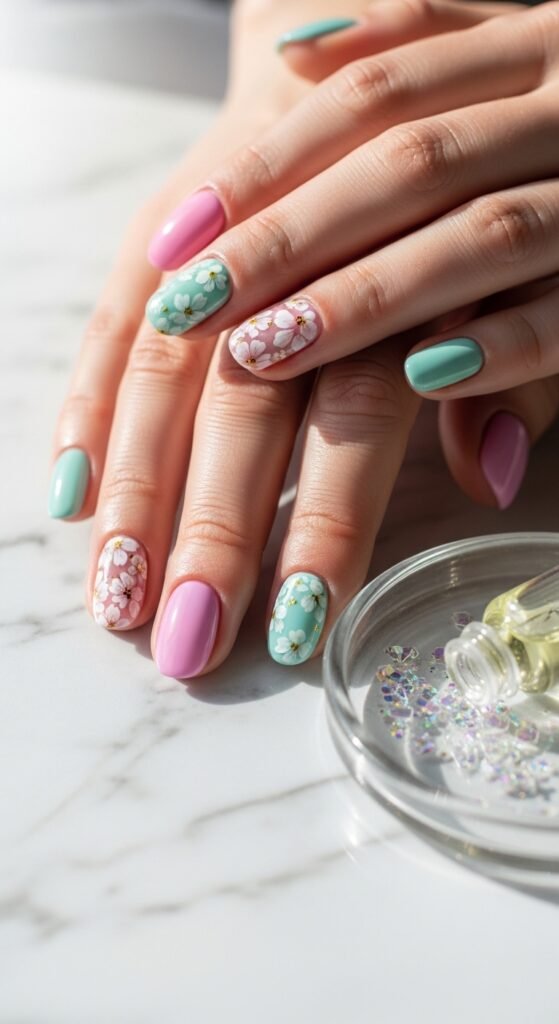
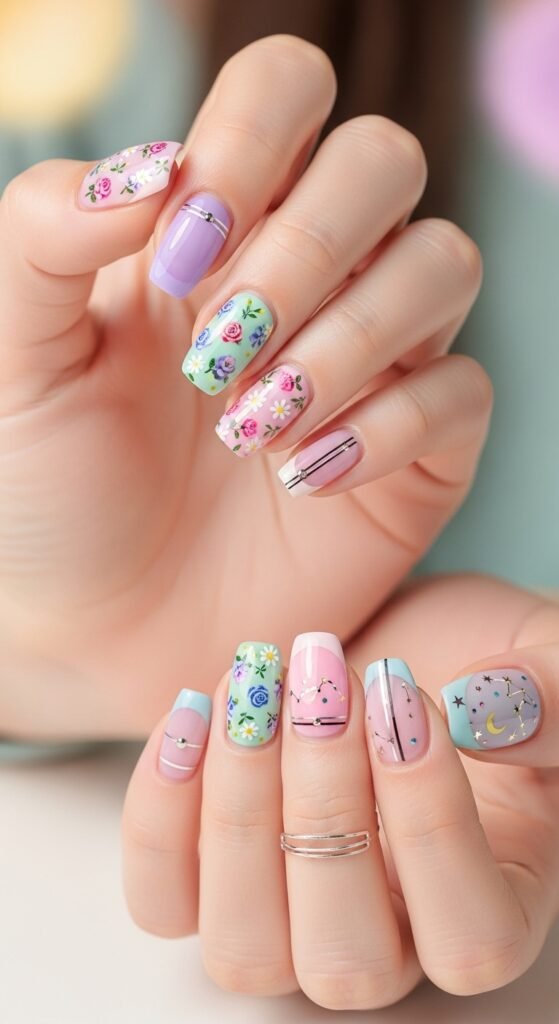
Cute Nail Decal Design Ideas
Need inspiration? Try these Pinterest-worthy looks:
- Accent nail with floral decal
- Minimal gold line art
- Black nails with tiny stars
- French tips with micro decals
- Pastel mismatched designs
How to Make Your Nail Decals Last Longer
Want salon-level longevity? Follow these simple habits.
Longevity tips:
- Avoid hot water for the first few hours
- Wear gloves while cleaning
- Reapply top coat every few days
- Don’t pick at the edges
- Keep nails moisturized (not oily on the surface)
Most decal manicures can last 7–14 days with proper care.
Final Thoughts
Nail decals are one of the easiest ways to get stunning nail art at home without stress or expensive salon visits. With just a little prep, careful placement, and a good top coat, you can create beautiful, professional-looking nails in minutes.
Try it today and watch your manicure game level up.
Save this guide for later and share it with your nail-loving friends!

Leave a Reply