
If you love experimenting with fun and unique nail designs, nail art with foil paper is an easy way to elevate your manicure. Foil paper is perfect for adding a pop of sparkle, texture, and metallic shine to your nails. Whether you’re aiming for something bold and trendy or subtle yet stunning, this nail art technique is versatile and easy to do at home. Ready to dive into the world of dazzling foil nails? Let’s get started!
Step-by-Step Guide to Nail Art with Foil Paper
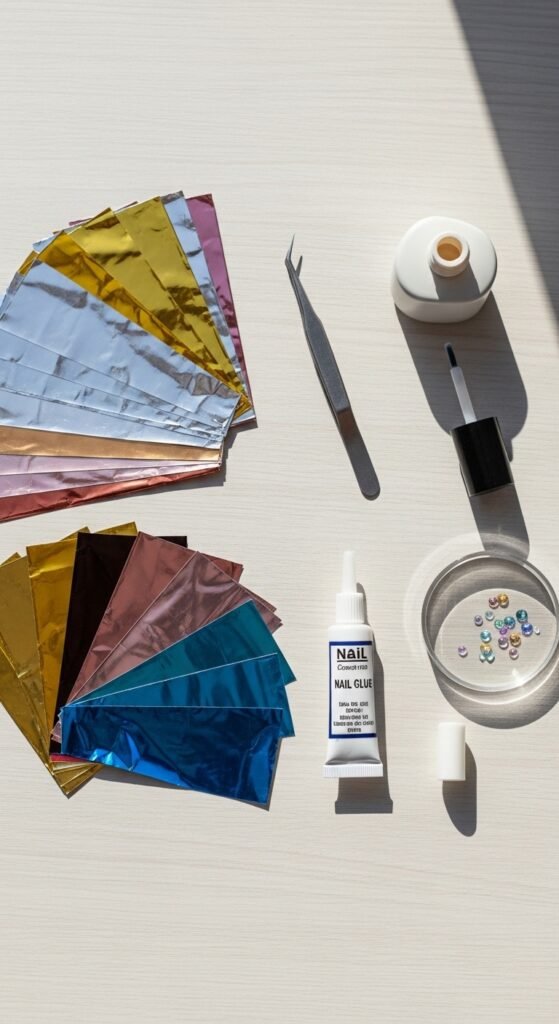
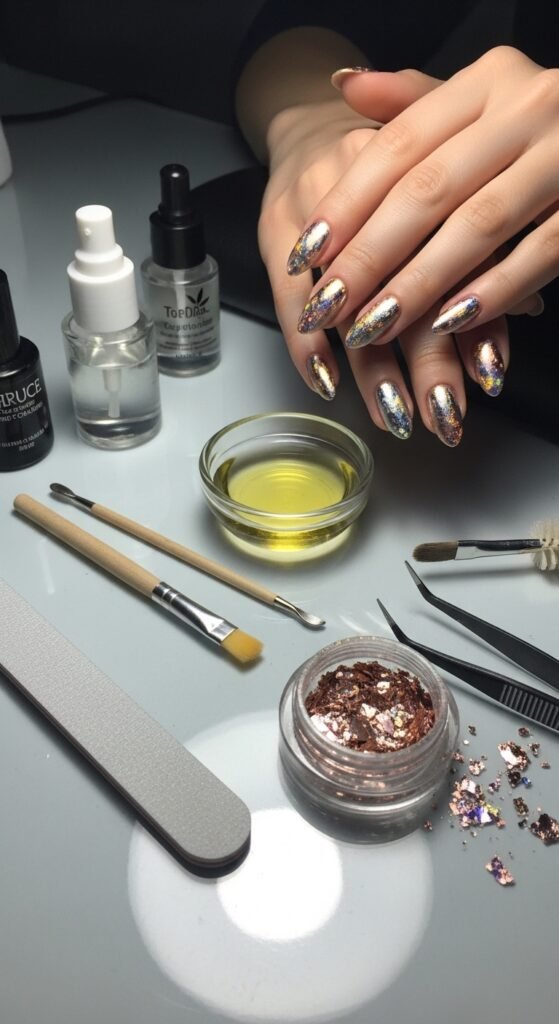
1. Gather Your Materials
Before you start, gather everything you’ll need to create your foil nail art. The essentials are simple but important:
- Foil paper (choose your favorite color or design)
- Nail polish (a base color, usually white or clear works best)
- Nail glue or foil adhesive
- Tweezers or a small brush for precise application
- Topcoat (to seal the design and make it last longer)
2. Prep Your Nails
Start by preparing your nails properly to ensure the best results. Begin with a gentle nail buffer to smooth out the surface of your nails. After that, trim and file your nails to your desired shape. Clean your nails with some nail polish remover to get rid of any oils or residue.
Once your nails are prepped, apply a thin layer of base coat to help your nail polish adhere better. Let it dry completely before moving on to the next step.
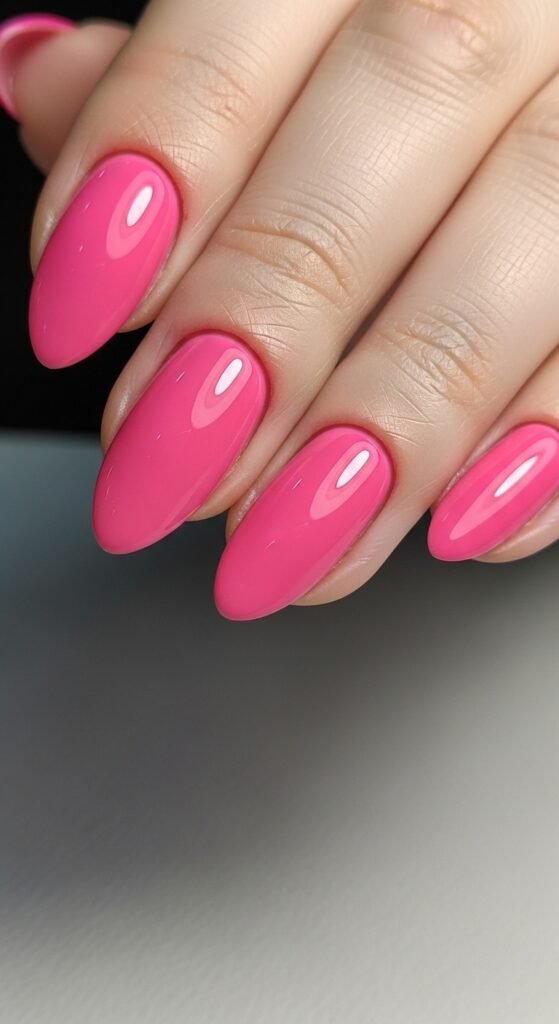
3. Apply Your Base Color
Pick a base color that will complement the foil you’ve chosen. If you’re going for a bold look, opt for dark or bright shades. For a more delicate design, neutral colors like nude, white, or pastel shades are perfect. Apply two coats of your base color, making sure each layer is dry before applying the next.
4. Apply Foil Adhesive
Next, it’s time to apply the foil adhesive or nail glue. This step is crucial as the adhesive helps the foil stick to your nails. Use a small brush or the brush provided with the adhesive to apply a thin, even layer over the area where you want the foil to be placed. Allow the adhesive to dry for about 30 seconds, or until it becomes tacky.
Pro Tip: If you want the foil to cover the entire nail, you can apply the adhesive to the whole nail. For a more creative look, apply the adhesive in random patches or designs.
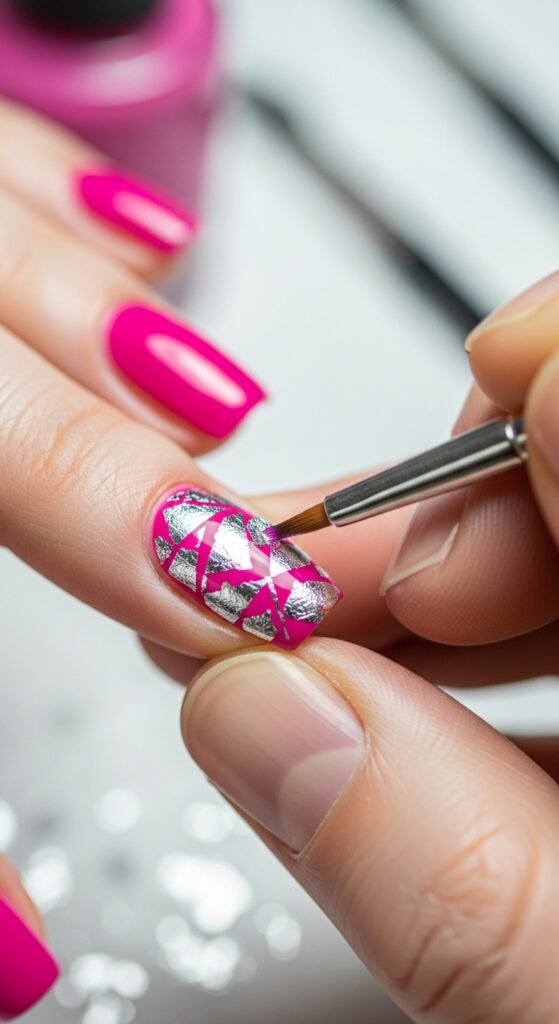
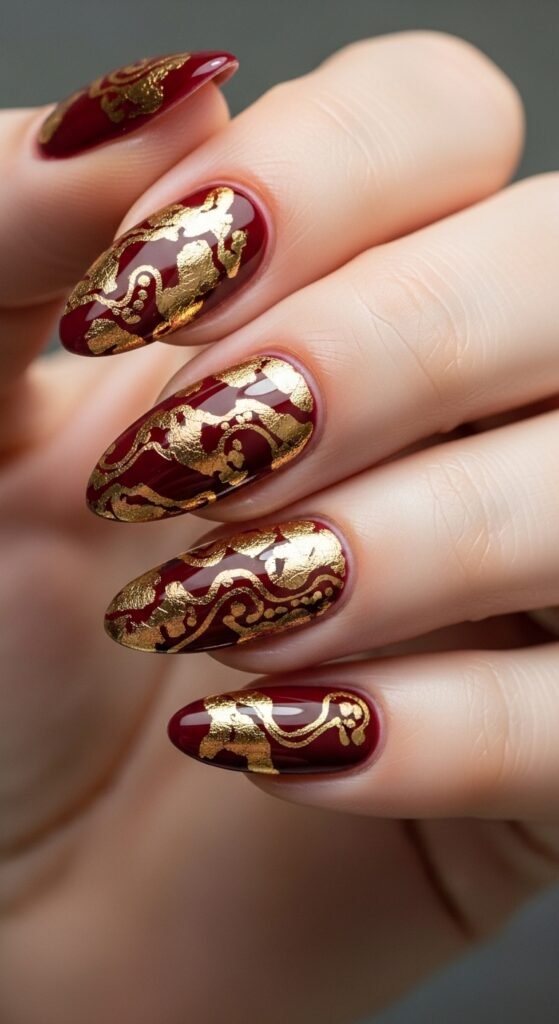
5. Apply the Foil Paper
Once the adhesive is ready, it’s time to add the foil. Cut small pieces of foil to match the design or size you want. Using tweezers or your fingers (be gentle), press the foil onto your nail. You can either press it in full sheets for a smooth metallic look or use smaller pieces for a more intricate, patchwork design.
For a more textured effect, gently rub the foil in place with your fingers, which will give it a distressed, artistic finish.
6. Seal the Design with a Top Coat
Once you’re satisfied with the foil design, it’s time to seal it in place. Apply a generous layer of top coat to lock in the foil and ensure it lasts longer. Be sure to apply the top coat gently over the foil to avoid disrupting its placement. Let your nails dry completely to prevent any smudging.
Pro Tip: Use a gel top coat for extra shine and durability, especially if you want the foil to stay intact for a longer period.
7. Clean Up and Finish
After your top coat has dried, clean up any excess foil or adhesive around the edges of your nails with a nail brush and some remover. You’re now ready to show off your stunning foil nail art!
Tips for Perfecting Your Foil Nail Art
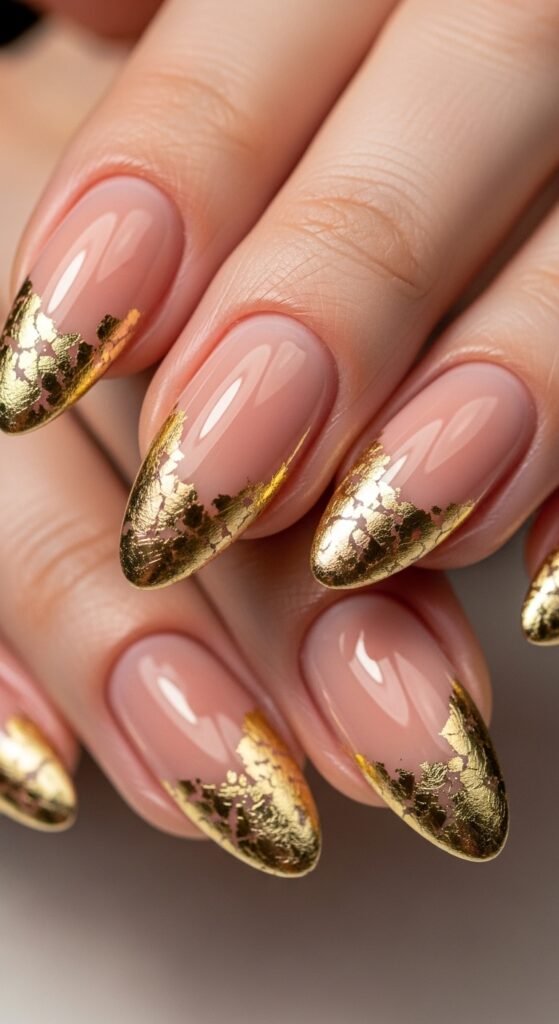
- Choose Your Foil Wisely: Experiment with different colors and designs of foil paper—metallic gold, silver, holographic, or even patterned foils can bring a whole new dimension to your nails.
- Play with Patterns: Don’t be afraid to get creative with the placement of the foil. Try adding it to the tips, around the cuticles, or in random patches for a modern, abstract look.
- Use Fine Detail: If you want a more intricate design, use a small, fine brush to apply the adhesive in specific patterns, like stripes, dots, or geometric shapes.
- Layering is Key: Layering multiple pieces of foil can create a richer, more textured look, perfect for adding drama to your nails.
Final Thoughts
Foil nail art is a fun and easy way to make your nails stand out. It’s perfect for anyone looking to add a bit of sparkle, shine, or texture to their look. Plus, the possibilities are endless when it comes to combining different foils, colors, and designs! Now that you know how to do it, it’s time to try it out yourself and create your own dazzling designs.
Save this guide for later, and don’t forget to share your foil nail art creations with your friends!

Leave a Reply