
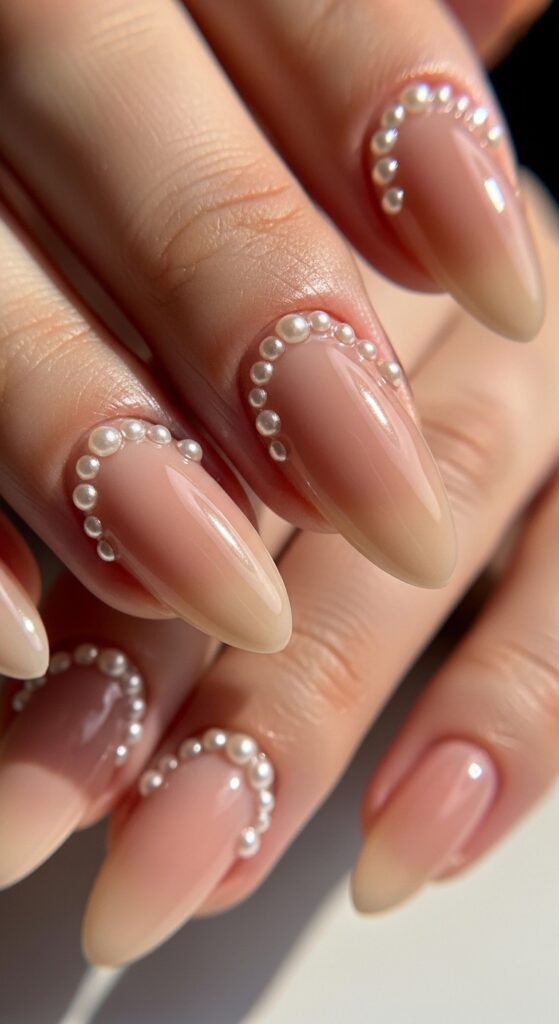
Pearl nail art is the quickest way to make your manicure look elegant, expensive, and totally Pinterest-worthy. Whether you love soft bridal vibes or bold glam nails, adding tiny pearls can instantly upgrade even the simplest polish. The best part? You don’t need to be a professional nail artist to do it at home.
In this step-by-step guide, you’ll learn exactly how to do nail art with pearls — from tools to pro tips — so your manicure looks flawless and long-lasting.
Why Pearl Nail Art Is Trending
Pearl nails are everywhere right now — and for good reason. They strike the perfect balance between minimal and luxurious.
Why people love pearl nail art:
- Looks classy and timeless
- Works for weddings, parties, and everyday wear
- Easy to customize with different sizes
- Beginner-friendly technique
- Elevates simple nail colors instantly
Whether you prefer subtle accents or full pearl glam, this trend is incredibly versatile.
Tools and Materials You’ll Need
Before you start, gather everything so the process goes smoothly.
Essential supplies:
- Base coat
- Nail polish (nude, pink, or your favorite color)
- Flat-back nail pearls
- Nail glue or thick top coat
- Dotting tool or tweezers
- Top coat (preferably gel-look)
- Nail file and buffer
Optional but helpful:
- Wax pickup pencil
- Rhinestone picker
- UV/LED lamp (if using gel)
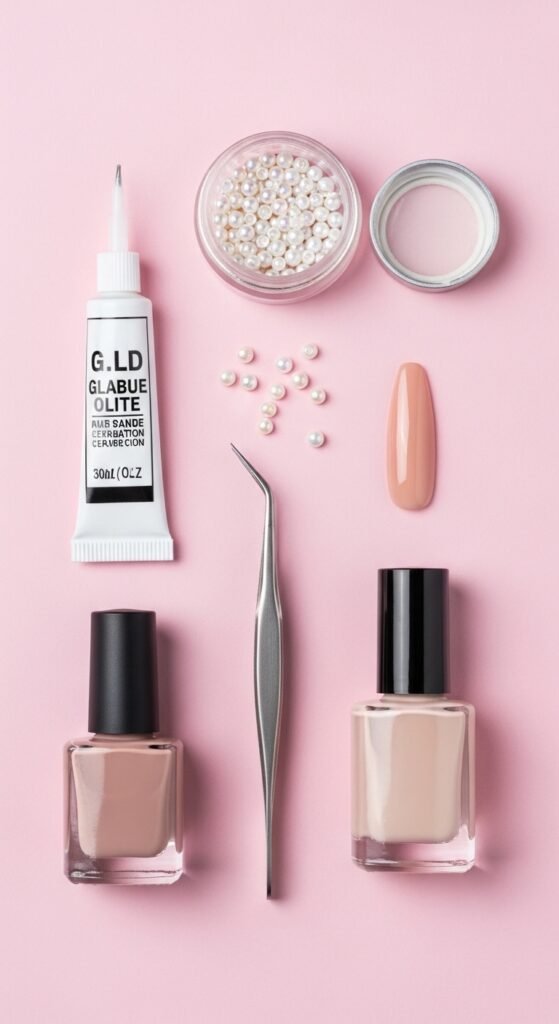
Pro tip: Use flat-back pearls made specifically for nails. Craft pearls are usually too bulky.
Step-by-Step: How to Apply Pearl Nail Art
Follow these simple steps for salon-quality results at home.
Step 1: Prep Your Nails Properly
Good prep is the secret to long-lasting nail art.
What to do:
- Remove old polish
- Trim and shape nails
- Push back cuticles
- Lightly buff the nail surface
- Clean nails with alcohol or remover
This creates a smooth base so pearls stick better.
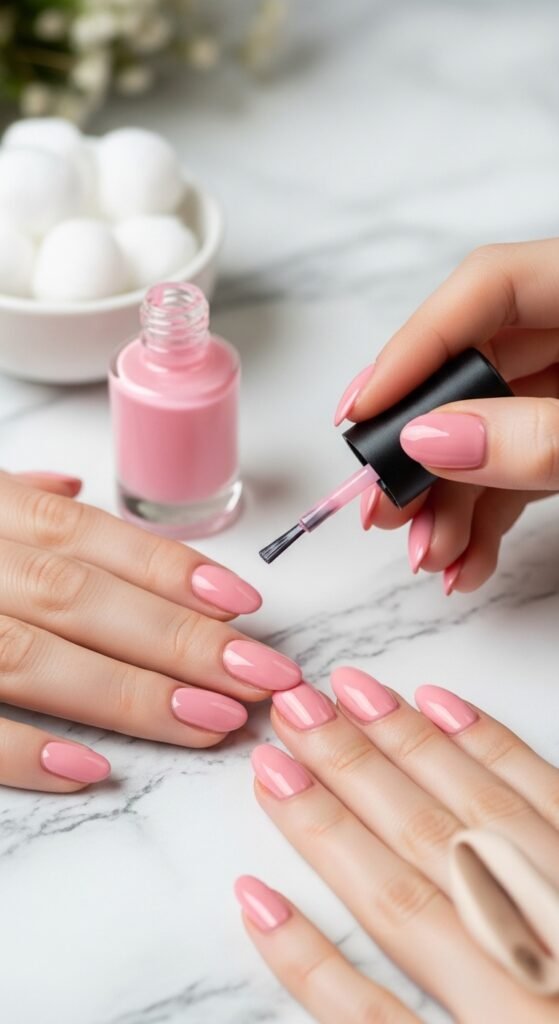
Step 2: Apply Base Coat and Color
Now it’s time to build your canvas.
Steps:
- Apply a thin base coat and let it dry
- Apply your chosen nail polish
- Add a second coat for full coverage
- Let polish become slightly tacky (not fully dry)
Soft shades like milky white, blush pink, and nude look especially stunning with pearls.
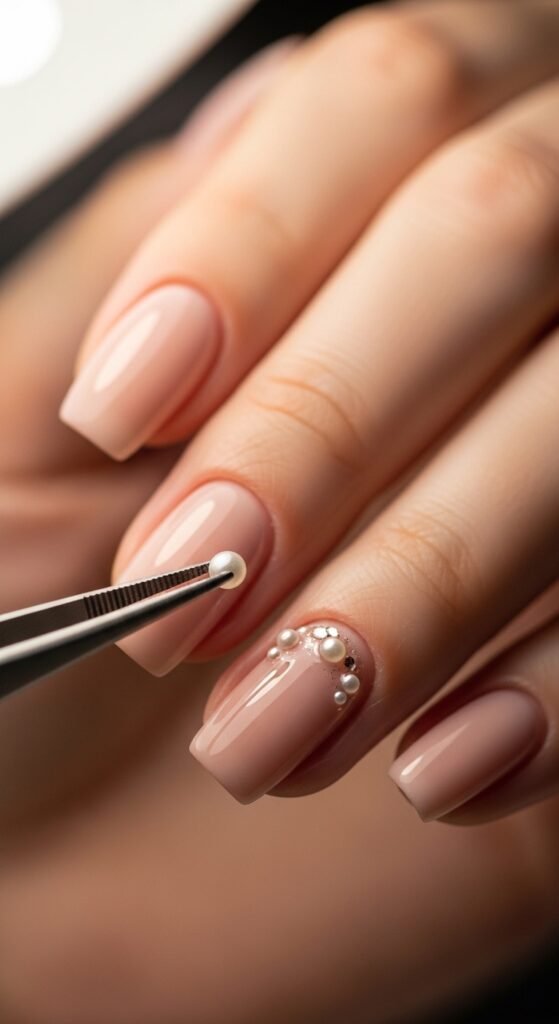
Step 3: Place the Pearls
This is the fun and creative part.
How to do it:
- Add a tiny dot of nail glue where you want the pearl
- Pick up the pearl with tweezers or wax pencil
- Gently place it on the nail
- Press lightly to secure
Beginner design ideas:
- Single pearl near the cuticle
- French tip lined with micro pearls
- Accent nail with clustered pearls
- Minimal side curve design
Take your time here — placement makes all the difference.
Step 4: Seal Everything In
Locking in the pearls properly prevents them from falling off.
Best method:
- Apply top coat around the pearls first
- Then lightly float top coat over the nail
- Avoid flooding pearls completely
- Let dry fully (or cure if gel)
Longevity tip: Two thin layers of top coat work better than one thick layer.
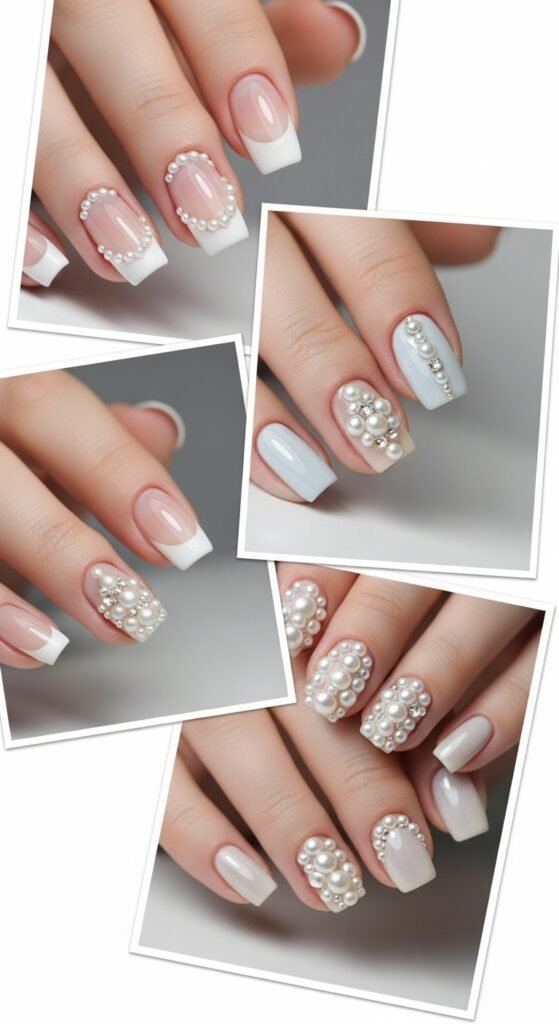
Cute Pearl Nail Design Ideas to Try
If you’re unsure what style to choose, start with these Pinterest favorites.
Minimal looks:
- Single pearl accent nail
- Micro pearl French tips
- Cuticle pearl line
Glam styles:
- Full pearl cluster nail
- Mixed pearls and rhinestones
- 3D bridal pearl nails
Trendy combos:
- Chrome + pearls
- Milky nails with pearls
- Pearl swirl designs
Tips to Make Pearl Nail Art Last Longer
Nothing is worse than losing pearls after one day. Follow these pro tips.
Do this:
- Use nail glue for bigger pearls
- Avoid very curved nail surfaces
- Seal edges carefully
- Wear gloves while washing dishes
- Avoid picking at pearls
Avoid this:
- Thick bulky pearls
- Skipping nail prep
- Flooding pearls with top coat
- Applying pearls on fully dry polish
Bonus tip: If you want extra durability, use builder gel instead of regular top coat.
Common Mistakes Beginners Make
If your pearl nails don’t look right, one of these might be the reason.
Watch out for:
- Pearls sliding on wet polish
- Uneven placement
- Using too much glue
- Not sealing properly
- Choosing pearls that are too large
The good news? Pearl nail art gets easier every time you practice.
Final Thoughts
Pearl nail art is one of the easiest ways to create a soft, luxurious manicure at home. With the right tools, a little patience, and smart placement, you can achieve salon-worthy nails in under an hour. Start simple, experiment with designs, and soon you’ll be creating stunning pearl manicures like a pro. Save this guide for later and try your first pearl nail design today!

Leave a Reply