
Want salon-worthy nails without spending hours (or money) at the salon? Nail art stickers are your secret weapon. They are quick, beginner-friendly, and surprisingly versatile. Whether you love cute florals, minimalist lines, or bold glam, you can transform plain nails into eye-catching designs in minutes.

If you have ever felt intimidated by nail art, this step-by-step guide will make the process simple and fun. Let’s dive in.
Why Nail Stickers Are Perfect for Beginners
Nail stickers have become wildly popular, and for good reason. They remove the need for advanced painting skills while still delivering professional-looking results.
Benefits of using nail stickers:
- No artistic skill required
- Budget-friendly compared to salon art
- Huge variety of designs available
- Quick application process
- Minimal mess
They are especially great if you are a beginner blogger or DIY lover who enjoys easy beauty hacks that still look premium.
What You Need Before You Start
Before applying nail art stickers, gather your tools. Having everything ready makes the process smooth and frustration-free.
Basic supplies:
- Nail polish (base color)
- Nail art stickers or decals
- Clear top coat
- Nail file
- Cuticle pusher
- Tweezers (optional but helpful)
- Nail polish remover and cotton pads
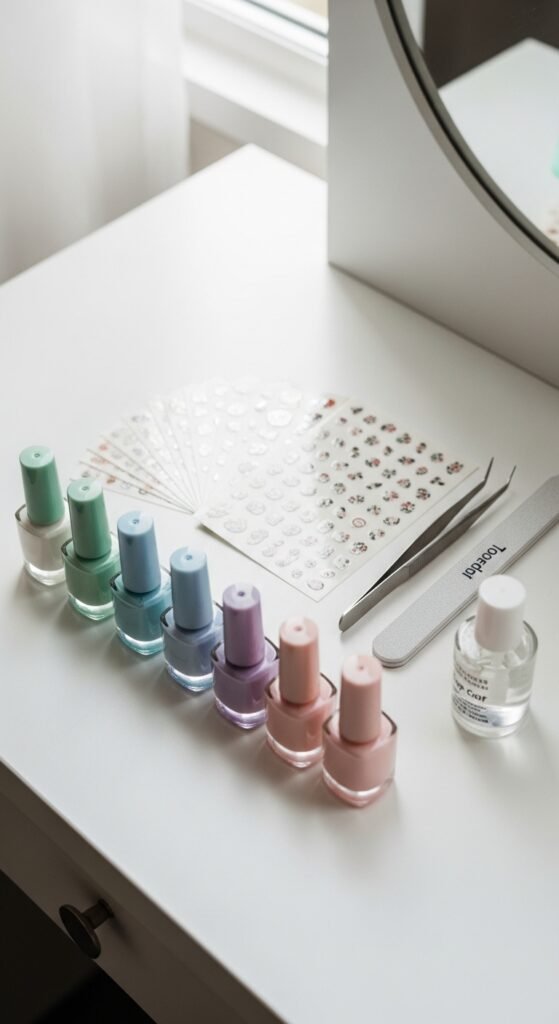
Pro tip: Choose thin, flexible stickers. They blend better with the nail and look more professional.
Step-by-Step Guide to Applying Nail Art Stickers
Follow these simple steps for flawless results.
Step 1: Prep Your Nails Properly
Good nail prep is the secret to long-lasting nail art.
What to do:
- Remove old polish completely
- Trim and shape your nails
- Gently push back cuticles
- Lightly buff the nail surface
- Wash and dry hands thoroughly
Clean nails help stickers stick better and last longer.
Step 2: Apply Your Base Color
Your base polish creates the background for your sticker design.
How to do it right:
- Apply a thin base coat
- Add 1–2 coats of your chosen color
- Let polish dry until slightly tacky (not fully hard)
Beginner tip: Light colors make stickers pop, while dark shades create dramatic looks.
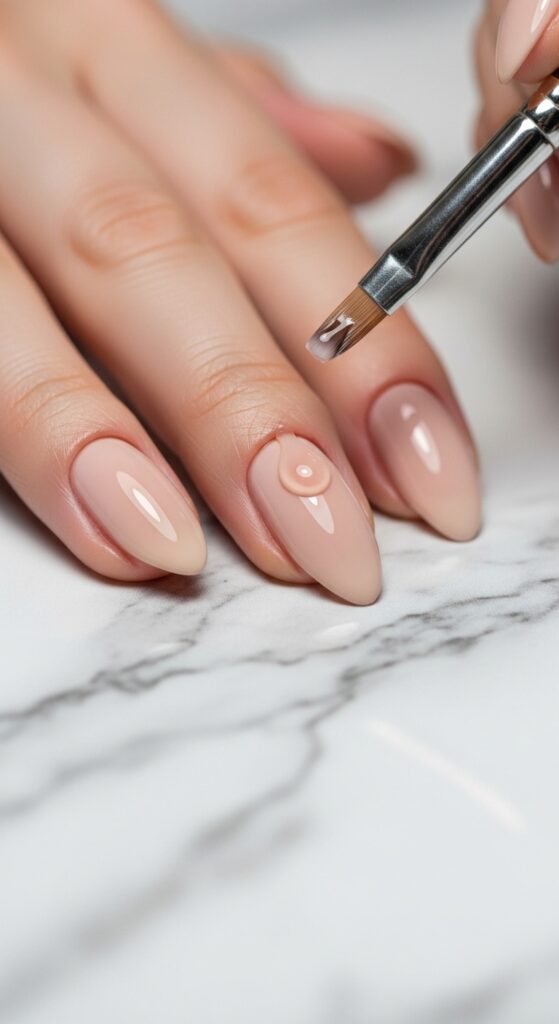
Step 3: Place the Nail Stickers Carefully
This is the fun part where your design comes to life.
Steps:
- Use tweezers to lift the sticker
- Position it gently on the nail
- Press from center outward to remove air bubbles
- Smooth edges carefully
Take your time here. Proper placement makes a huge difference in the final look.
Step 4: Seal with a Top Coat
Never skip this step. The top coat locks everything in place.
Apply the top coat to:
- Protect the sticker
- Add shine
- Prevent peeling
- Extend wear time
Let the nails dry completely to avoid smudging.
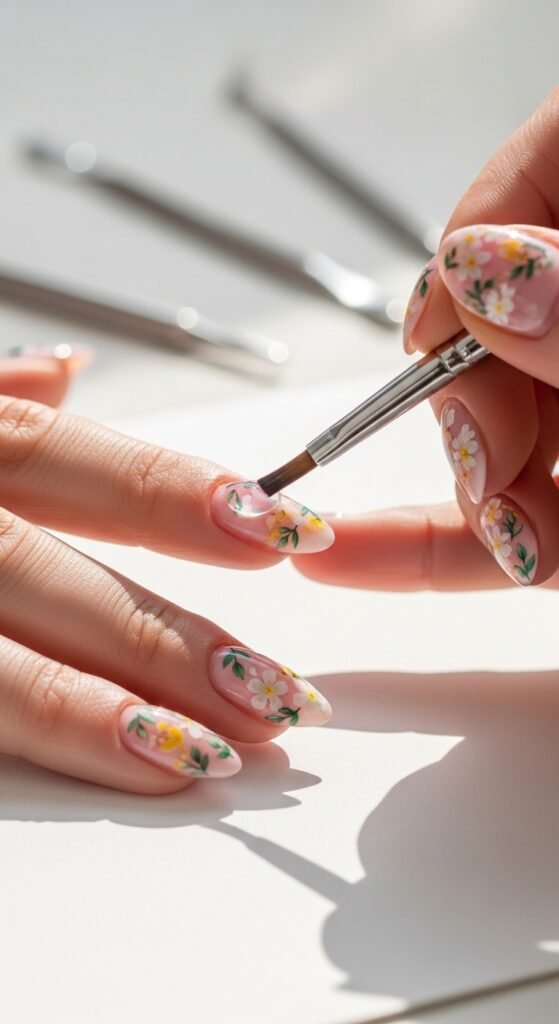
Cute Nail Sticker Design Ideas to Try
Feeling creative? Here are some Pinterest-worthy ideas.
Popular beginner designs:
- Tiny floral accents
- Minimal gold lines
- Black and white geometric shapes
- Heart stickers for romantic nails
- Celestial moon and star themes
Trending tip: Accent nails (one or two decorated nails) look chic and are easier for beginners.
Common Mistakes to Avoid
Even though nail stickers are easy, a few mistakes can ruin the finish.
Avoid these:
- Applying stickers on wet polish
- Skipping nail prep
- Using thick or stiff stickers
- Forgetting the top coat
- Touching nails before fully dry
If your stickers keep lifting, the polish was likely too dry or the top coat was too thin.
How to Make Your Nail Stickers Last Longer
Want your manicure to survive busy days? Follow these longevity tips.
Make them last with these habits:
- Apply thin layers of polish
- Always seal edges with top coat
- Reapply top coat every 2–3 days
- Wear gloves while washing dishes
- Avoid picking at stickers
With proper care, sticker nail art can last 7 to 14 days.
Easy Removal Without Damaging Nails
When it is time for a new look, removal should be gentle.
Safe removal method:
- Soak cotton in nail polish remover
- Press onto nail for 10–15 seconds
- Wipe gently
- Moisturize cuticles afterward
Never peel stickers off dry nails. That can damage the nail surface.
Final Thoughts
Nail art using stickers is one of the easiest ways to achieve beautiful, salon-style nails at home. With the right prep, careful placement, and a glossy top coat, even beginners can create stunning designs in minutes.
Start simple, experiment with styles, and most importantly have fun with it.
Save this guide for later and try your first sticker manicure today!

Leave a Reply