
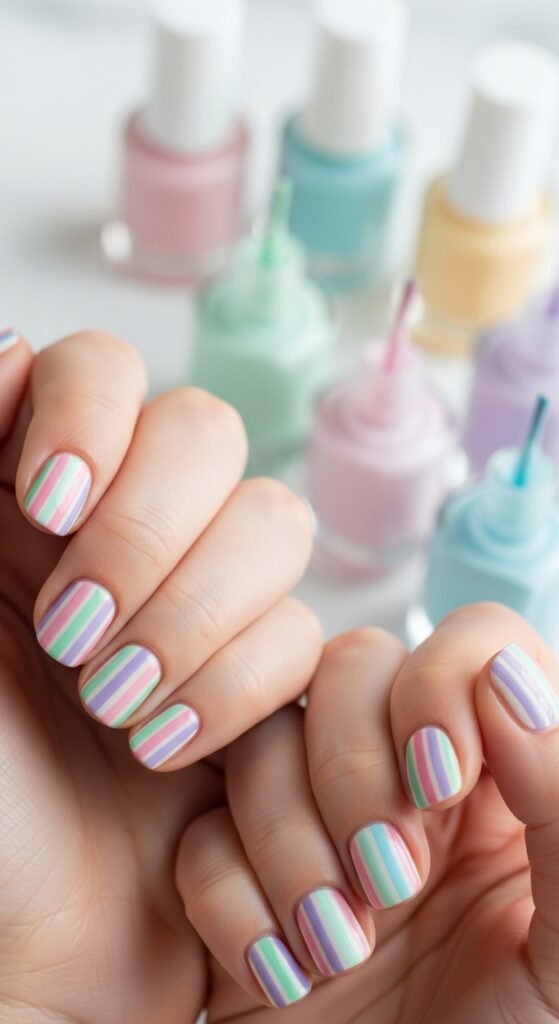
Stripes are timeless, chic, and surprisingly versatile in nail art. Whether you’re going for a classic pinstripe, a bold color-blocked look, or a fun rainbow design, striped nails instantly elevate your manicure game. The best part? You don’t need to be a professional to pull off flawless stripes at home. With a few tools, a little patience, and some creativity, your nails can become mini canvases for stylish patterns.
Gather Your Tools
Before diving into stripes, make sure you have everything you need. Here’s a simple checklist:
- Base coat and top coat – Protects nails and locks in your design.
- Nail polish in 2–3 colors – Choose contrasting or complementary shades.
- Striping tape or thin nail art brush – Helps create precise lines.
- Tweezers – Makes applying tape easier.
- Acetone and a small brush – For cleaning up mistakes.
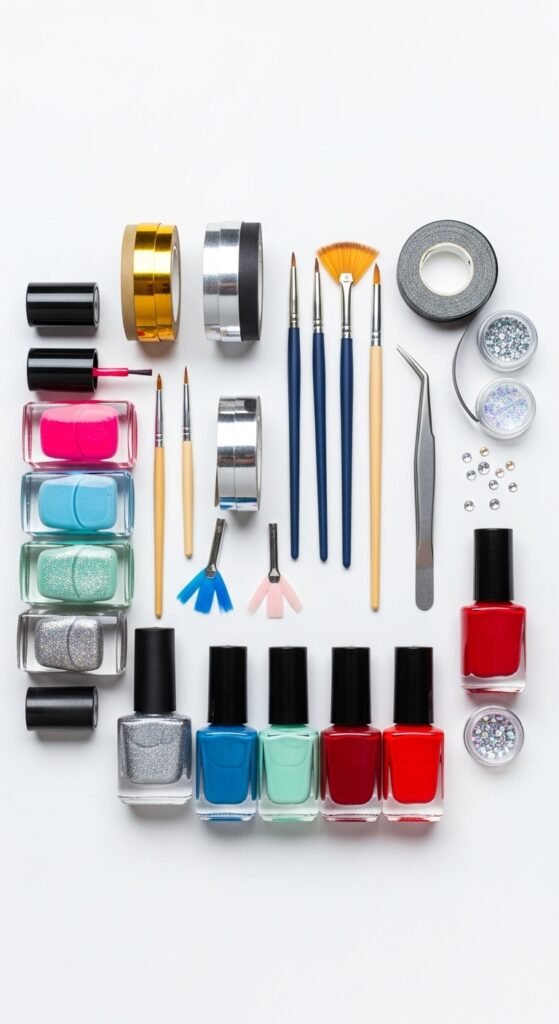
Pro Tip: If you’re new to stripes, start with striping tape. It’s a foolproof way to get clean, straight lines without freehand struggles.
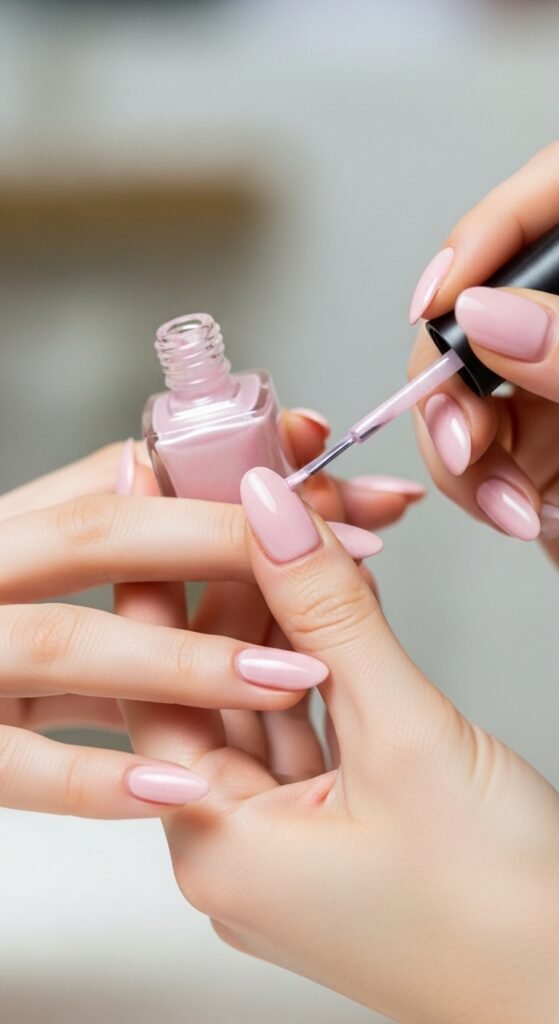
Prep Your Nails
Preparation is key to long-lasting nail art:
- Shape and buff your nails to your preferred style. Rounded, square, or almond shapes all work beautifully.
- Apply a base coat to prevent staining and make polish last longer.
- Choose your base color – Usually, a lighter shade works best for contrast with stripe colors. Let it dry completely before adding tape or painting lines.
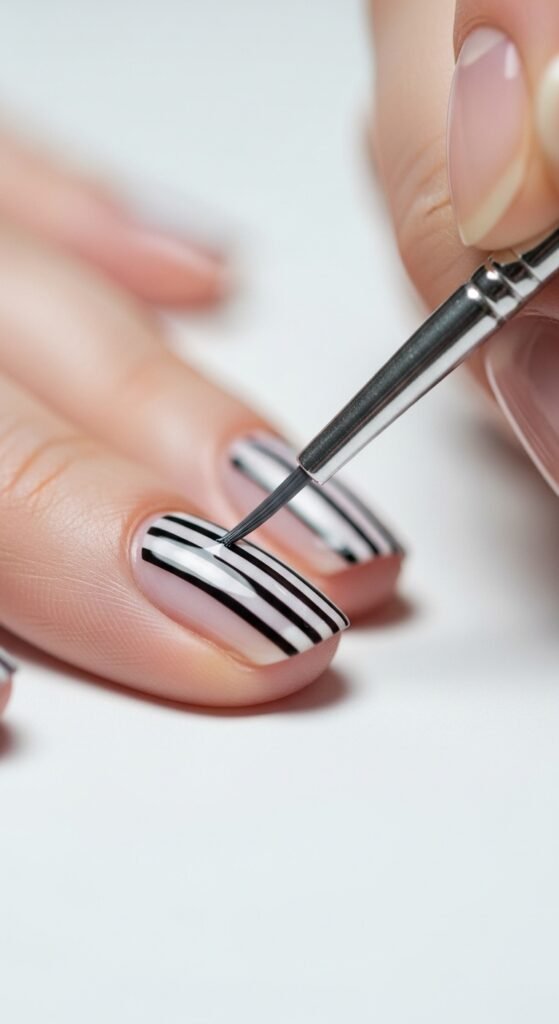
Create Your Stripes
Now comes the fun part! There are a few techniques depending on your style preference:
1. Using Striping Tape
- Cut small pieces of tape and place them where you want stripes.
- Paint over your nail with the secondary color.
- Carefully remove the tape before the polish dries to reveal crisp lines.
2. Freehand with a Thin Brush
- Dip a thin brush into your polish and carefully draw stripes.
- Keep your hand steady by resting it on a flat surface.
- Clean up edges with a small brush dipped in acetone if needed.
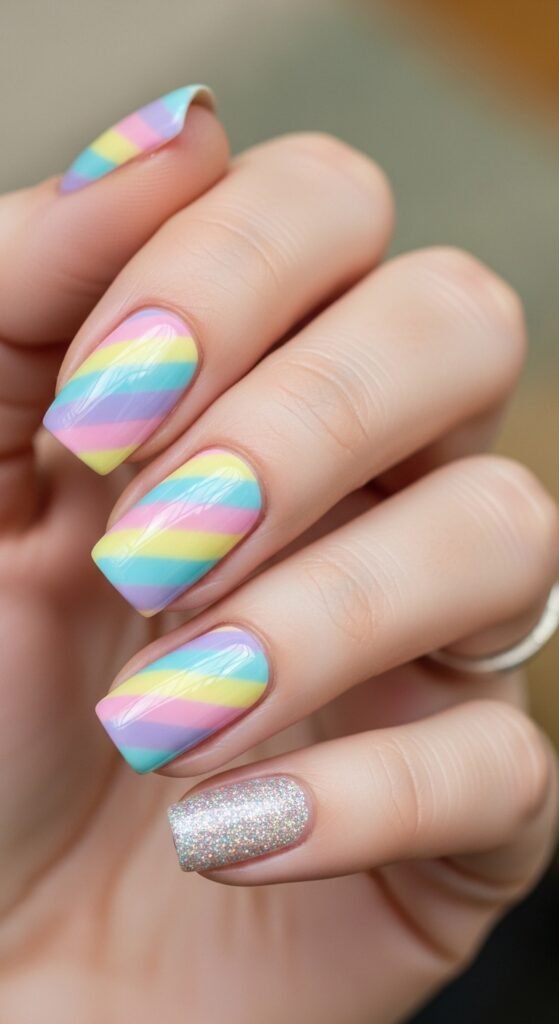
3. Play with Patterns
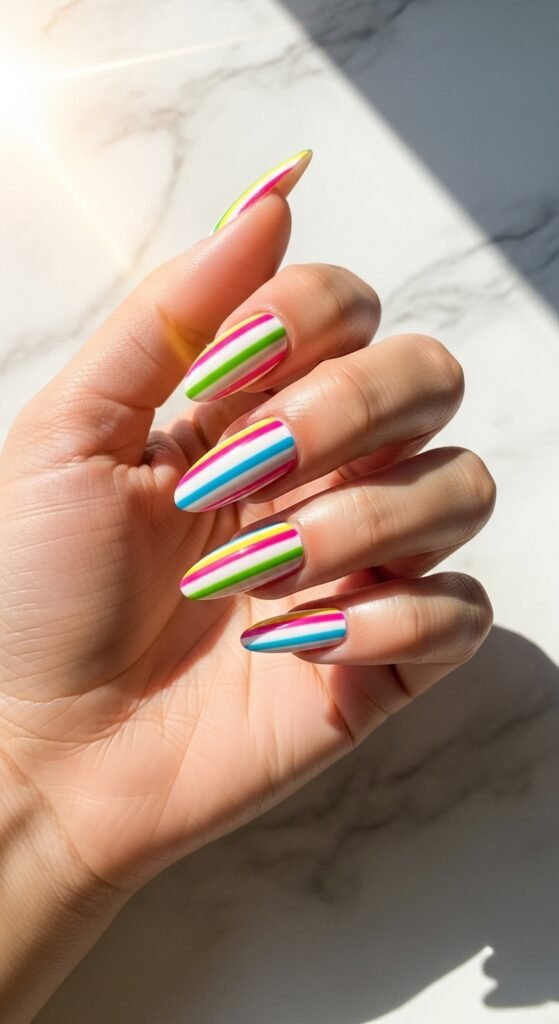
- Horizontal stripes – Simple and classic.
- Vertical stripes – Elongates the nails.
- Diagonal stripes – Trendy and dynamic.
- Mix-and-match – Try different stripe widths and colors on each nail for a playful look.

Add Finishing Touches
A few small details can take your striped nail art from good to amazing:
- Top coat: Seal your design with a glossy or matte top coat. This prevents chipping and adds shine.
- Accent nails: Consider making one nail a solid color or glittery stripe for extra flair.
- Nail stickers or rhinestones: Add subtle embellishments without overcomplicating your design.
Maintenance Tips
- Avoid hot water for the first few hours after painting.
- Apply a thin layer of top coat every 2–3 days to prolong your manicure.
- Keep cuticles moisturized with a nourishing oil to maintain a polished look.
Pro Tip: Stripes can chip easily if the layers are too thick, so keep each coat thin and dry thoroughly between layers.
Stripes are a fun and flexible way to experiment with nail art. Once you get the hang of striping tape or a steady hand with a brush, the design possibilities are endless—classic, bold, subtle, or playful.
Takeaway: Try this striped nail art for your next manicure and mix colors, patterns, and textures. Save this guide for later and turn your nails into mini works of art!

Leave a Reply