
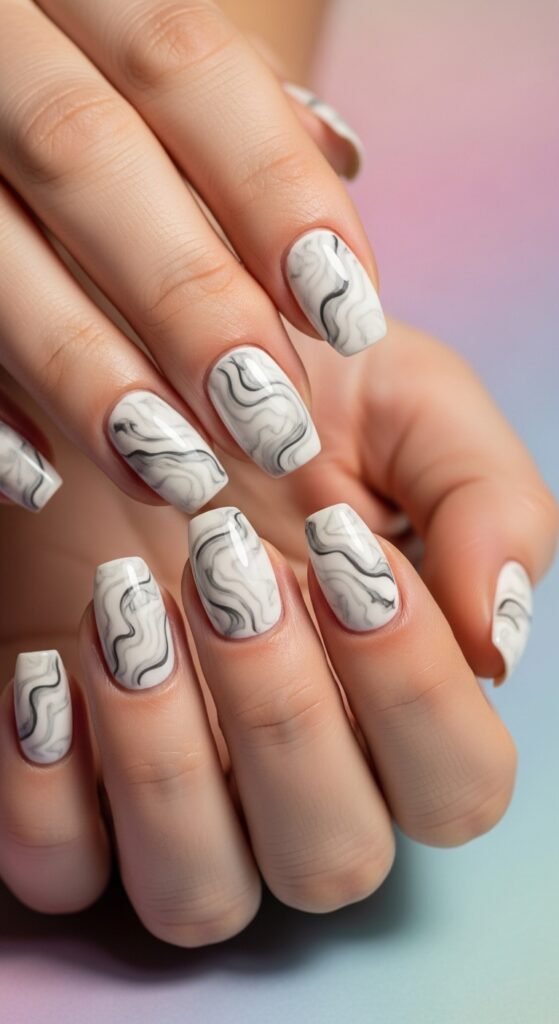
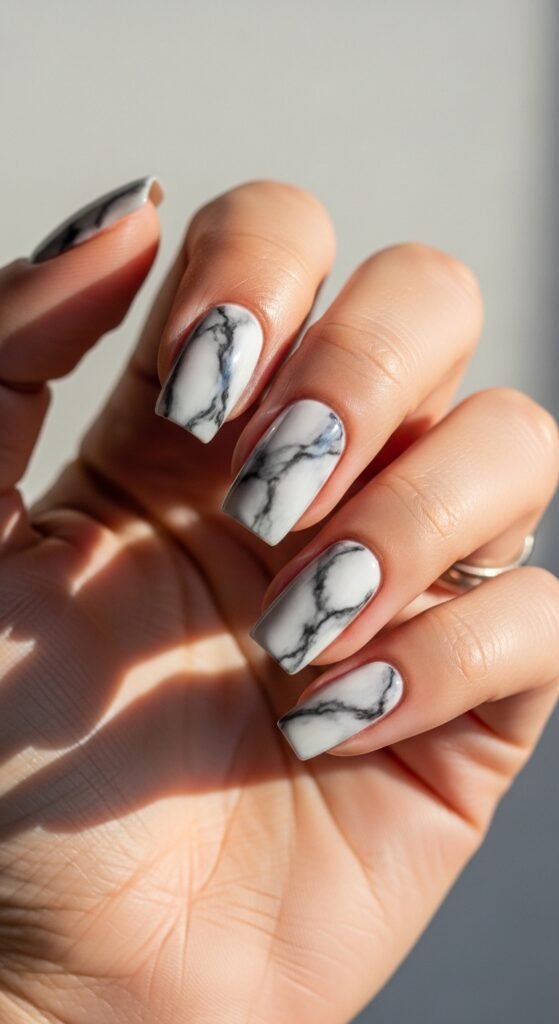
If you’ve ever stared at marble countertops or swirly latte art and thought, “I wish my nails could look like that,” you’re in for a treat. Marble nail art is chic, elegant, and surprisingly easy to do at home with just a few tools and a little patience. From subtle gray veining to bold colorful swirls, this style instantly elevates your manicure game.
In this guide, we’ll break down the steps, tools, and tricks to master marble nails without needing a salon appointment. Whether you’re prepping for a special occasion or just want to treat yourself, you’ll find this technique both fun and relaxing.
What You’ll Need for Marble Nails
Before diving in, gather your materials. Having everything ready makes the process smoother and less messy. Here’s a simple list:
- Base coat – protects your natural nails
- Two to three nail polish colors – a main shade, a complementary color, and a metallic or glitter accent if desired
- A small cup of room-temperature water – for the classic water marble technique
- Toothpicks or a thin nail art brush – to create swirls
- Tape or liquid latex – protects your skin from polish spills
- Top coat – seals in your design and adds shine
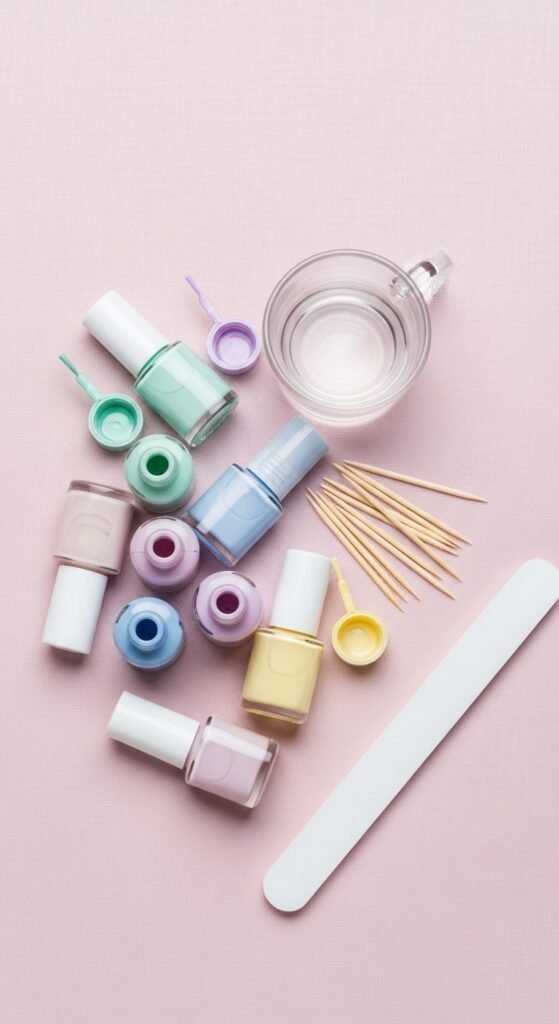
Tip: Stick to 2–3 colors at first. Too many can look busy and make it harder to control the swirl.
Step 1: Prep Your Nails
Start with a clean canvas. Remove old polish, file your nails to the desired shape, and push back cuticles. Apply a base coat to prevent staining and to help your polish adhere better.
- File in one direction to avoid splitting
- Buff gently for smooth surfaces
- Let the base coat fully dry before moving on
Step 2: Choose Your Marble Technique
There are two popular ways to create marble nails at home: water marbling and dry marbling.
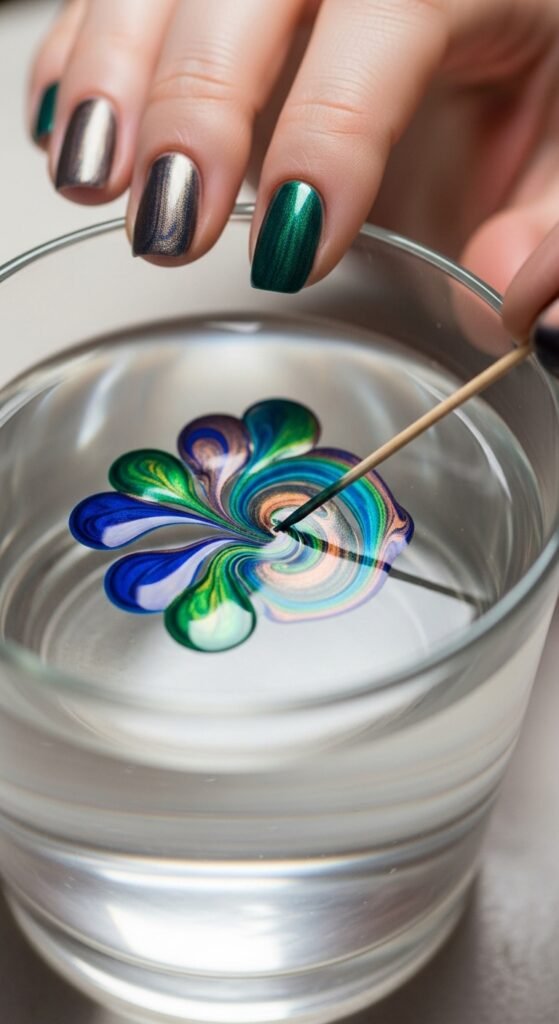
Water Marbling:
- Fill a small cup with room-temperature water.
- Drop alternating colors into the water so they spread into concentric circles.
- Use a toothpick to swirl the colors into a marbled pattern.
- Dip your nail at an angle and gently remove it from the water.
Dry Marbling:
- Apply a base color and let it dry.
- Place a few drops of other colors on the nail while the base is still slightly wet.
- Swirl the polish with a toothpick or small brush.
Tip: Practice on a plastic sheet or nail wheel first—it helps you control the swirls and avoid frustration.
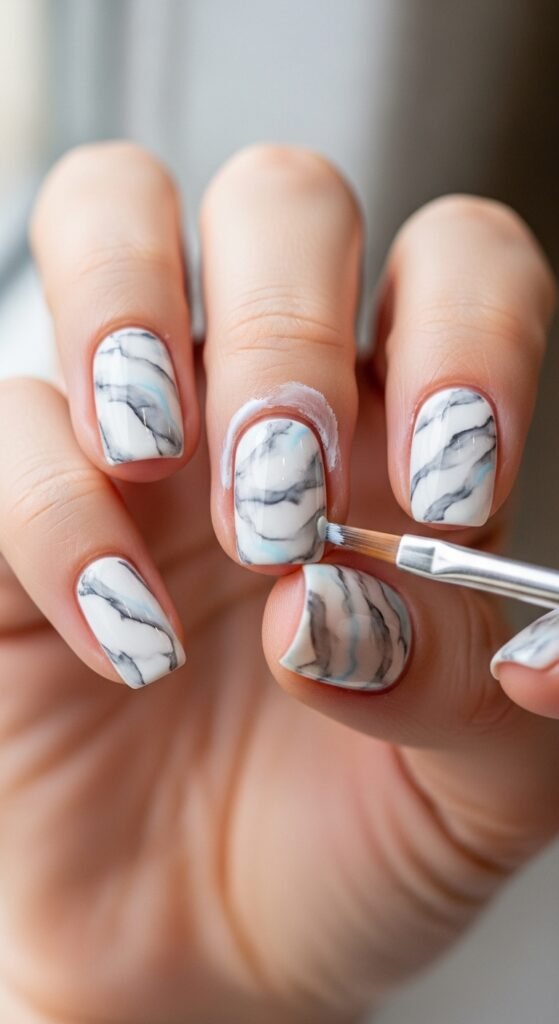
Step 3: Clean Up Your Edges
Marble nails can get a little messy around the cuticles. Using tape or liquid latex before starting will help, but you may still need to tidy up afterward.
- Dip a small brush in nail polish remover and gently trace around your nail edges
- Take your time; precision makes your manicure look professional
Step 4: Seal Your Design
Once your marble effect is dry, finish with a glossy top coat. This will:
- Smooth out any uneven texture
- Protect the design from chipping
- Give your nails that polished, professional look
Pro tip: Apply two thin layers instead of one thick coat to avoid smudging the delicate marble pattern.
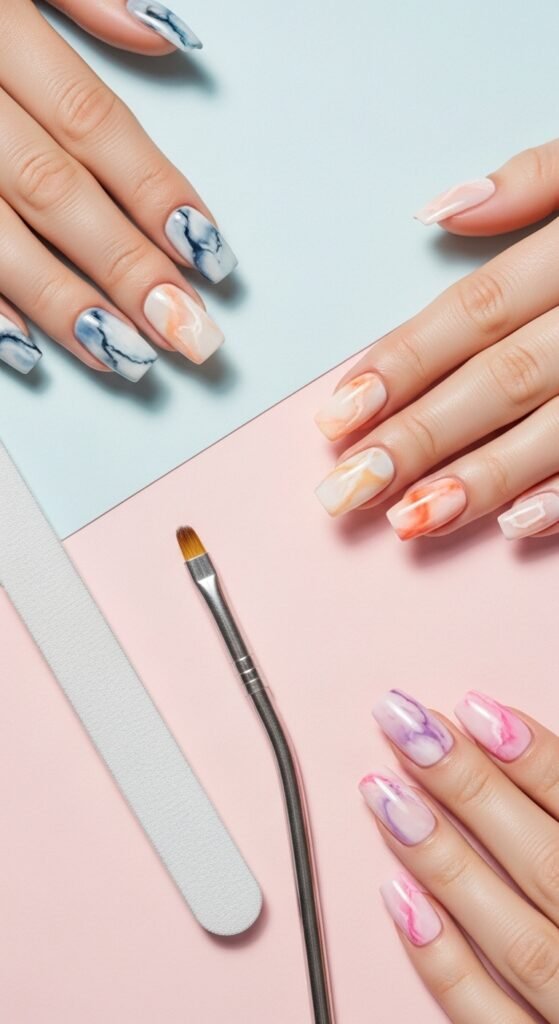
Extra Tips for Stunning Marble Nails
- Contrast is key: Lighter base with darker veins often looks more realistic
- Metallic accents: A hint of gold or silver polish in the swirl adds luxury
- Don’t rush: Let each layer dry to prevent colors from bleeding too much
- Experiment with colors: Soft pastels, neutrals, or bold jewel tones all work beautifully
Marble nail art might look complex, but with a little patience, it’s completely doable at home. Start simple, practice your swirls, and soon you’ll be creating salon-worthy designs in your own space.
Save this guide for later, gather your polish, and bring a touch of luxury to your fingertips!

Leave a Reply