
Festival season is your excuse to go bold. Glitter that catches the sun. Neon colors that glow under stage lights. Tiny gems that sparkle every time you lift your hand for a photo.
If your outfit is planned but your nails are still bare, don’t worry. Festival nail art doesn’t have to be complicated or expensive. With a few tools and a little creativity, you can create eye-catching designs right at home.
Let’s break it down step by step so you can create nails that are as fun as the festival itself.
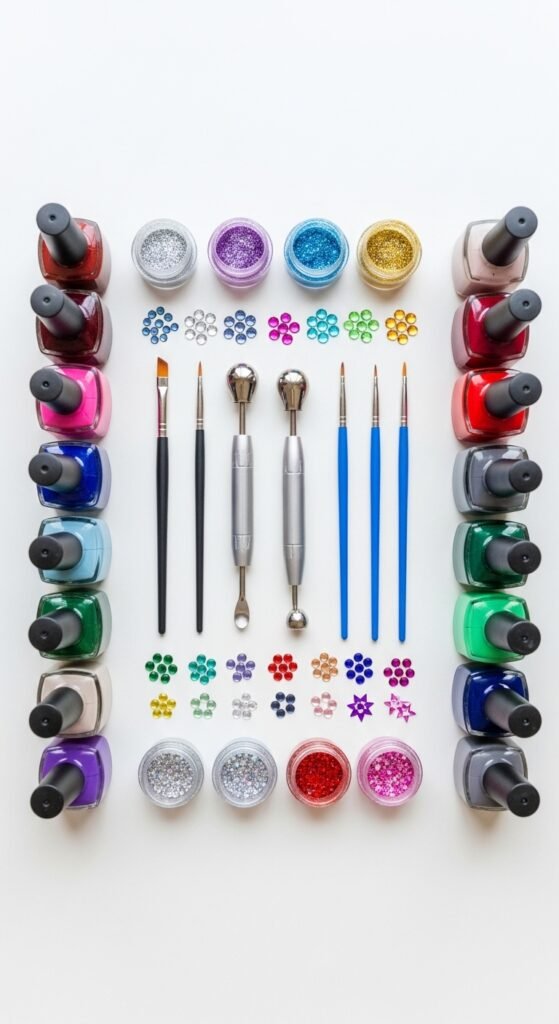
Step 1: Gather Your Nail Art Essentials
Before you start painting, set up your mini nail station. Having everything ready makes the process smoother (and less messy).
Here’s what you’ll need:
- Base coat
- Top coat
- 2–4 nail polish colors (bright or metallic shades work great)
- Glitter polish or loose nail glitter
- Nail art brushes or dotting tools
- Toothpicks (yes, they work!)
- Small rhinestones or nail gems
- Nail glue
- Cotton pads and remover for cleanup
You don’t need every single tool to create something amazing. Even two bold colors and a dotting tool can make a big impact.
Step 2: Start with a Strong Base
Festival days are long. Your nails need to survive dancing, sweating, and endless phone photos.
Follow these prep steps:
- Clean your nails and remove any old polish.
- Shape them with a file (almond and coffin shapes look especially trendy).
- Push back your cuticles gently.
- Apply a thin layer of base coat and let it dry completely.
The base coat protects your nails and helps the polish last longer. Don’t skip it. It’s boring but important.
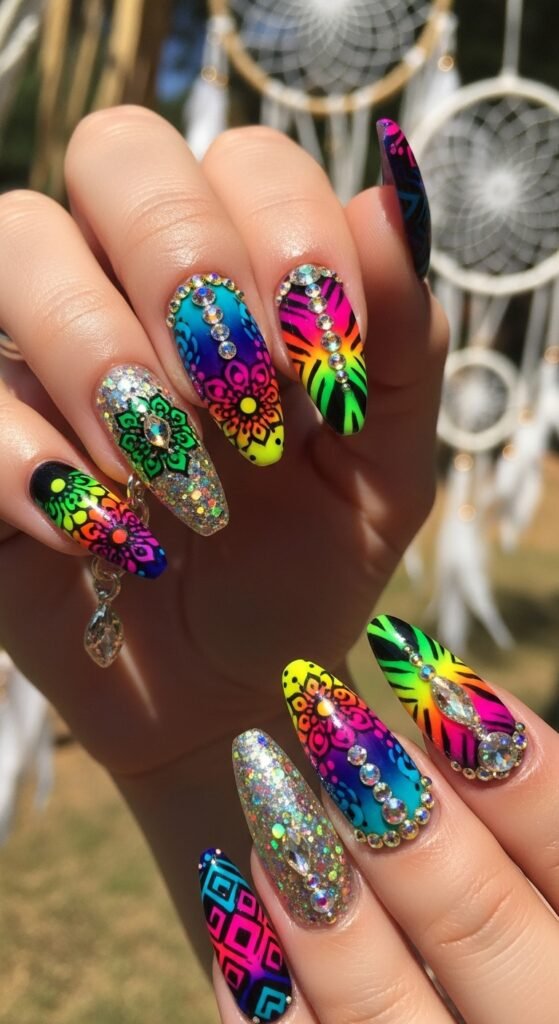
Step 3: Choose a Festival Theme
Instead of randomly mixing colors, pick a vibe. It makes your design look intentional and stylish.
Here are some popular festival nail ideas:
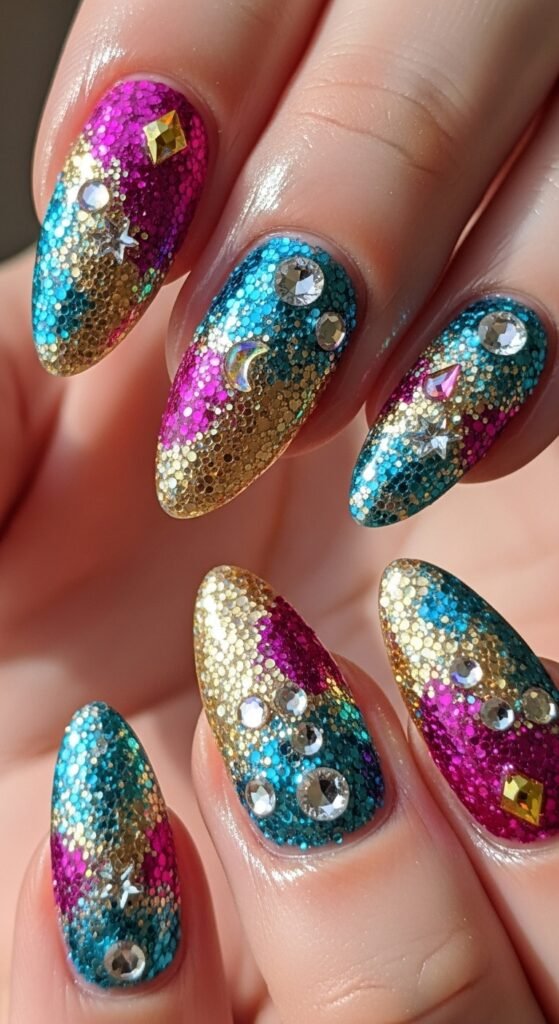
✨ Glitter Bomb Nails
Paint your nails a bright base color and layer chunky glitter on top. You can:
- Cover the entire nail
- Do glitter tips
- Create a glitter ombré effect
🌈 Neon Pop Nails
Use electric pink, lime green, or bright orange. Add simple patterns like:
- Dots
- Flames
- Wavy lines
- Color-block sections
🌼 Boho Floral Nails
Perfect for outdoor music festivals. Use a nude base and add:
- Tiny daisies
- Gold accents
- Minimal leaf patterns

Pick one main idea and build around it. Too many elements can look messy.
Step 4: Create Simple Festival Designs (Beginner-Friendly)
You don’t need to be a professional artist. These techniques are easy and look impressive.
1. Dot Design
- Apply your base color.
- Dip a dotting tool or toothpick into another shade.
- Add small dots in patterns or randomly.
Try rainbow dots over a white base for a playful look.
2. Glitter Fade
- Paint your base color and let it dry.
- Apply glitter polish starting at the tip.
- Drag it slightly downward to create a fade effect.
It looks magical in sunlight.
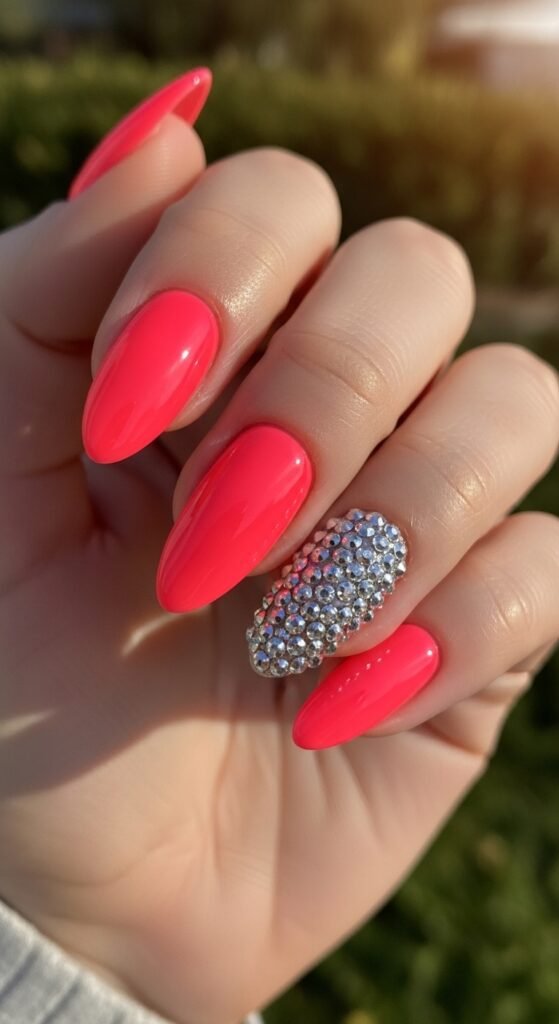
3. Accent Nail
If detailed designs feel overwhelming, decorate just one or two nails fully and keep the others simple.
For example:
- Four nails in neon pink
- One nail fully covered in rhinestones
That contrast looks stylish without too much effort.
Step 5: Add Gems and Extra Shine
Festival nails are all about sparkle. This is where you can go bold.
How to apply gems properly:
- Add a small dot of nail glue.
- Place the rhinestone using tweezers.
- Press gently and hold for a few seconds.
- Seal around (not over) the gem with top coat.
Don’t overload every nail. A few well-placed gems look more elegant and last longer.
Pro tip: Place gems near the cuticle area for a chic “half-moon” design.
Step 6: Seal Everything In
Once your design is complete and fully dry:
- Apply a generous layer of top coat.
- Seal the tips by brushing across the edge of your nail.
This step makes your design glossy and helps prevent chipping.
If you’re using chunky glitter or gems, you might need two layers of top coat.
Quick Tips to Make Your Nail Art Last All Weekend
- Avoid very thick polish layers. They peel faster.
- Let each layer dry properly before adding the next.
- Carry a small top coat bottle for quick touch-ups.
- Apply cuticle oil at night to keep your nails looking fresh.
And most importantly? Have fun with it.
Festival nail art is not about perfection. A slightly uneven line or extra sparkle just adds personality. The goal is expression, not precision.
Final Thoughts
Doing your own festival nail art can actually be part of the excitement. Put on your favorite playlist, lay out your colors, and turn it into a pre-festival ritual.
You don’t need a salon appointment to shine. Just creativity, confidence, and a little glitter.
Now grab your polish and start creating. And when you’re done? Take that close-up photo in the sunlight.
Save this guide for later and try a new design for your next festival!

Leave a Reply