
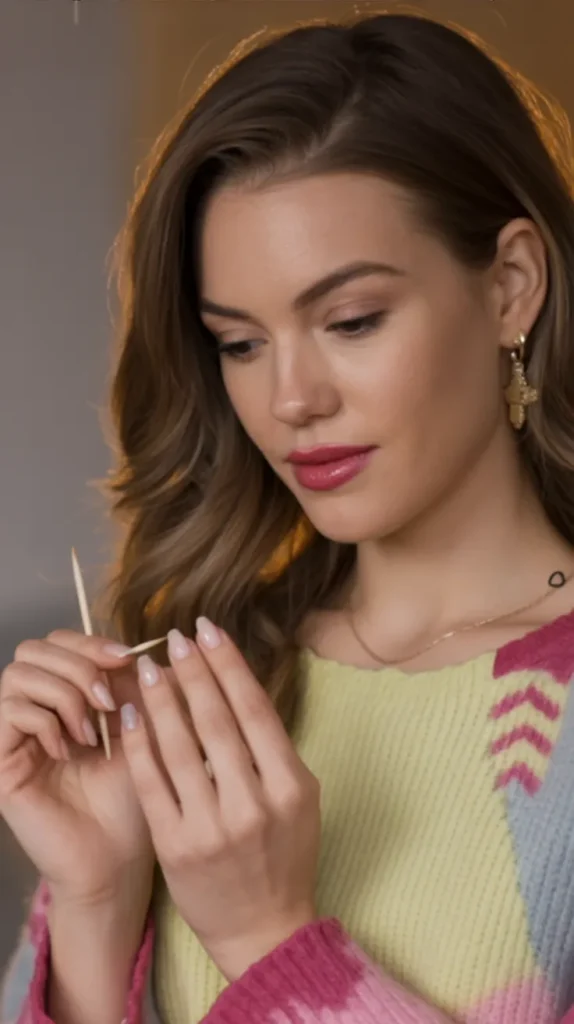
You don’t need a drawer full of fancy tools to create cute nail art. In fact, one of the easiest and most affordable tools is probably already in your kitchen. A simple toothpick can help you create dots, flowers, swirls, and even tiny hearts—no salon appointment required.
Whether you’re brand new to nail art or just want something quick and fun, this method is perfect for experimenting at home.
Why a Toothpick Works So Well for Nail Art
A toothpick might seem basic, but that’s what makes it so effective.
- The pointed tip gives you control
- It’s easy to clean between colors
- You can create both tiny details and soft lines
- No special skills or tools required
If you’ve ever felt intimidated by nail art brushes or dotting tools, this is a stress-free way to start.
What You’ll Need Before You Start
Keep things simple. You don’t need much to get started.
- Toothpicks (wooden ones work best)
- 2–4 nail polish colors
- Base coat
- Top coat
- A paper plate or foil (for polish dots)
- Cotton swabs and nail polish remover (for quick fixes)
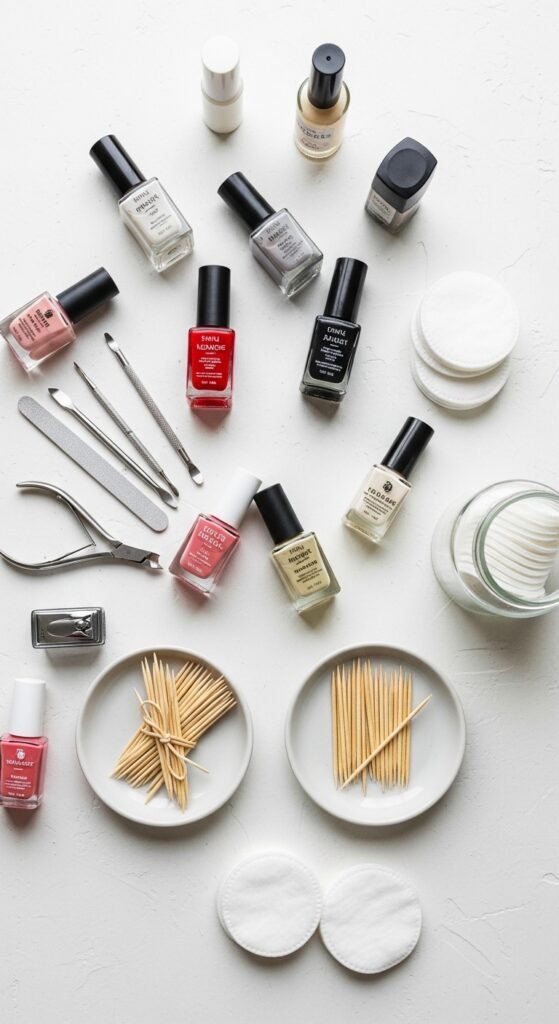
Tip: Choose colors with good contrast so your designs stand out.
Prep Your Nails for Best Results
Good prep makes a huge difference, even for simple designs.
- Remove old polish and clean your nails.
- Shape and lightly buff the nail surface.
- Apply a base coat and let it dry fully.
- Paint one or two coats of your base color.
Make sure your base color is dry before adding designs. Slightly tacky polish can cause smudging.
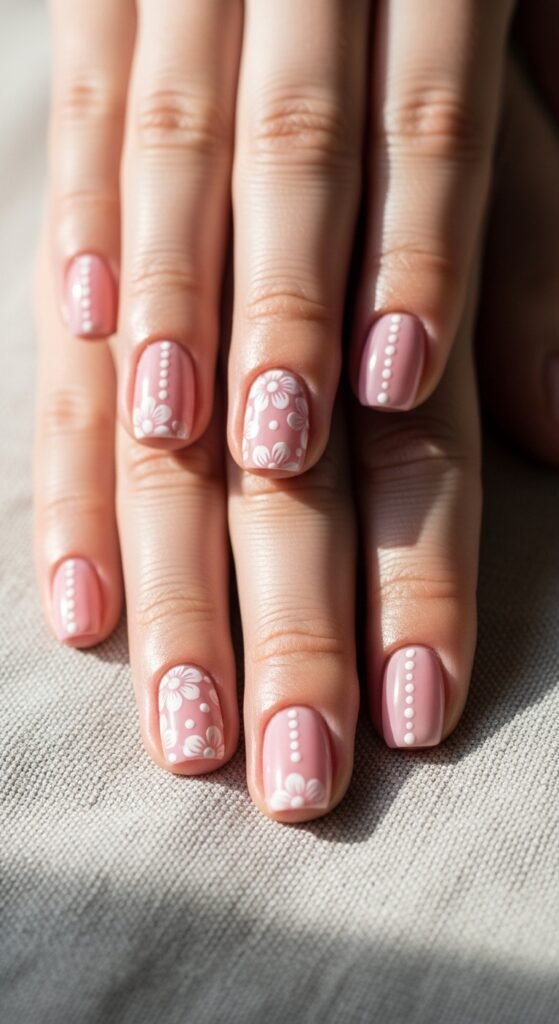
Easy Toothpick Nail Art Designs to Try
This is where the fun starts. Dip the tip of the toothpick into polish and lightly touch it to your nail.
Simple Polka Dots
Perfect for beginners.
- Dip the toothpick into polish
- Gently dot onto the nail
- Space dots evenly or cluster them
You can layer dots once the first layer dries for a more playful look.
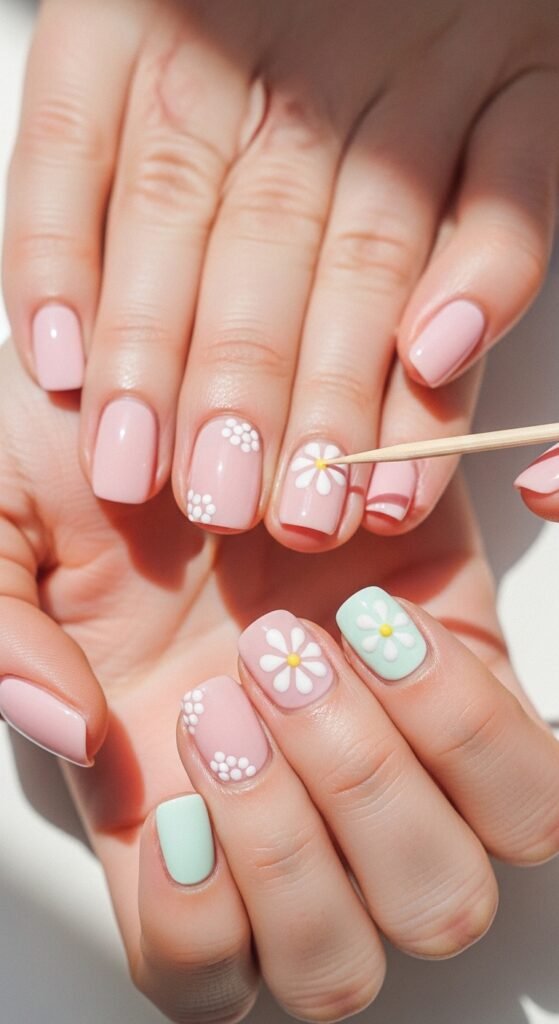
Cute Flower Design
A classic toothpick favorite.
- Add five small dots in a circle
- Use a different color dot in the center
- Keep the dots close for a clean flower shape
Hearts and Mini Shapes
Hearts are easier than they look.
- Place two dots side by side
- Drag the toothpick downward from the center
- Lightly connect the shape
Small stars, leaves, and abstract shapes also work well with gentle dragging motions.
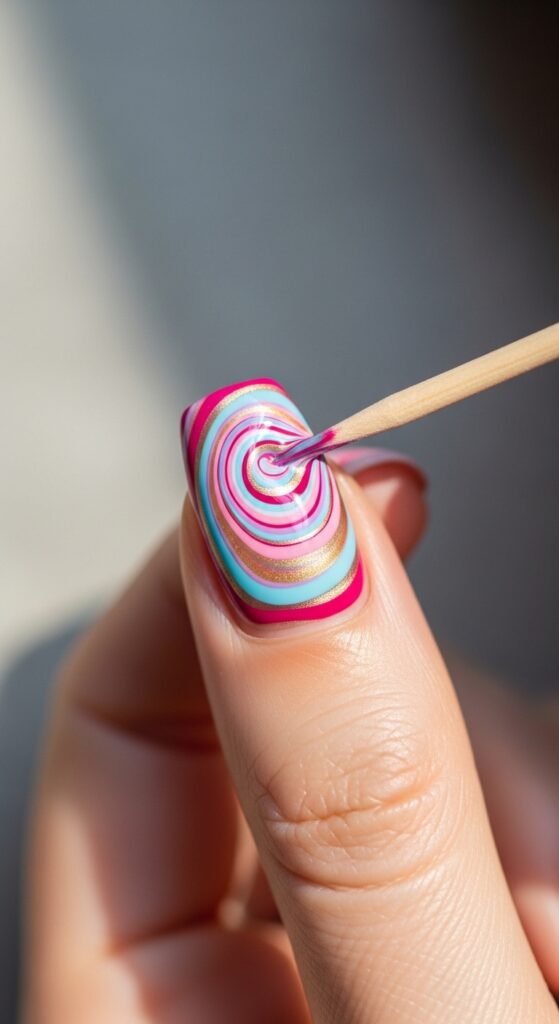
How to Create Swirls and Marble Effects
Toothpicks are great for soft, flowing designs.
- Add two or three dots of different colors close together
- Gently drag the toothpick through the colors
- Use light pressure for smooth swirls
Less is more here. Overworking the polish can muddy the colors.
Common Mistakes and How to Avoid Them
Even simple nail art can go wrong. Here’s how to keep it frustration-free.
- Too much polish on the toothpick: Wipe excess off before touching the nail
- Rushing between layers: Let designs dry before adding more
- Pressing too hard: Light touches give cleaner results
- Skipping top coat: This can cause designs to chip quickly
If you mess up, don’t panic. A cotton swab dipped in remover can clean small mistakes fast.
Seal Your Design the Right Way
Once your design is completely dry, apply a top coat.
- Use a gentle floating motion
- Avoid dragging the brush too hard
- Let nails dry fully before touching anything
A good top coat smooths out texture and makes your nail art last longer.
Final Thoughts: Nail Art Made Simple
Nail art doesn’t have to be complicated or expensive. With a toothpick and a little patience, you can create fun designs that feel personal and creative. The more you practice, the more confident you’ll get—and the ideas will start flowing naturally.
Try one design today, then build from there.
Save this nail art idea for later and pull it out whenever you want a quick, creative manicure!

Leave a Reply