
You don’t need a drawer full of nail tools—or a salon appointment—to have cute, creative nails. In fact, some of the best nail art happens with everyday items you already have at home. Toothpicks. Tissues. Old makeup sponges. Even your fingers.
If you’ve ever scrolled Pinterest and thought “I could never do that,” this guide is for you.
Below, you’ll learn easy nail art techniques you can do at home with zero tools, even if you’re a total beginner.
Start With a Clean, Simple Base
Before any design magic happens, prep matters. A smooth base makes even the simplest nail art look intentional.
Here’s what to do:
- Wash your hands and gently push back cuticles with a towel
- Shape nails using a file or even folded paper if needed
- Apply one thin coat of a neutral or clear base color
- Let it dry completely (this step is key)
You don’t need perfection. Slightly uneven edges won’t matter once designs are added.
Tip: Light shades and sheer colors hide mistakes better than dark polish.
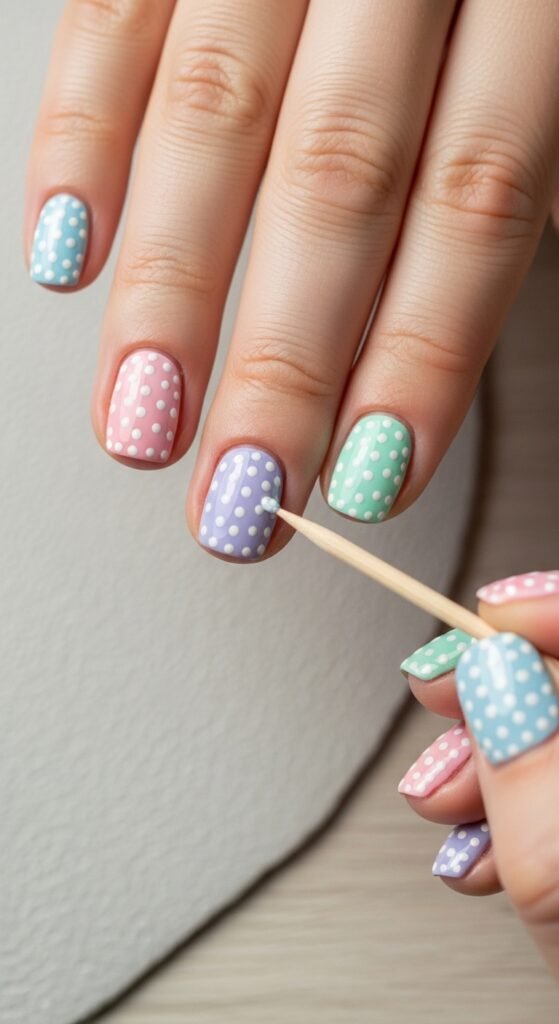
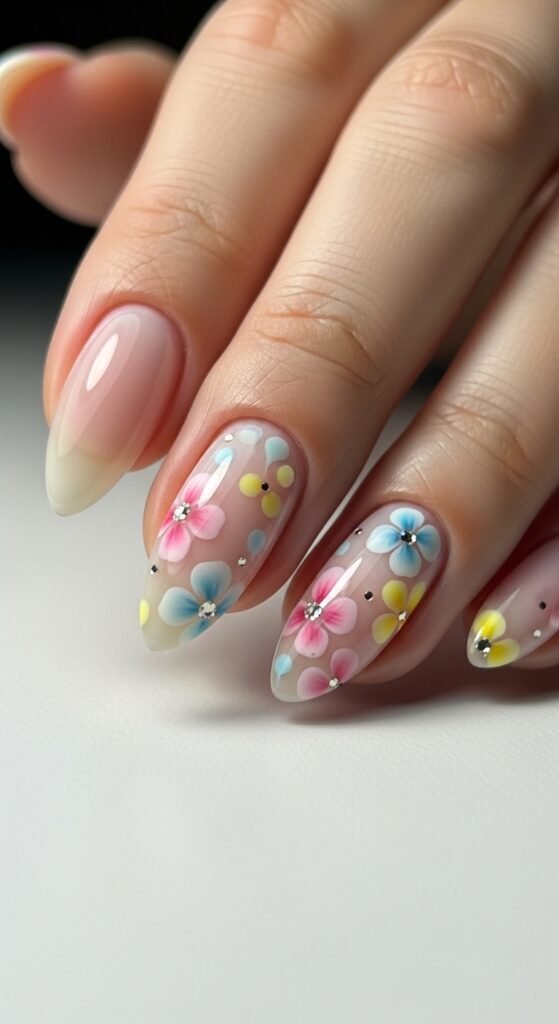
Use Toothpicks for Dots, Swirls, and Lines
Toothpicks are the ultimate no-tool nail art hack. They give you control without needing brushes.
Try these easy designs:
- Polka dots: Dip the tip in polish and gently dot onto nails
- Mini flowers: Make five dots in a circle, then swirl the center
- Swirls: Drag the toothpick lightly through wet polish
- Marble effect: Swirl two colors together before they dry
Work slowly. If a dot goes wrong, wait for it to dry and layer over it.
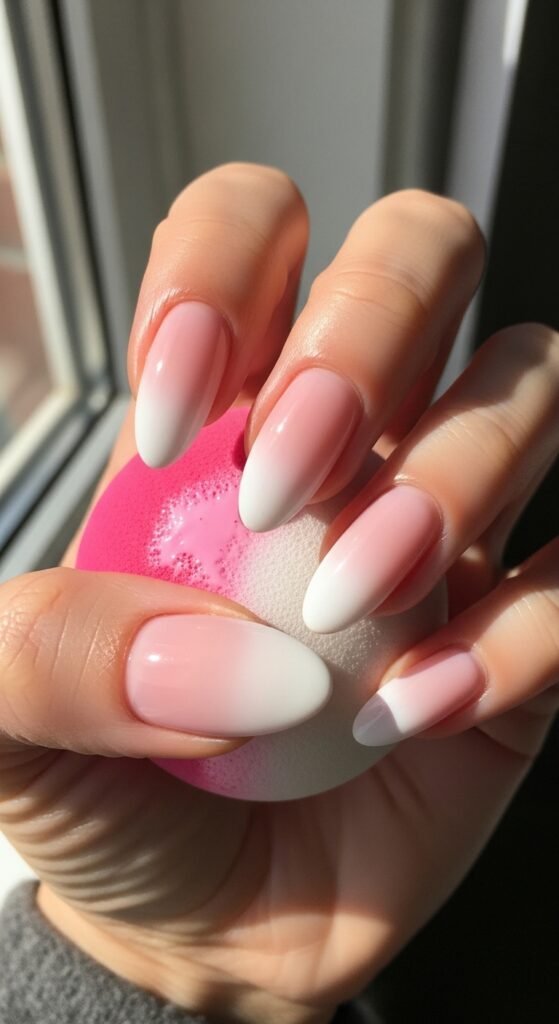
Create Texture With a Makeup Sponge or Tissue
If you want that soft, Pinterest-style look, sponging is your friend.
You can use:
- A makeup sponge
- A torn kitchen sponge
- A folded tissue for subtle texture
How it works:
- Dab a tiny amount of polish onto the sponge
- Lightly press onto the nail
- Build color slowly instead of one heavy dab
This works beautifully for:
- Ombre nails
- Cloudy or “washed” color effects
- Soft gradients with two similar shades
Let each layer dry slightly before adding more color.
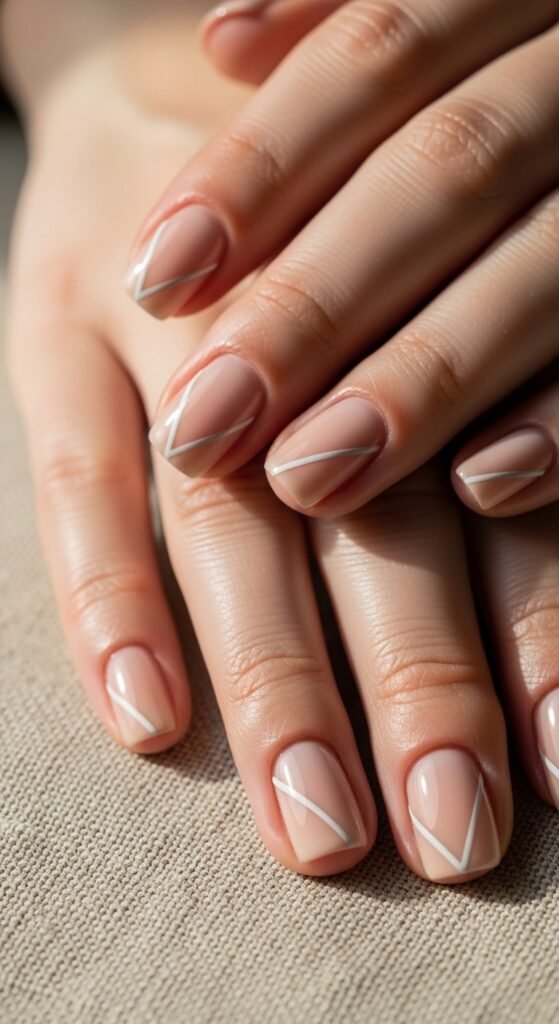
Use Tape or Stickers for Clean Shapes
No nail tape? No problem.
You can use:
- Clear tape
- Masking tape
- Small stickers or paper dots
Cut or tear small shapes and press them onto dry base polish. Paint over, let it dry slightly, then peel off.
Easy ideas:
- Half-moon designs
- Diagonal color blocks
- Minimal stripes
- Accent nail shapes
Make sure the base layer is fully dry before sticking anything on—or it will peel.
Try Finger-Smudge Nail Art
This one feels messy but looks surprisingly cool.
While polish is still wet:
- Lightly tap with your fingertip
- Gently smudge edges for an abstract look
- Blend two colors where they meet
This technique works best for:
- Abstract nail art
- Soft, artsy designs
- Casual everyday looks
No two nails will look the same—and that’s the point.
Fix Mistakes Without Special Tools
Mistakes happen. The good news? You don’t need correction pens.
Try this instead:
- Wrap tissue or cotton around a toothpick
- Dip it lightly in remover
- Gently clean edges or dots
For tiny mistakes, you can also:
- Cover with a dot or line
- Add glitter polish as a disguise
- Turn it into part of the design
Most “mistakes” just look like creative choices once everything dries.
Seal Everything With a Top Coat
A top coat pulls the entire look together. It smooths texture, blends layers, and makes designs last longer.
Tips for best results:
- Use a light floating motion
- Don’t press too hard or you’ll smear designs
- Add a second coat the next day if needed
Glossy top coats make designs pop, while matte ones give a soft, modern finish.
Simple Nail Art Ideas to Try First
If you’re not sure where to start, try one of these beginner-friendly looks:
- Single accent nail with dots
- Neutral base + one thin stripe
- Two-color swirl on short nails
- Soft sponge gradient
- Tiny dots along the cuticle line
Start small. Confidence builds fast once you see results.
Final Thoughts: Keep It Fun, Not Perfect
Nail art at home isn’t about perfection—it’s about creativity. Some of the most saved Pinterest nails are simple, slightly imperfect, and clearly handmade.
You don’t need tools.
You don’t need experience.
You just need a little patience and curiosity.
Save this guide for your next at-home nail day—and try one design tonight.

Leave a Reply