
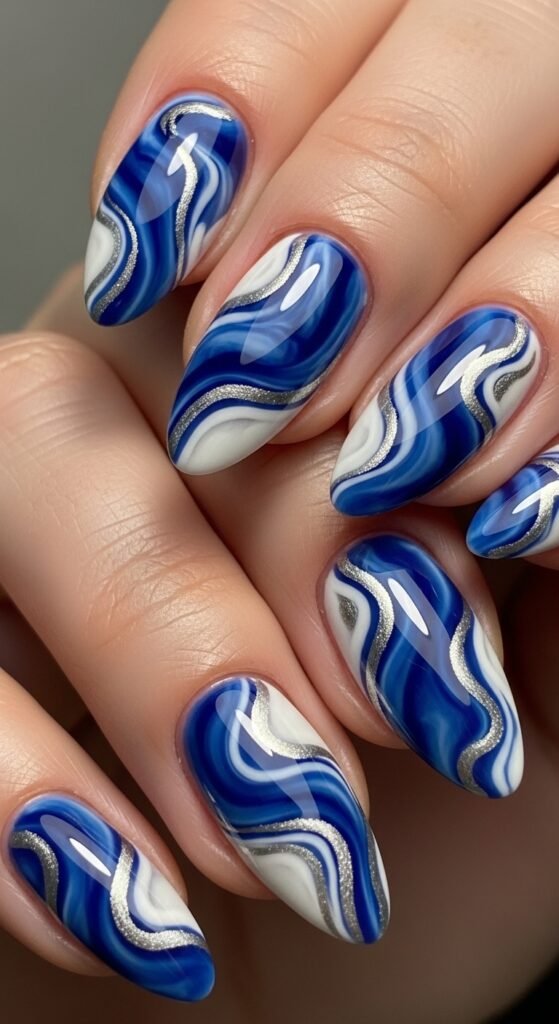
Nail art has come a long way from simple polish to intricate designs that look like mini masterpieces. One of the coolest trends you can try at home is water nail art—a technique that creates marbled, watercolor, or abstract designs using, you guessed it, water! It’s mesmerizing, fun, and makes your nails look professionally done without stepping foot in a salon.
If you love playful, eye-catching nails, water nail art is perfect. Even beginners can master it with a few tips and a little patience. Let’s dive in!
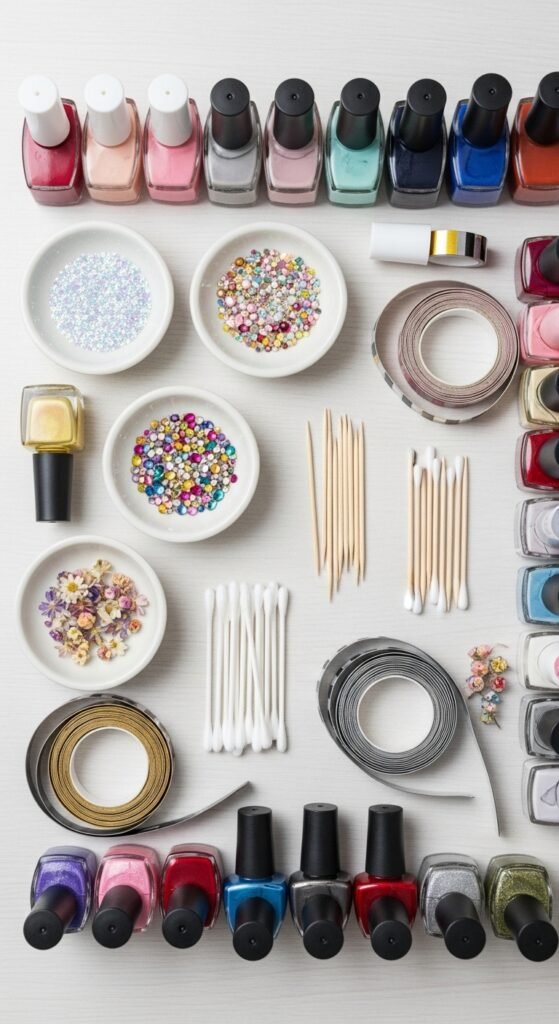
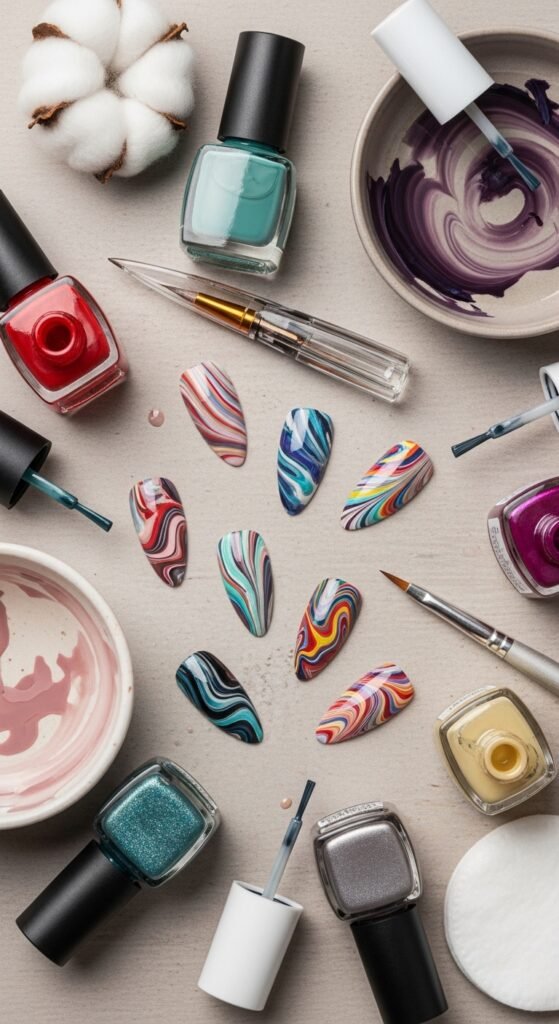
What You’ll Need for Water Nail Art
Before you start, gather your materials. Having everything ready will make the process smooth and stress-free.
Essentials:
- A small bowl of room-temperature water
- Nail polish in 2–5 colors (try contrasting shades for a bold effect)
- Base coat and top coat
- Tape or liquid latex (to protect your fingers)
- Toothpick or a small stick
- Cotton swabs and nail polish remover for cleanup
Optional:
- Glitter or metallic polish for extra sparkle
- Nail stickers to enhance the design
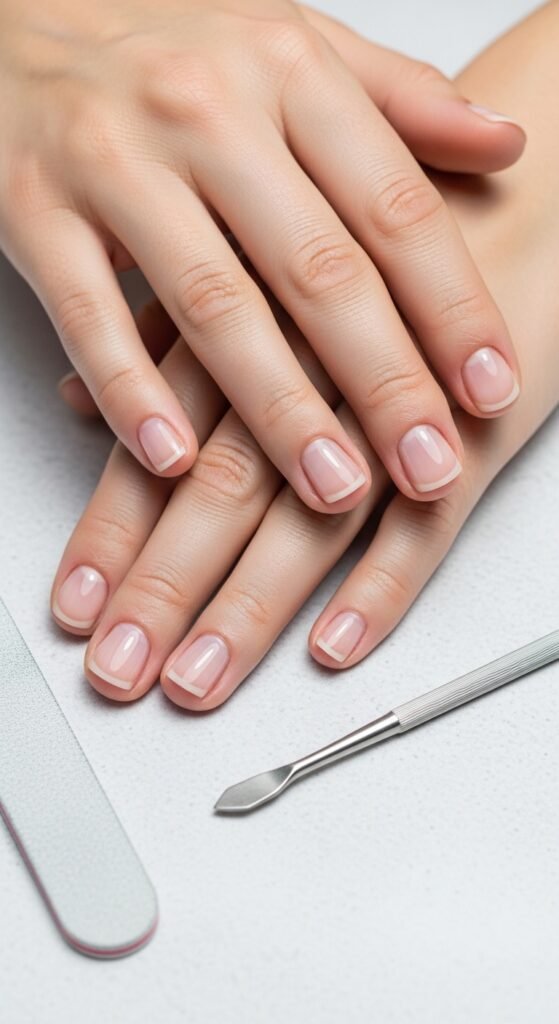
Step 1: Prep Your Nails
Like any nail art, prep is key! Clean, shaped nails give you the smoothest canvas.
- Remove old polish and wash your hands thoroughly
- Shape nails with a file and gently push back cuticles
- Apply a base coat to protect nails and help polish adhere
Tip: Choose a light-colored base coat if you’re planning on using bright or dark colors in your water design.
Step 2: Protect Your Skin
Water nail art can get messy. Protect the skin around your nails to make cleanup easier.
- Apply tape or liquid latex around each nail
- Make sure the layer is thin but fully covers the skin near the nail edges
This step ensures that the colors stay on your nails instead of your fingers.
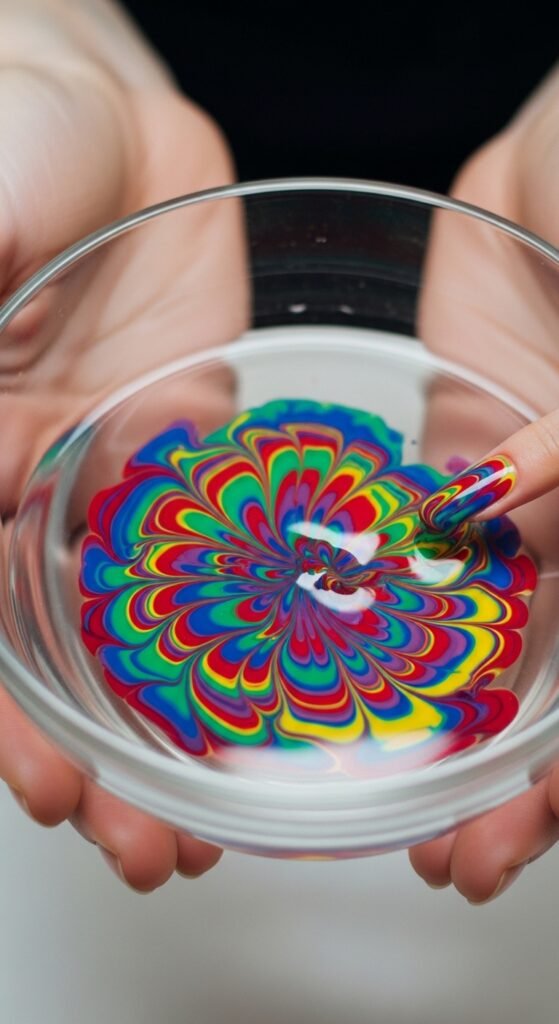
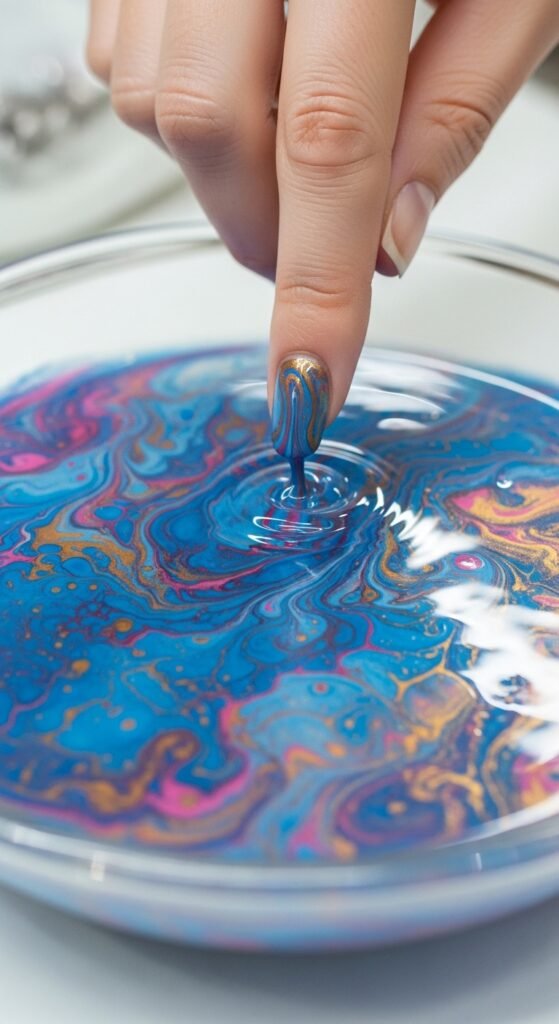
Step 3: Create Your Water Design
Now comes the fun part: the water marble!
- Fill a small bowl with room-temperature water.
- Choose your first polish color and drip a small amount onto the water’s surface. It should spread into a thin layer.
- Add your second, third, or fourth colors in the same way, layering them carefully.
- Use a toothpick to gently swirl the colors into patterns—think spirals, waves, or random abstract shapes.
- Dip your nail slowly into the design at an angle, keeping the pattern intact.
- Use the toothpick to clean up the floating polish around the nail before lifting your finger out.
Tip: Practice with a few colors first—too many layers can make the polish sink or mix into a muddy color.
Step 4: Clean Up and Seal
Even with tape, some polish may sneak onto your skin.
- Use a cotton swab dipped in nail polish remover to clean edges
- Gently peel off the protective tape or latex
- Let nails dry for a few minutes, then apply a top coat to seal the design and add shine
Pro tip: Apply two thin layers of top coat rather than one thick layer—it prevents smudging and keeps the design vibrant.
Step 5: Extra Tips for Stunning Water Nail Art
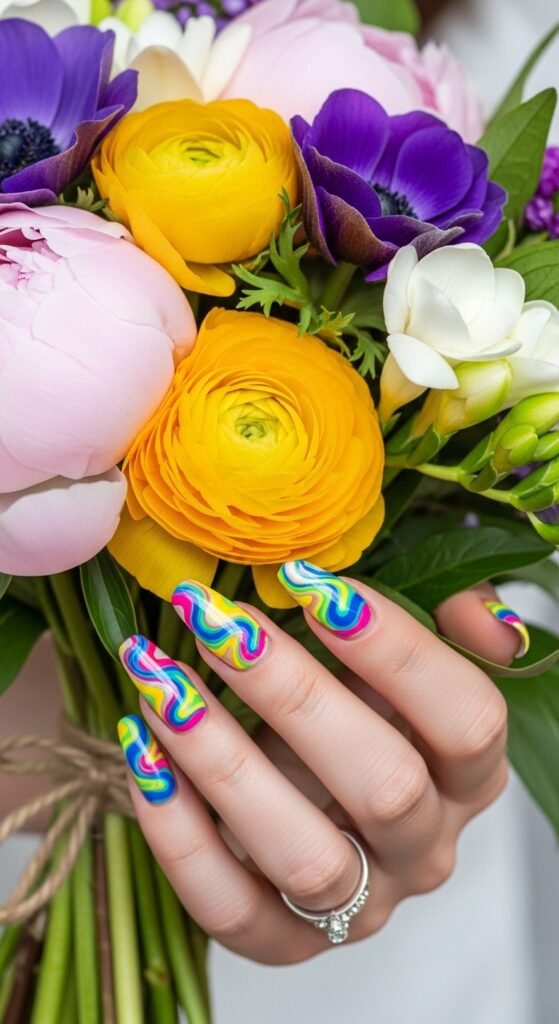
- Experiment with colors: Try pastel shades for soft watercolor nails or bold neons for a statement look.
- Control the polish flow: Room-temperature water works best. Cold water can make polish clump.
- Work quickly: Nail polish dries fast. Plan your design before starting.
- Practice makes perfect: Don’t worry if your first attempt isn’t perfect. Every try helps you master the technique.
Water nail art is a playful way to transform your nails into tiny pieces of art. It’s perfect for special occasions, weekend DIY fun, or just because you love having unique nails. The more you experiment, the more creative your designs will become.
Takeaway: Keep practicing, mix and match colors, and don’t be afraid to try bold swirls. Your nails can become a canvas for endless creativity!

Leave a Reply