
There’s something oddly satisfying about nail art with perfectly crisp lines. No smudges. No wobbly edges. Just clean, sharp designs that look like they were done in a salon.
If you’ve ever tried to paint straight stripes or geometric shapes and ended up with a blurry mess… you’re not alone. The good news? Clean-line nail art isn’t about having a steady hand like a surgeon. It’s about using the right tools, simple techniques, and a little patience.
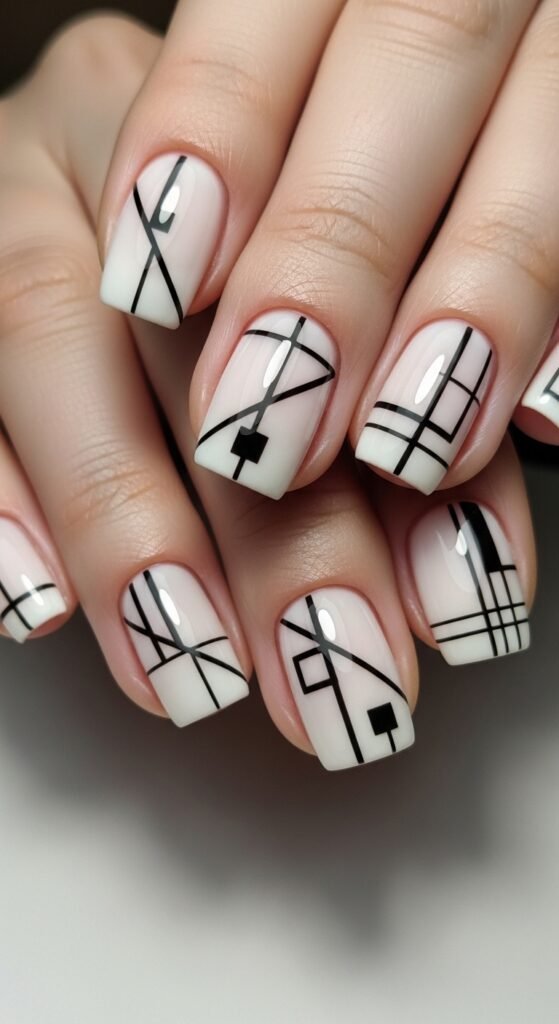
Let’s break it down step by step so you can get those Pinterest-worthy nails at home.
Start With a Smooth, Clean Base
Before you even think about lines, you need a flawless base. Clean lines only look good when the foundation is smooth.
Prep your nails properly:
- Remove old polish completely
- Shape your nails evenly
- Gently push back cuticles
- Lightly buff the nail surface
- Wipe nails with rubbing alcohol to remove oils
Apply:
- A thin base coat
- Your chosen base color (2 thin coats)
- Let it dry completely

This part is important. If the base isn’t fully dry, your lines will drag and smear. Give it at least 10–15 minutes, or longer if needed.
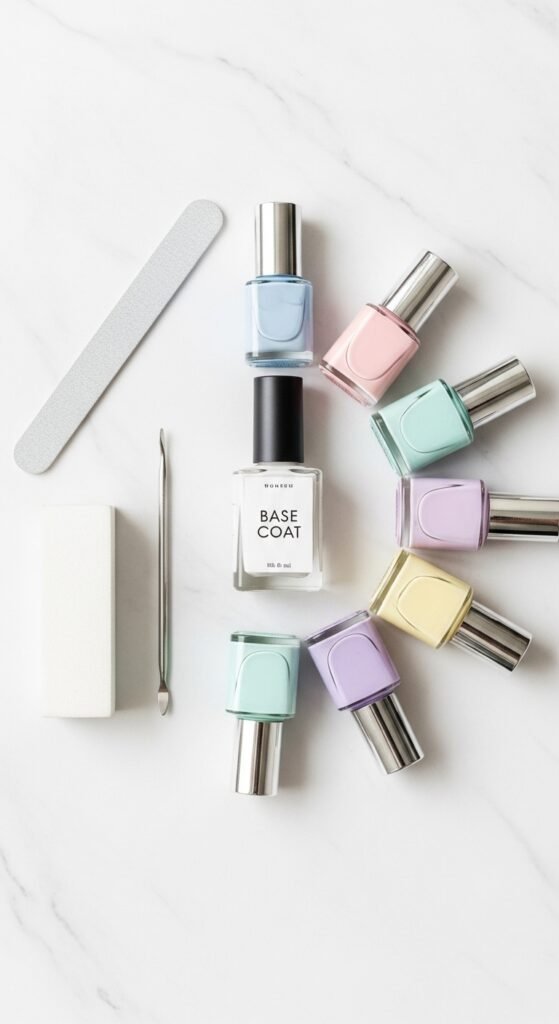
Use the Right Tools for Sharp Lines
Trying to create clean lines with a regular polish brush is frustrating. Instead, use tools made for detail work.
Best tools for clean nail art:
- Striping brush (thin, long bristles)
- Detail liner brush
- Nail art tape
- Toothpick (in a pinch)
- Fine-tip nail art pen
If you’re just starting, nail tape is your best friend. It does the steady-hand work for you.
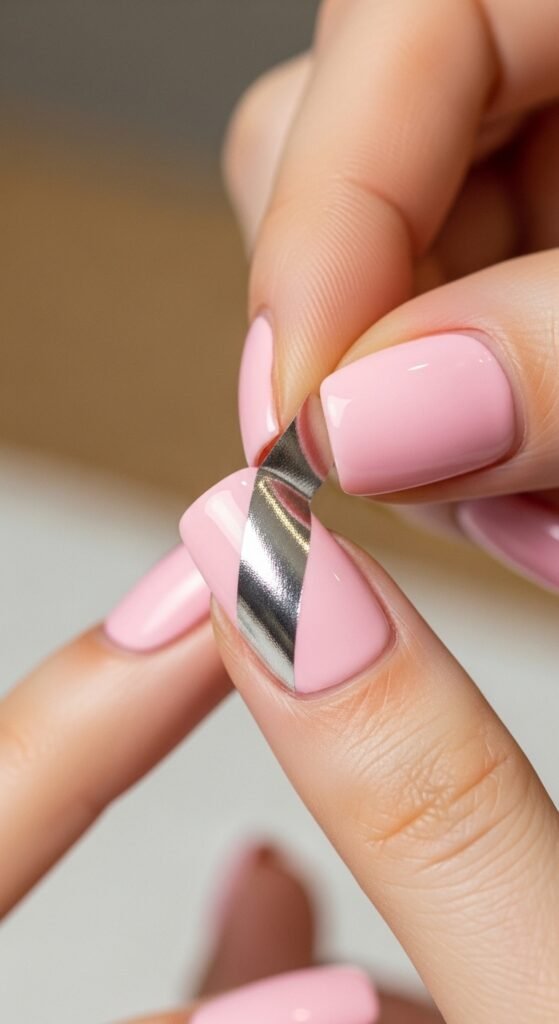
Method 1: Clean Lines Using Nail Tape
This is the easiest technique for beginners.
Step-by-step:
- Make sure your base color is completely dry.
- Apply thin strips of nail tape in your desired pattern (straight lines, angles, grids).
- Press the edges down firmly.
- Paint over the tape with your second color.
- Remove the tape immediately while the polish is still wet.
Peeling the tape off while wet prevents cracking and lifting.
Keep your polish layers thin. Thick coats bleed under tape and ruin the crisp edge.
Method 2: Freehand Lines (Without the Stress)
If you’re ready to level up, freehand lines look amazing — especially minimal designs.
Tips for steady freehand lines:
- Rest your painting hand on a table for stability.
- Use your pinky finger as a support anchor.
- Load only a small amount of polish onto the brush.
- Pull the brush slowly in one direction.
Instead of trying to draw the line in one perfect stroke, lightly guide the brush and adjust as you go.
Start with simple designs:
- Thin vertical lines
- French tip outlines
- Minimal side stripes
- Simple negative space designs
If you mess up? Wait for it to dry, clean the edge with a small brush dipped in remover, and try again.
Work in Thin Layers (This Changes Everything)
Here’s a secret: thin layers are what make nail art look professional.
Thick polish:
- Smudges easily
- Takes forever to dry
- Creates uneven edges
Thin polish:
- Dries faster
- Looks cleaner
- Layers beautifully
If your polish feels thick, let a little air into the bottle before use. Don’t overload your brush.
Patience beats rushing every single time.
Seal It With a Top Coat (Without Smearing)
You did the hard work. Now don’t ruin it at the last second.
When applying top coat:
- Use a generous bead of polish on the brush.
- Float it lightly over the nail.
- Avoid pressing down too hard.
Dragging the brush firmly across the design can smear your lines.
A good glossy top coat instantly sharpens the look and blends everything together.
Common Mistakes That Ruin Clean Lines
Even small mistakes can make lines look messy. Watch out for these:
- Painting over a tacky base
- Using too much polish
- Not pressing tape down firmly
- Waiting too long to remove tape
- Skipping top coat
If your lines look shaky, it’s usually because you’re trying to move too fast.
Slow down. Breathe. Let layers dry.
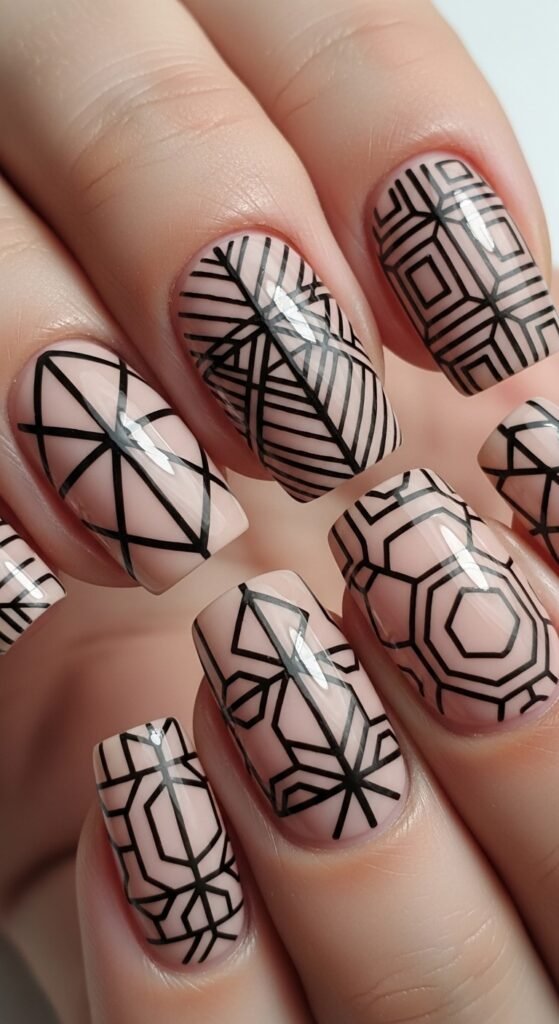
Simple Clean-Line Design Ideas to Try
If you’re not sure what to create, start simple.
Minimalist ideas:
- Nude base + thin black vertical stripe
- White base + diagonal pastel tip
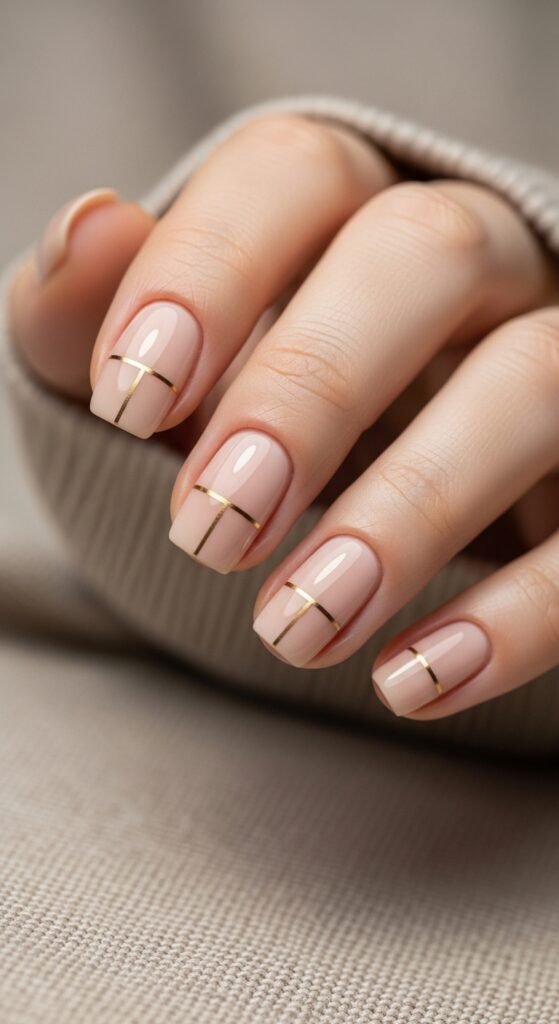
- Clear base + thin gold strip across the center
- Matte base + glossy line accent
Clean-line nail art doesn’t have to be complicated to look stunning. Sometimes one single stripe looks more elegant than a busy pattern.
Practice Makes Precision
The truth? Your first attempt might not look perfect. That’s normal.
Clean lines are about:
- The right tools
- Thin polish layers
- Letting polish dry fully
- Taking your time
The more you practice, the steadier your hand becomes. And once you get the hang of it, you’ll start experimenting with grids, abstract shapes, and bold color contrasts.
Nail art should feel fun, not stressful.
So grab your striping brush, pick your favorite colors, and give it a try tonight.
And if this guide helped you? Save it for later and pin it for your next manicure session

Leave a Reply