
Nail art has come a long way from simple polish. If you’ve ever scrolled through Pinterest and wondered how those dreamy metallic or holographic designs are created, the secret might just be nail foil. Lightweight, versatile, and surprisingly easy to use, foil can transform your nails from simple to show-stopping in minutes. Whether you’re a beginner or a nail pro, this guide will walk you through everything you need to know to master foil nail art at home.

What You’ll Need for Foil Nail Art
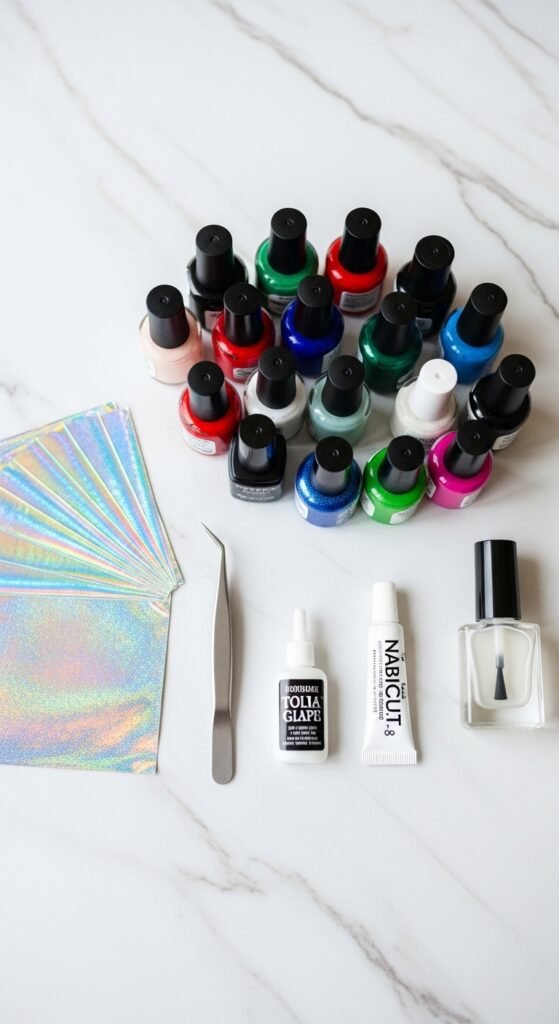
Before jumping in, make sure you have all the essentials. Having the right tools makes a huge difference in getting that perfect foil finish.
Essentials:
- Base coat
- Nail polish (any color you like as a base)
- Nail foil sheets (gold, silver, holographic, or patterned)
- Foil glue or special nail adhesive
- Tweezers or a silicone tool
- Top coat for sealing
Optional but helpful:
- Small scissors for trimming foil
- Cotton swabs and nail polish remover for clean-up
Step 1: Prep Your Nails
Like any nail art, prep is key. Clean, dry nails help the foil stick better and last longer.
- Remove old polish and trim your nails to your preferred shape.
- Gently push back cuticles and buff the surface lightly.
- Apply a thin base coat to protect your nails and allow it to fully dry.
Pro tip: If your nails are freshly trimmed, lightly filing the edges helps prevent foil from catching and tearing later.

Step 2: Apply Base Color
The base color sets the stage for your foil. Choose a color that complements or contrasts with the foil for the best effect.
- Apply 1–2 coats of your chosen polish.
- Let each layer dry completely before moving on.
- Dark colors tend to make metallic foils pop, while pastels give a subtle shimmer effect.
Step 3: Apply Foil Adhesive
Foil won’t stick to polish alone—you need foil glue or adhesive.
- Using a small brush or the applicator, apply a thin layer of glue over the areas you want foiled.
- Wait until the glue becomes tacky. The timing is crucial: too wet, and the foil won’t stick; too dry, and it won’t transfer properly.
Pro tip: You can create unique patterns by applying glue in stripes, dots, or random patches.
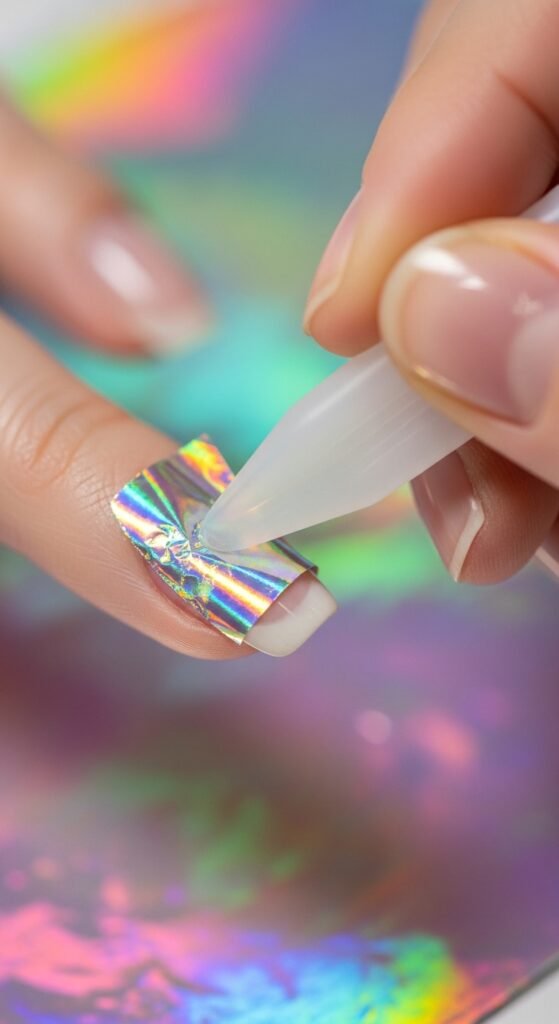
Step 4: Transfer the Foil
Now comes the fun part!
- Cut a piece of foil slightly larger than your nail.
- Press the shiny side down onto the tacky adhesive.
- Smooth gently with a silicone tool, finger, or tweezers to ensure the foil adheres.
- Peel off the foil carefully. The metallic layer should transfer beautifully to your nail.
Tips for beginners:
- Work one nail at a time for better results.
- If small patches don’t transfer perfectly, repeat the process or use tiny foil fragments for a collage effect.
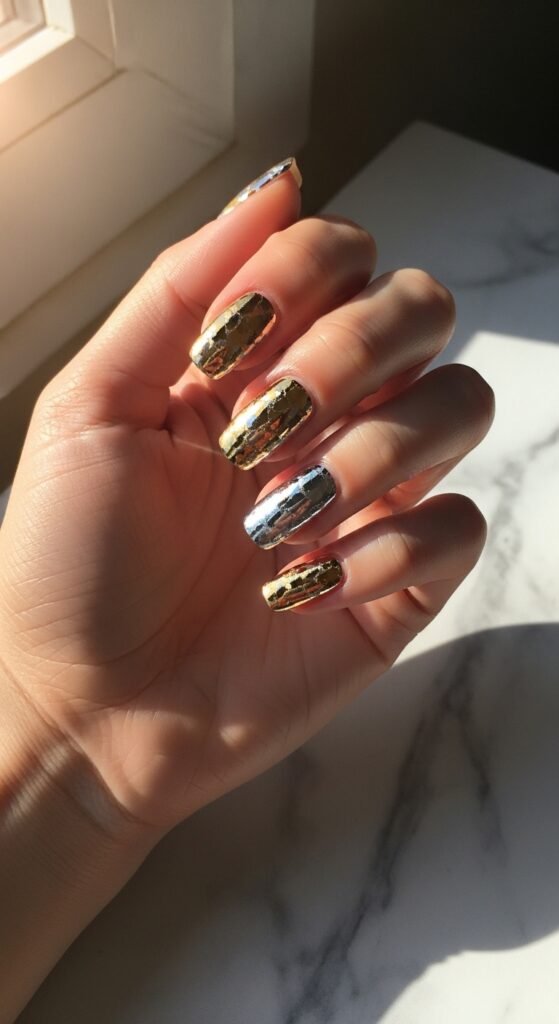
Step 5: Seal With Top Coat
Foil designs need protection to last longer.
- Apply 1–2 layers of top coat over the foil.
- Make sure to cover edges to prevent lifting or peeling.
- Let it dry completely before using your hands normally.
Pro tip: Matte top coats give a soft, trendy look, while glossy top coats amplify shine and metallic effects.
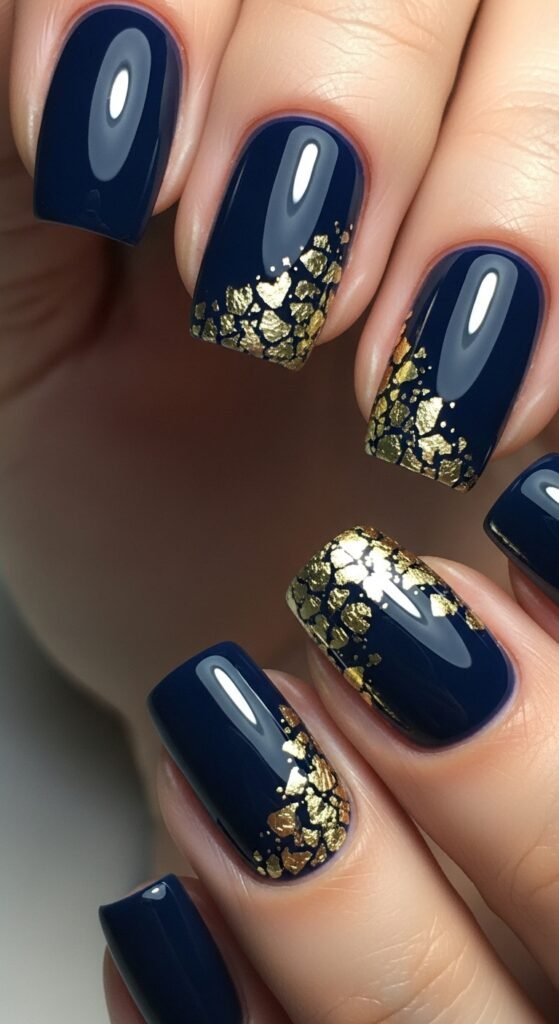
Creative Tips for Foil Nail Art
- Mix colors: Combine multiple foil colors for an abstract, gradient effect.
- Negative space: Leave parts of your nail bare for a modern, minimalist style.
- Layering: Add glitter or nail stickers over foil for extra dimension.
- Accent nails: Foil one or two nails while keeping others simple to create a balanced look.

Troubleshooting Common Issues
- Foil won’t stick: Ensure your adhesive is tacky, not wet or dry.
- Foil tears: Press gently and peel slowly. Small pieces can be patched.
- Foil lifting: Seal with multiple top coat layers and avoid heavy water exposure immediately after application.
Final Thoughts
Foil nail art is a quick way to make your nails look salon-perfect without spending hours or money. With a little practice, you can create dazzling designs that stand out, whether for everyday wear or special occasions. Experiment with colors, textures, and patterns to make your nail art uniquely yours.
Save this guide for later and start experimenting—you’ll be amazed at what a few shiny sheets of foil can do!

Leave a Reply