
Want to have gorgeous, eye-catching nails without needing a million bottles of polish? Nail art doesn’t have to be complicated—or expensive. With just a few colors, you can create chic, playful, and professional-looking designs that will make your hands pop. Whether you’re a beginner or just looking to simplify your nail routine, this guide will show you how to get creative with minimal tools and colors.
Start With the Basics: Choosing Your Colors
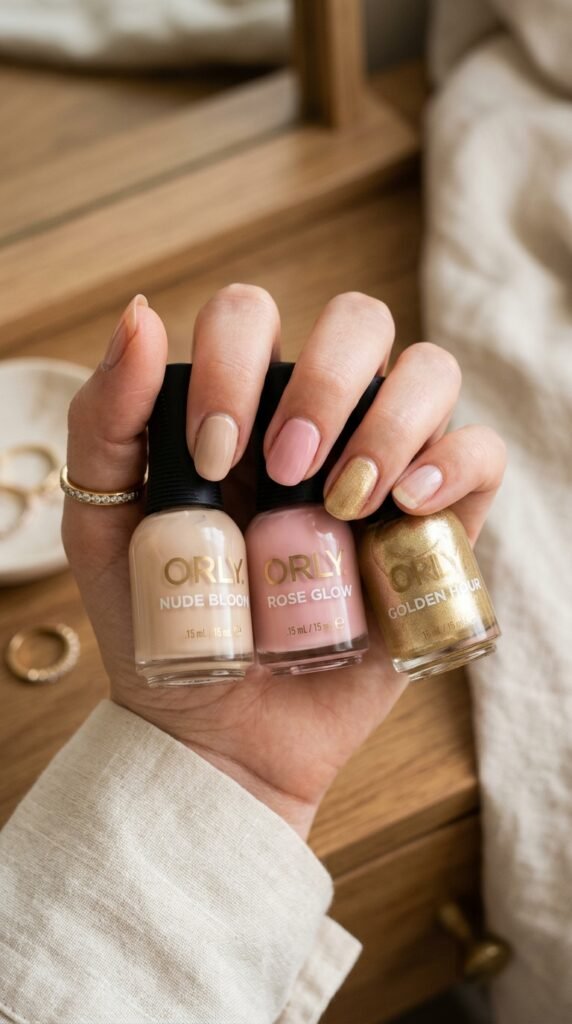
When you’re working with just a few colors, it’s important to choose them wisely. The right palette will allow you to mix and match to create multiple looks.
- Pick a neutral base: Nude, white, or pale pink makes a perfect canvas for any design.
- Select one bold color: Red, black, or blue can create contrast and make your patterns stand out.
- Add a metallic or shimmer: Gold, silver, or glitter adds a touch of glam without needing extra shades.
Tip: Stick to 3–4 colors maximum. Too many colors can make designs look busy and overwhelming.
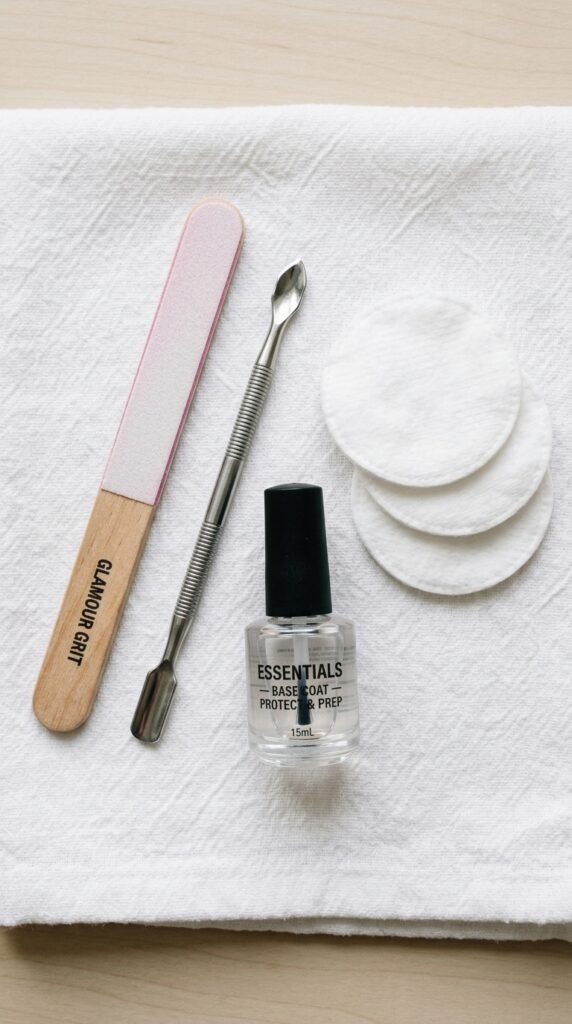
Nail Prep: The Secret to Long-Lasting Art
Before you start painting, prep is key. Smooth, clean nails make any design look more polished.
- Remove old polish with a gentle, acetone-free remover.
- Trim and shape nails using a file—oval and square shapes are easiest to decorate.
- Push back cuticles gently to create a neat canvas.
- Apply a base coat to protect nails and prevent staining.
Tip: Let the base coat dry completely before starting any designs—it ensures clean lines and prevents smudging.
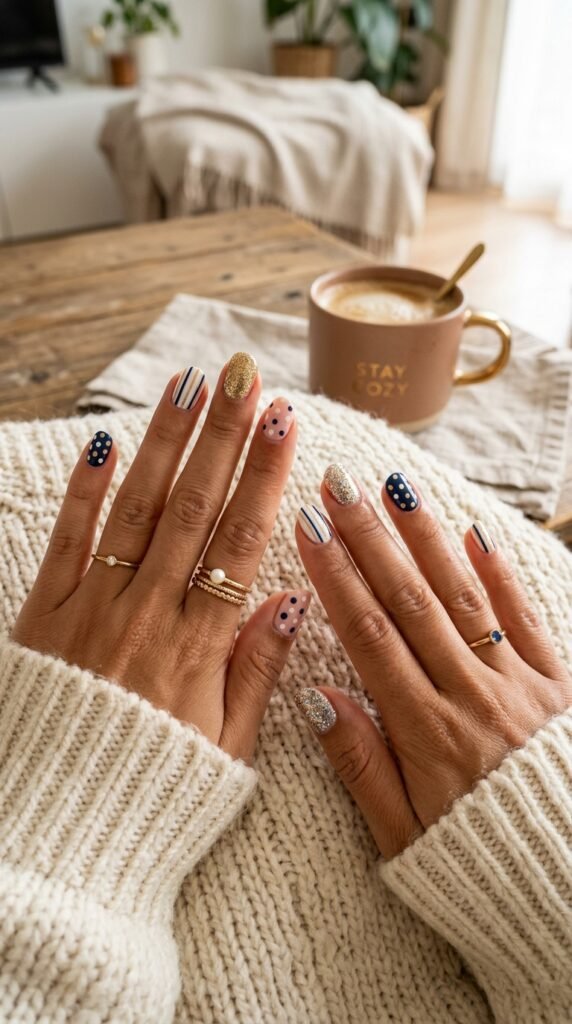
Easy Designs With Just a Few Colors
Even with only a handful of polishes, you can create fun and trendy nail art. Here are some beginner-friendly ideas:
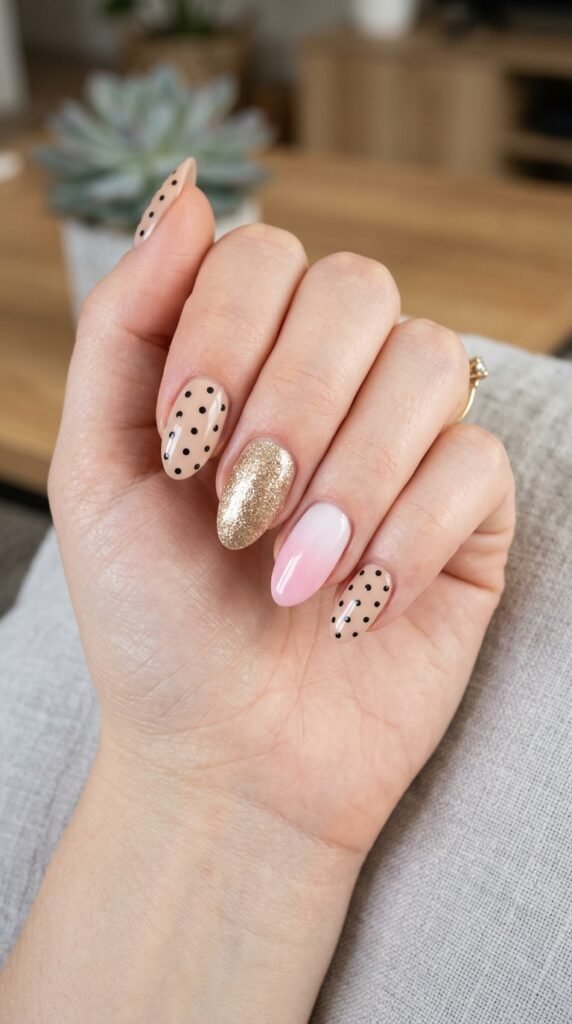
1. Polka Dots
- Use a dotting tool, toothpick, or the end of a bobby pin.
- Apply dots in a contrasting color over your base coat.
- Try uniform spacing for a classic look or random dots for a playful vibe.
2. Stripes
- Use thin nail tape or a steady hand to paint stripes.
- Vertical stripes make nails look longer; horizontal stripes are cute and casual.
- Mix a metallic shade with a neutral for a chic twist.
3. Accent Nails
- Paint all nails a neutral shade and pick one or two nails for a pop of bold color or glitter.
- You can also use a simple heart, star, or triangle on the accent nail.
4. Gradient / Ombre
- Use a makeup sponge to dab two colors together on the nail.
- Start with your lightest color at the cuticle and blend into the darker color toward the tip.
- Seal with a top coat for a smooth finish.
Tip: Don’t worry about perfection—nail art is supposed to be fun and expressive!
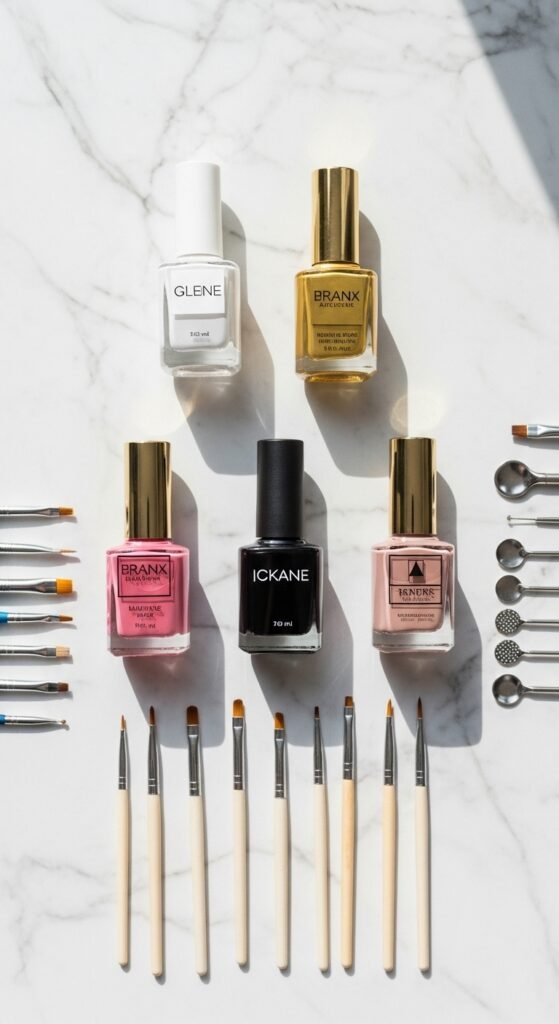
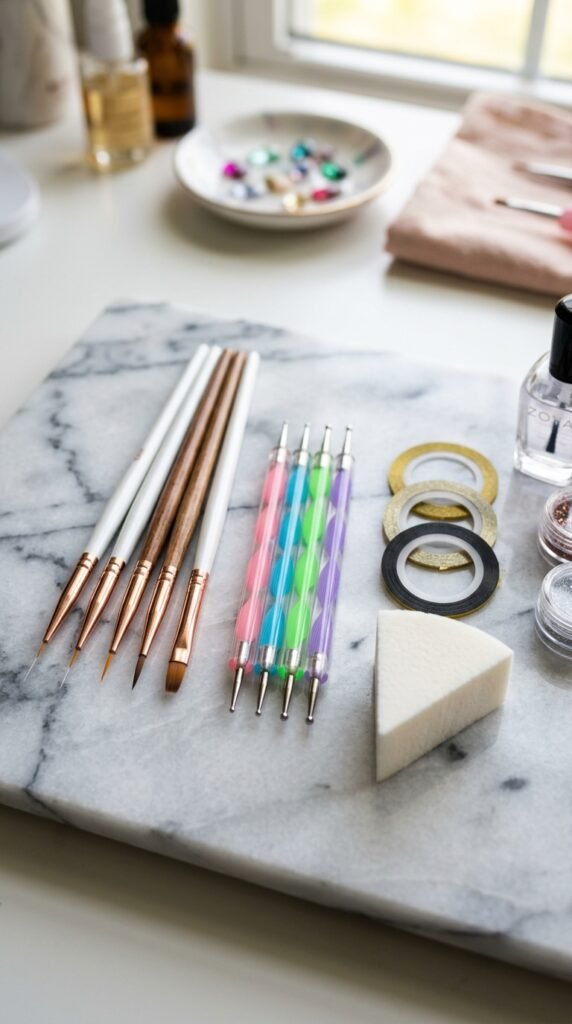
Tools That Make a Big Difference
Even with just a few colors, the right tools can elevate your designs:
- Dotting tools for polka dots, flowers, or tiny details.
- Thin nail brushes for stripes, lines, or geometric shapes.
- Tape or stickers for clean edges and patterns.
- Sponge for gradient effects.
Tip: You don’t need a huge collection. Even household items like toothpicks, bobby pins, or a small brush can double as tools.
Finishing Touches: Protect Your Art
Once your design is complete, the finishing steps will help it last longer:
- Top coat: A clear glossy or matte top coat seals your design.
- Quick-dry drops: Optional, but great for speeding up the process.
- Moisturize: Apply cuticle oil to keep nails and skin healthy.
Tip: Reapply a top coat every 2–3 days to prevent chipping and keep your design vibrant.
Final Thoughts
Creating beautiful nail art doesn’t have to be complicated or color-heavy. With just a few shades, a bit of creativity, and simple tools, you can have salon-worthy nails at home. Experiment, mix patterns, and most importantly—have fun with it.
Save this guide for later, and next time you pick up your nail polishes, see how far a few colors can take you!

Leave a Reply