
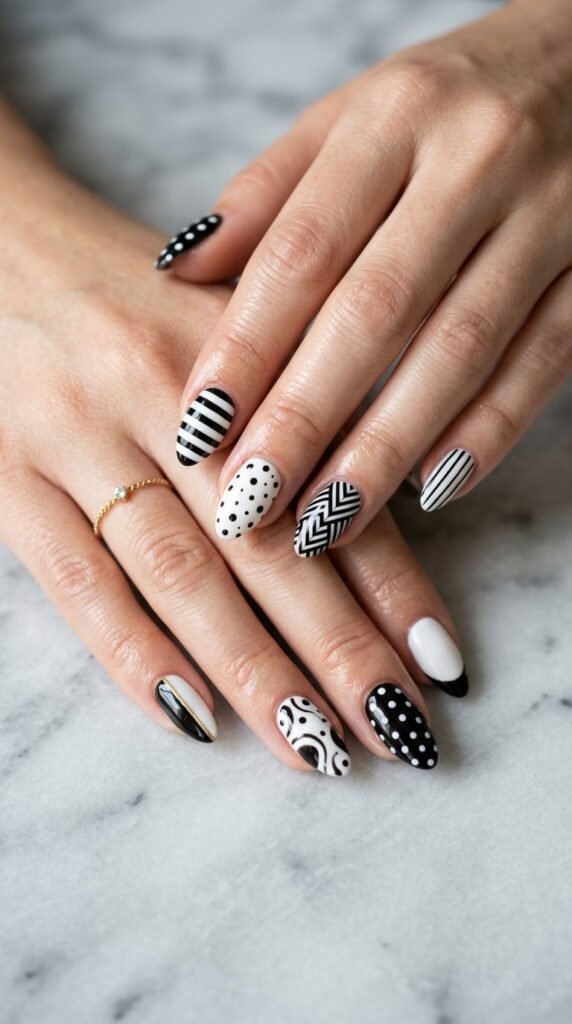
Black and white nail art is the ultimate combo of chic and timeless. Whether you love minimalist styles or bold graphic designs, this classic color duo lets you create salon-worthy nails right at home. The best part? You don’t need to be a professional to get stunning results.
In this beginner-friendly guide, you’ll learn exactly how to do black and white nail art step by step, plus pro tips to make your manicure look clean and polished.
Why Black and White Nail Art Is So Popular
Before we jump into the how-to, let’s talk about why this style never goes out of trend.
Black and white nails are loved because they are:
- Timeless and classy
- Easy to match with any outfit
- Perfect for both short and long nails
- Beginner-friendly
- Highly customizable
From modern minimalism to bold geometric looks, this combo works for every vibe.
Tools and Supplies You’ll Need
Getting the right tools makes the process much smoother.
Basic nail art kit:
- Black nail polish
- White nail polish
- Base coat
- Top coat
- Thin nail art brush or dotting tool
- Nail polish remover
- Cotton swabs or pads
- Optional: striping tape or nail stickers
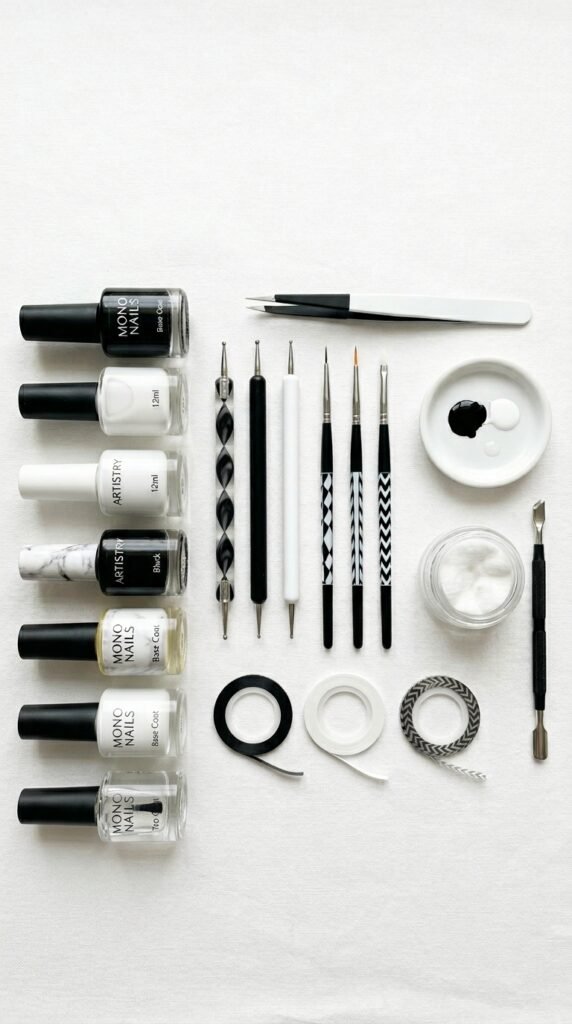
Pro tip: Choose highly pigmented polishes. Cheap watery formulas make designs look messy.
Step-by-Step: How to Do Black and White Nail Art
Follow these simple steps for clean, professional-looking nails.
Step 1: Prep Your Nails Properly
Good prep is the secret to long-lasting nail art.
Do this first:
- Remove old polish
- Trim and file nails
- Push back cuticles
- Buff nail surface lightly
- Wash and dry hands
Then apply a thin base coat and let it dry completely.
✔ Smooth nails = smoother designs
✔ Base coat = protects from staining
Step 2: Apply Your Base Color
Decide your main background color.
Popular choices:
- White base for bold black designs
- Black base for dramatic white art
- Accent nails with opposite colors
Apply 1 to 2 thin coats and let them dry fully. Patience here prevents smudging later.
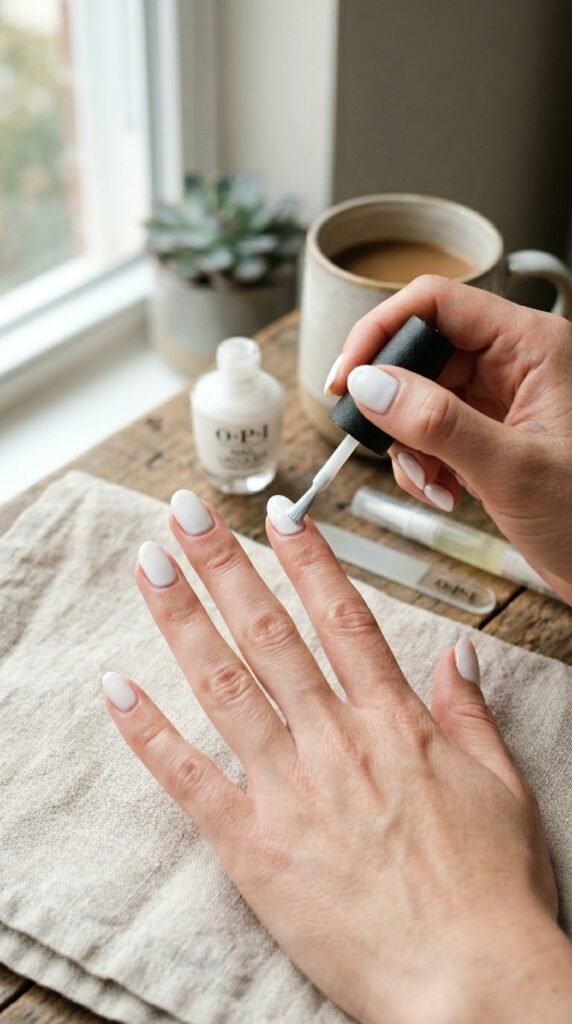
Important: Thick coats = bubbling and streaks.
Step 3: Create Simple Beginner Designs
If you’re new, start with easy patterns that still look stylish.
Easy Design Ideas
• Polka dots
- Dip dotting tool in polish
- Gently press onto nail
- Keep spacing even
• Minimal stripes
- Use a thin brush
- Draw straight vertical or horizontal lines
- Keep pressure light
• Accent nail
- Paint one nail opposite color
- Add small dots or lines
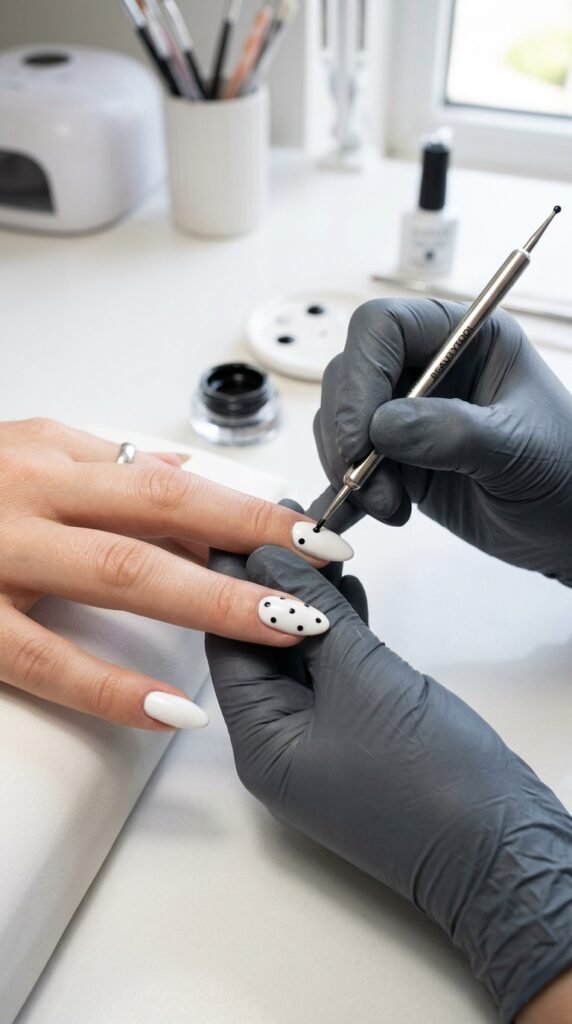
Beginner tip: Rest your painting hand on a table to reduce shaking.
Step 4: Try Trendy Black and White Patterns
Ready to level up? These designs look Pinterest-worthy but are still doable at home.
Popular Stylish Patterns
✔ French tip twist
- White or black tip
- Add thin opposite-color outline
✔ Half-moon design
- Paint half the nail black
- Leave the other half white
- Use tape for clean lines
✔ Abstract swirls
- Use thin brush
- Create soft curved lines
- Mix black and white
✔ Checkerboard
- Draw grid lines
- Fill alternating squares
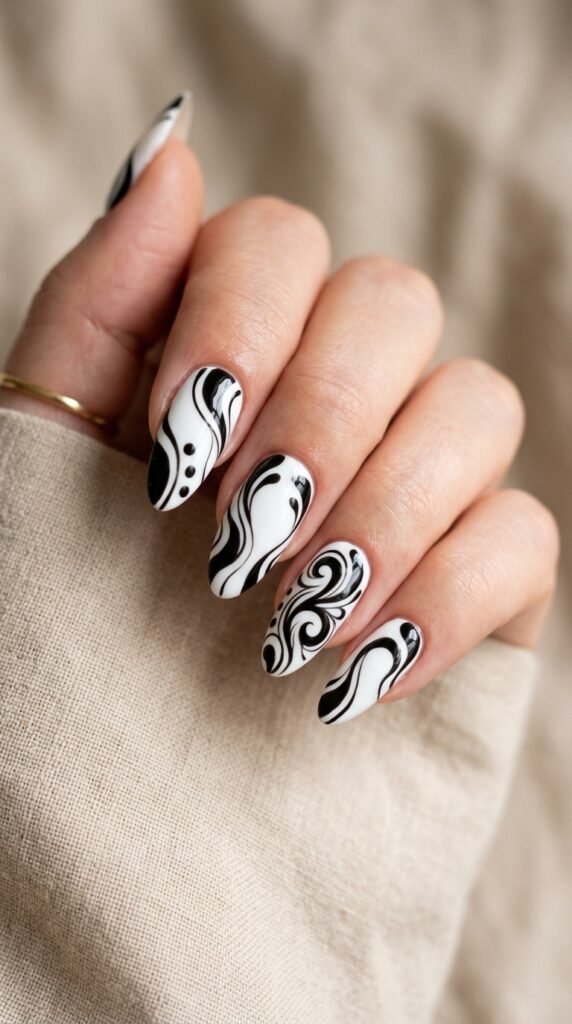
Pro secret: Imperfect abstract designs often look more modern than perfectly rigid ones.
Step 5: Clean Up the Edges
This is what separates amateur from salon-quality nails.
Quick cleanup method:
- Dip small brush in remover
- Gently trace around cuticles
- Remove any smudges
Take your time here. Clean edges make a HUGE difference.
Step 6: Seal with a Glossy Top Coat
Never skip this step.
Top coat benefits:
- Adds shine
- Prevents chipping
- Smooths design texture
- Makes nails look professional
Apply one even layer and let dry fully.
Pro Tips for Perfect Black and White Nails
Want that Instagram-worthy finish? Keep these in mind:
Do:
- Use thin layers
- Let each layer dry fully
- Work in good lighting
- Use quality polish
Avoid:
- Rushing between coats
- Overloading the brush
- Painting on oily nails
- Skipping base or top coat
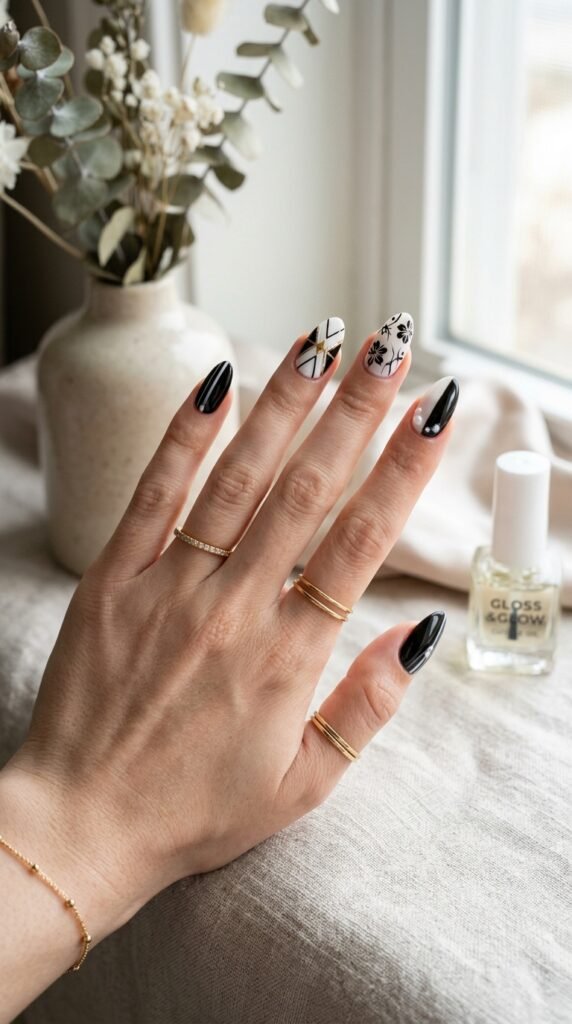
Easy Design Ideas to Try First
If you’re wondering where to start, try these beginner favorites:
- Black dots on white base
- White lines on black nails
- Yin-yang accent nail
- Minimal corner stripe
- Matte black with glossy white art
Start simple, then build your skills.
Final Thoughts
Black and white nail art proves you don’t need dozens of colors to create stunning nails. With just two polishes and a little patience, you can design everything from minimalist chic to bold graphic looks right at home.
Save this guide for later and try your first black and white nail art today!

Leave a Reply