
Nail art doesn’t have to mean splurging on fancy kits or endless trips to the salon. Believe it or not, some of the most creative designs can be done with items you already have at home. From kitchen tools to office supplies, everyday objects can help you turn your nails into tiny canvases. Ready to give your fingertips a fun makeover? Let’s dive in!
Why Household Nail Art Is Perfect
Before we jump into the techniques, let’s talk about why this is such a fun approach:
- Affordable: No need for expensive brushes or nail kits.
- Accessible: You likely have everything in your home already.
- Creative freedom: The possibilities are endless when you think outside the polish bottle.
- Quick fixes: Great for last-minute parties or photo shoots.
Household items can help you create everything from geometric patterns to glittery textures without breaking the bank.
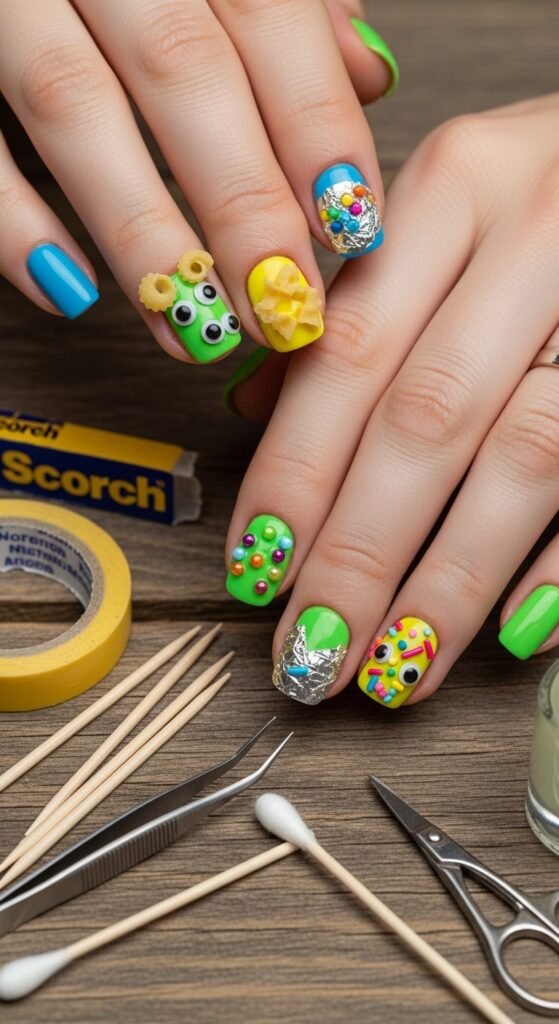
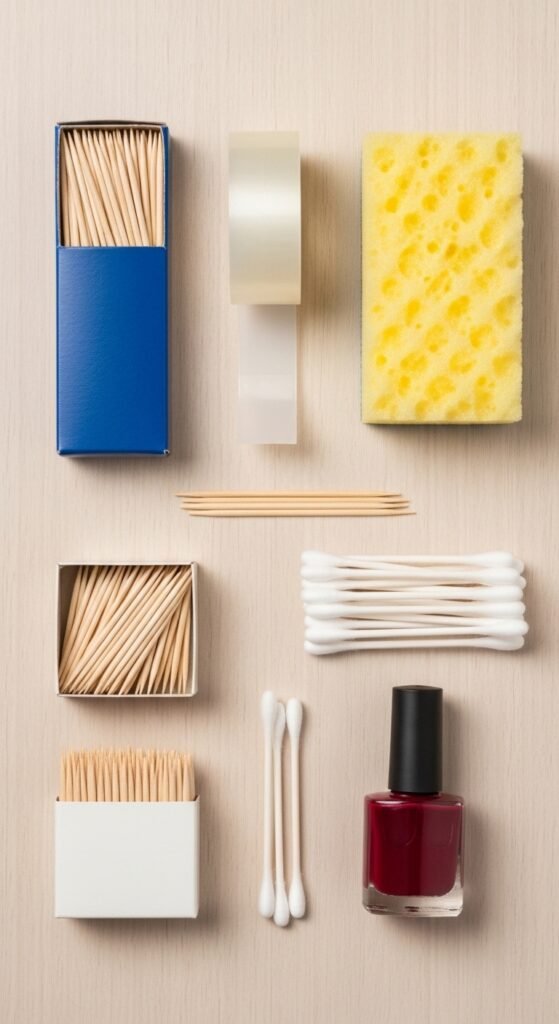
Tools You Can Use Around the House
Here’s a quick rundown of everyday items that can double as nail art tools:
- Toothpicks or bobby pins: Perfect for dots, tiny lines, or swirls.
- Tape or sticky notes: Ideal for clean stripes and geometric shapes.
- Sponge pieces: Great for gradient or ombré effects.
- Cotton swabs: Excellent for smudging or blending colors.
- Paper clips: Can make unique patterns or minimalist designs.
- Old makeup brushes: Work well for painting delicate details.
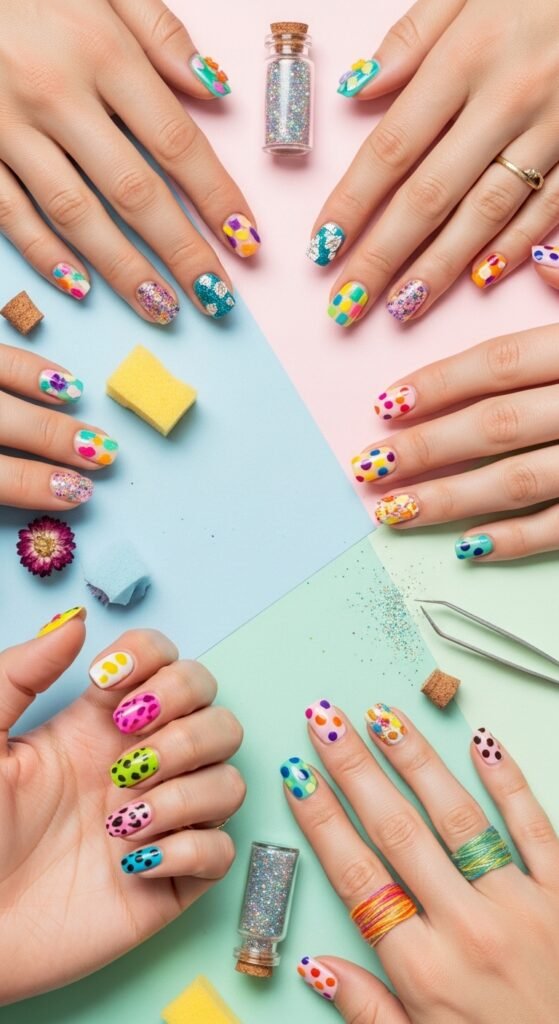
Step-by-Step Nail Art Ideas
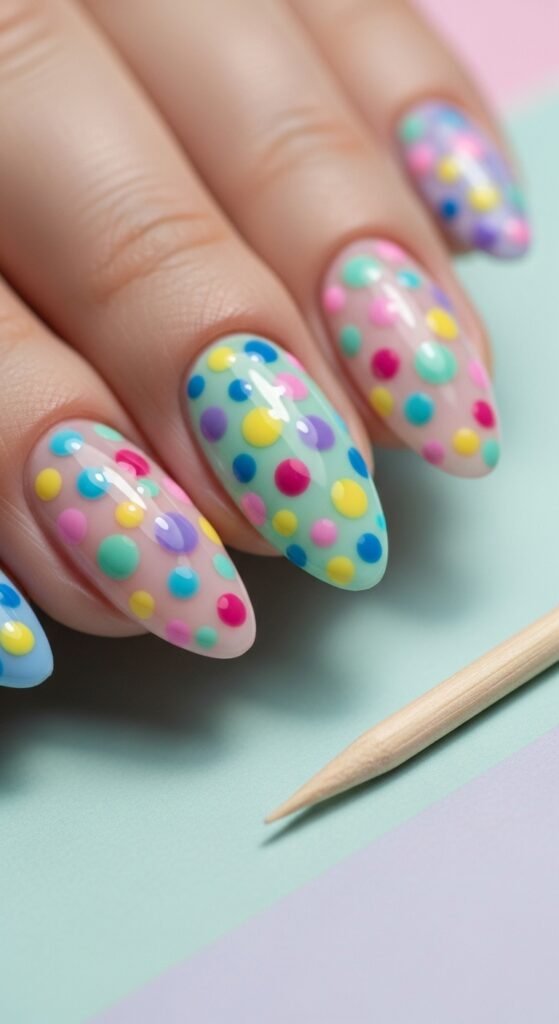
1. Polka Dot Perfection
Polka dots are simple but striking.
What you need:
- Nail polish
- Toothpick or bobby pin
Steps:
- Apply a base color and let it dry completely.
- Dip the toothpick into a contrasting polish.
- Lightly dot the polish onto your nails in a pattern you like.
- Seal with a topcoat for a glossy finish.
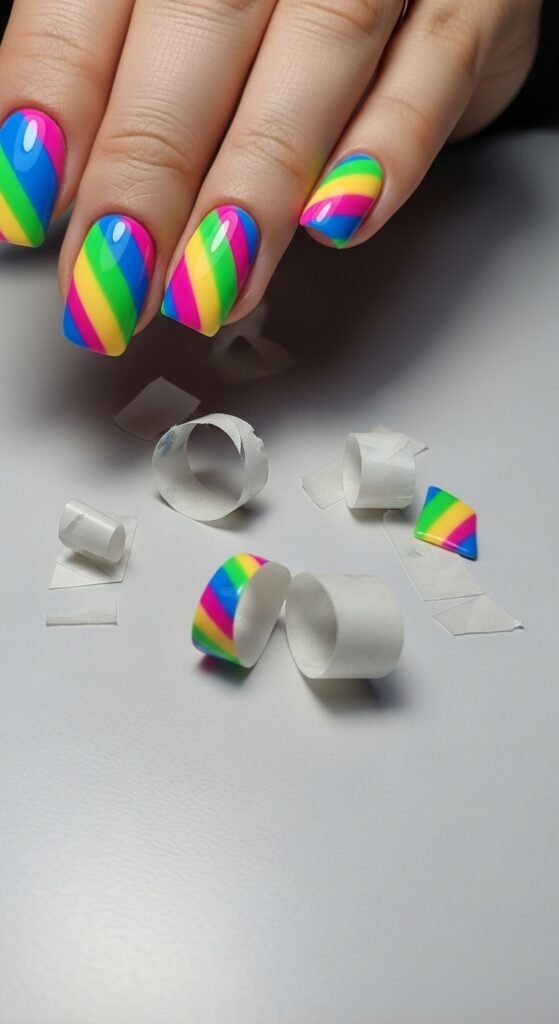
2. Stripes With Tape
Straight lines don’t have to be tricky.
What you need:
- Nail polish
- Tape or sticky notes
Steps:
- Paint your nails with a base color.
- Once dry, cut thin strips of tape and place them on your nails where you want stripes.
- Paint over with another color.
- Remove the tape while the polish is still slightly wet.
Pro tip: For thinner lines, fold the tape in half lengthwise.
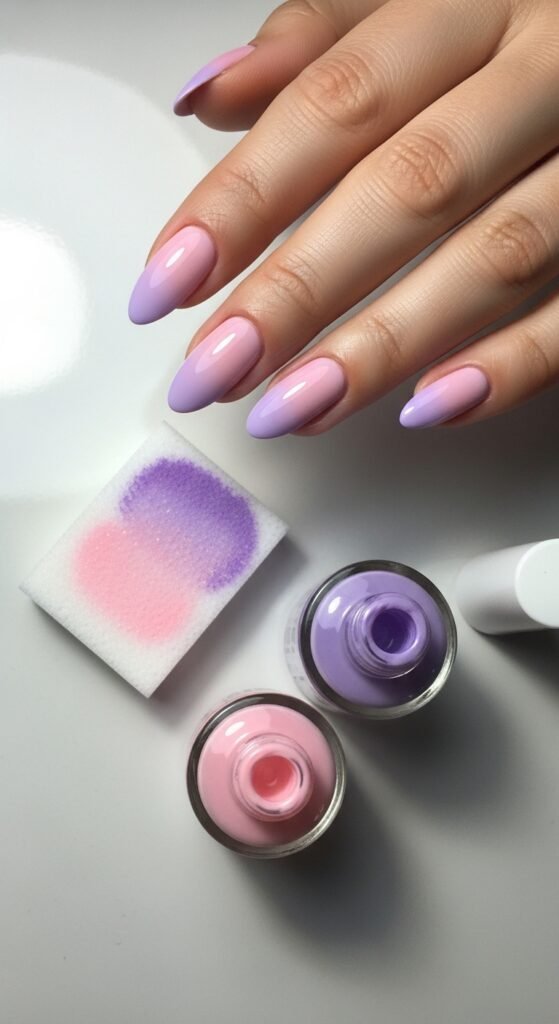
3. Gradient Glam With a Sponge
Create an ombré effect using a simple sponge.
What you need:
- Nail polish in two or more shades
- Small makeup sponge or kitchen sponge piece
Steps:
- Apply a light base color.
- On a piece of foil, paint stripes of your chosen colors next to each other.
- Dab the sponge onto the polish, then gently press it onto your nail.
- Repeat until the colors blend smoothly.
- Finish with a topcoat to smooth out the texture.
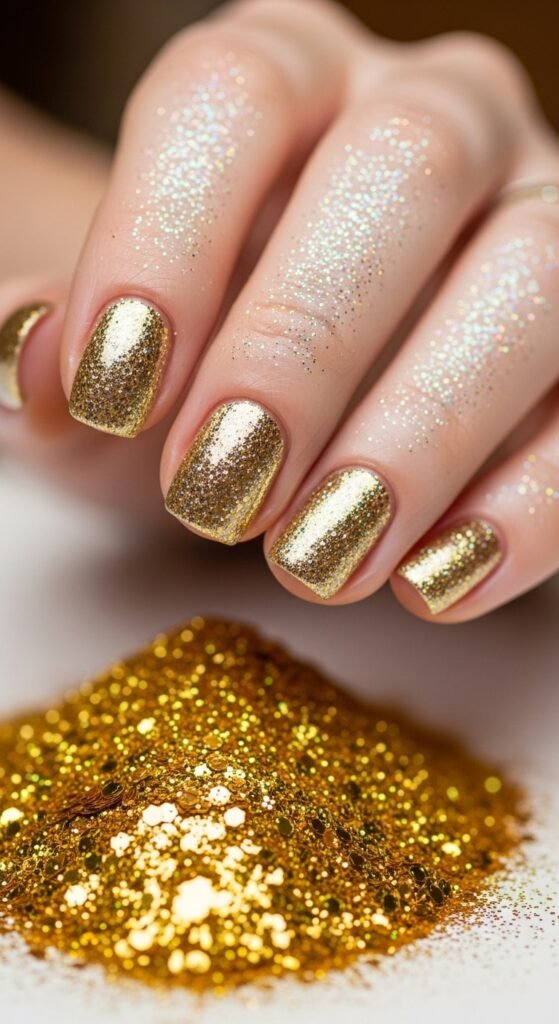
4. Glitter Without a Brush
Who says you need a glitter nail polish?
What you need:
- Loose glitter from crafts or old makeup
- Clear topcoat
- Small spoon or paper
Steps:
- Paint nails with a base color.
- Apply a clear topcoat where you want glitter.
- Sprinkle glitter carefully using a spoon or your fingers.
- Press lightly and let dry.
- Seal with another layer of clear polish.
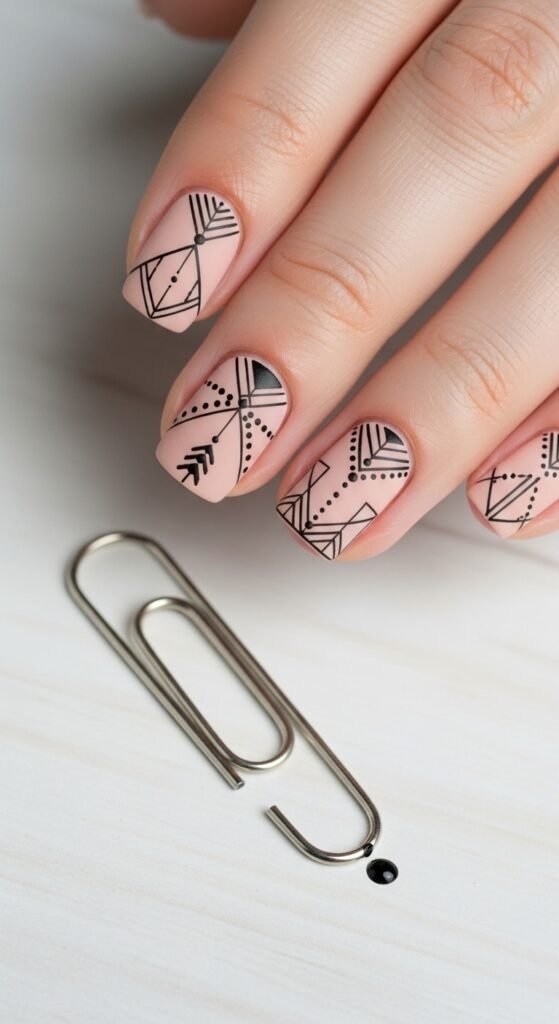
5. Minimalist Designs With Paper Clips
Yes, office supplies can be chic!
What you need:
- Nail polish
- Paper clips, bent into small shapes
Steps:
- Apply a base color and let it dry.
- Use the paper clip tip to drag a small line, heart, or geometric shape in another color.
- Seal with topcoat for longevity.
Quick Tips for Household Nail Art
- Always start with clean nails and a base coat.
- Patience is key: let layers dry to avoid smudges.
- Mix and match techniques for a custom look.
- Keep a topcoat handy to protect your designs and make them last longer.
Nail art doesn’t need to be complicated or expensive. With just a few items from around your house, you can create gorgeous, Instagram-ready nails that are completely unique. Experiment, have fun, and let your fingertips tell your story!
Save this guide for your next DIY nail day—it’s time to turn ordinary household items into extraordinary nail designs.

Leave a Reply