
Long nails are like tiny canvases just waiting to show off your creativity. Whether you love elegant minimal designs or bold statement looks, nail art for long nails lets you express your personality in the most stylish way. The best part? You do not need to be a professional to create stunning designs at home.
In this guide, you will learn simple, beginner-friendly steps to create gorgeous nail art that looks salon-level.
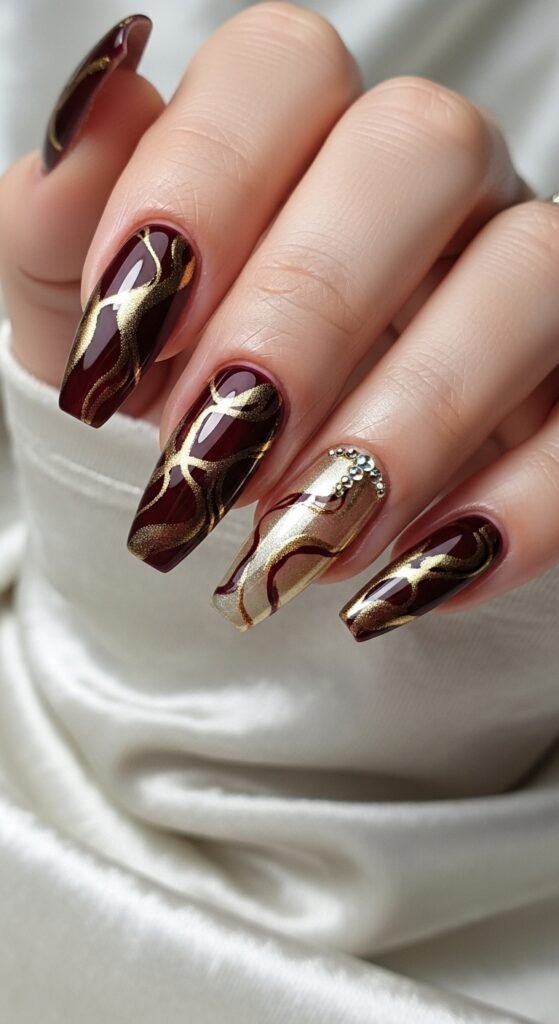
Why Long Nails Are Perfect for Nail Art
Long nails give you more space to experiment with designs. This makes detailed patterns, gradients, and embellishments much easier to apply.
Benefits of nail art on long nails:
- More room for creativity
- Better visibility of designs
- Easier placement of gems and decals
- More dramatic and eye-catching results
If you have been growing your nails, now is the perfect time to start decorating them.
Step 1: Prep Your Nails Properly
Great nail art always starts with proper preparation. Skipping prep is the biggest mistake beginners make.
Follow these prep steps:
- Remove old polish completely
- Trim and shape your long nails
- Gently push back cuticles
- Buff the nail surface lightly
- Wash and dry hands thoroughly
- Apply a protective base coat
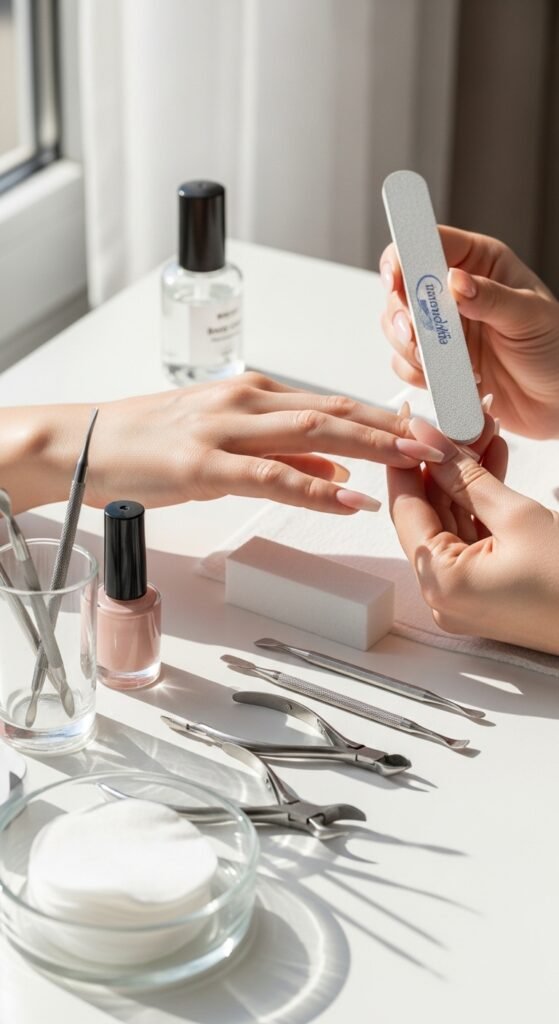
Pro tip: Almond, coffin, and stiletto shapes look especially stunning with nail art.
Step 2: Choose Your Nail Art Design
Before you start painting, decide on your design. Long nails allow both simple and complex styles.
Beginner-friendly nail art ideas:
- French tips with a twist
- Ombre gradients
- Minimal dot patterns
- Glitter accent nails
- Floral designs
- Chrome or metallic finishes
If you are new, start simple. You can always level up later.
Step 3: Apply Your Base Color
Your base color sets the mood for the entire design. Apply it carefully for a smooth finish.
How to apply perfectly:
- Apply thin, even coats
- Let each layer dry fully
- Usually apply 2 coats
- Clean edges with a small brush
Popular base colors for long nails:
- Nude for elegant looks
- Milky white for minimal styles
- Black for bold nail art
- Pastels for soft feminine vibes
- Deep red for classic glam
Take your time here. A smooth base makes everything look more professional.
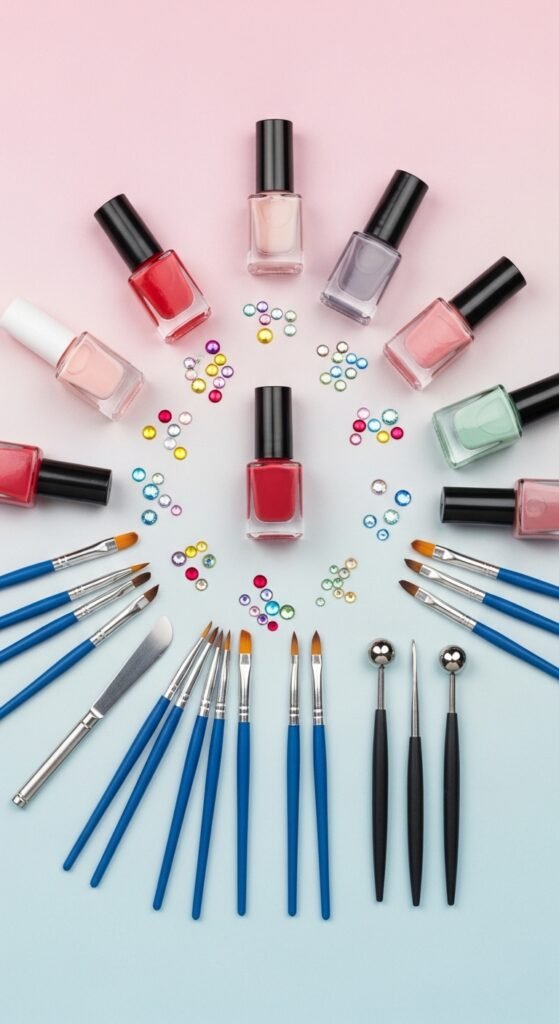
Step 4: Create the Nail Art Design
Now comes the fun part. Work slowly and build your design step by step.
Basic techniques you can try:
Dotting Technique
- Dip a dotting tool in polish
- Gently place dots on the nail
- Create flowers or patterns
Striping Technique
- Use a thin nail brush
- Draw clean lines or swirls
- Great for abstract designs
Glitter Accent
- Apply glitter on one nail
- Or create glitter tips
- Seal with top coat
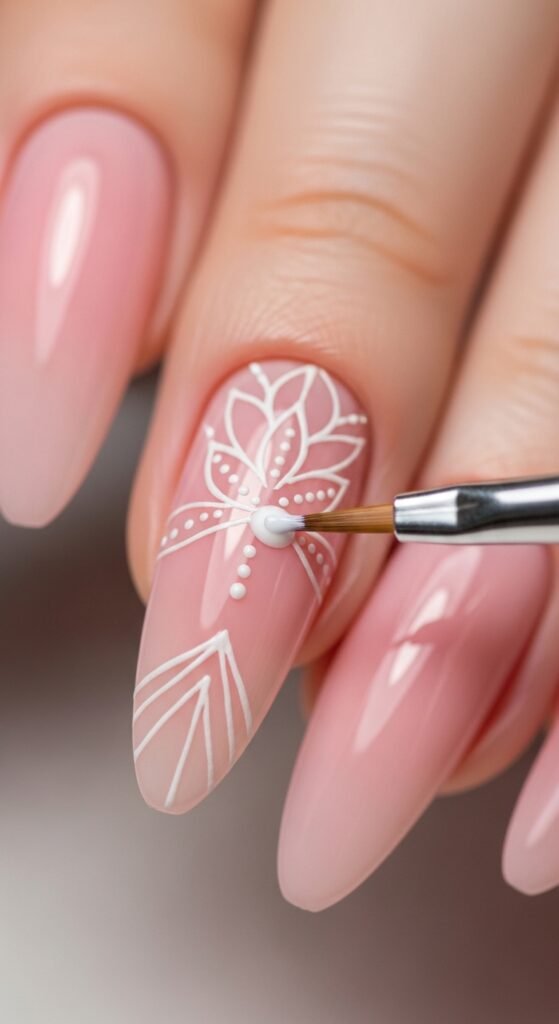
Beginner tip: Rest your painting hand on a table to avoid shaking.
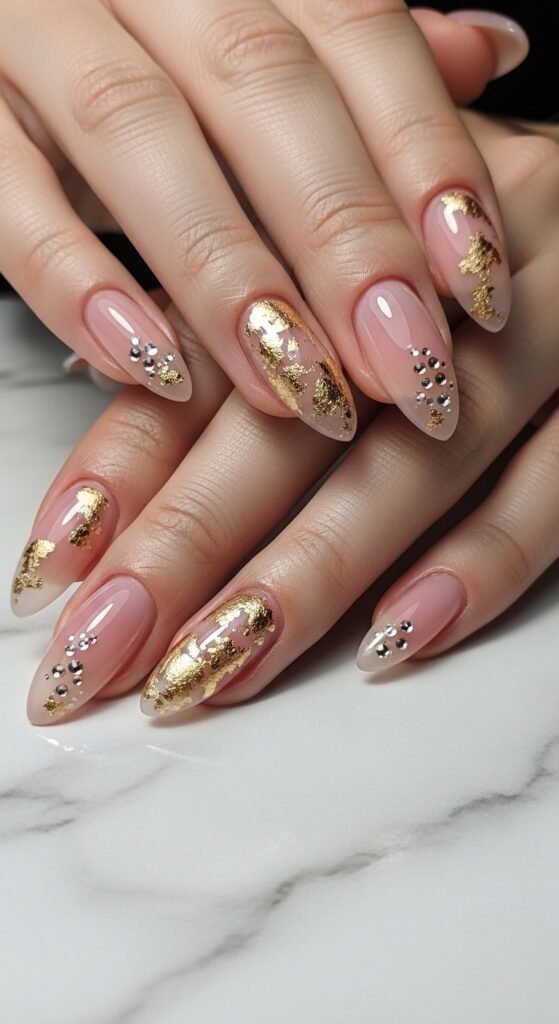
Step 5: Add Gems or Stickers (Optional)
Long nails look extra glamorous with small embellishments.
Popular add-ons:
- Rhinestones
- Nail stickers
- Foil flakes
- Pearls
- 3D charms
Apply them while the polish is slightly tacky or use nail glue for better hold.
Do not overdo it. One or two accent nails often look more elegant than fully covered nails.
Step 6: Seal Everything With Top Coat
Never skip the top coat. It protects your design and adds that salon shine.
Benefits of top coat:
- Prevents chipping
- Adds gloss or matte finish
- Smooths the nail surface
- Extends wear time
Apply one generous but controlled layer and let it dry completely.
Common Mistakes to Avoid
Even simple nail art can go wrong if you rush. Watch out for these mistakes:
- Applying thick polish layers
- Not letting coats dry
- Skipping base coat
- Overcrowding the design
- Using too much glue for gems
- Forgetting the top coat
Patience is your secret weapon.
Easy Nail Art Ideas for Beginners
If you want quick wins, try these first:
- Nude base with white tips
- Pink nails with tiny hearts
- Glitter fade from tips
- Minimal black lines on nude
- One accent nail with gems
These look impressive but are very beginner-friendly.
Final Thoughts
Creating nail art for long nails is easier than it looks and incredibly fun once you start. With the right prep, simple tools, and a bit of patience, you can achieve beautiful salon-style results right at home.
Save this guide for later and try your first long nail art design this week.

Leave a Reply