
Ever scroll past gorgeous nail designs and think, “I could never do that”? Here’s the secret: most cute nail art looks way harder than it actually is. With a few simple tools (and a little patience), you can create fun, stylish nails at home—even if you’ve never tried nail art before.
This guide breaks everything down into easy, stress-free steps. No fancy skills. No complicated tools. Just designs you’ll actually want to try.
Start With a Clean, Simple Base
Before you jump into designs, prep matters. A smooth base makes even the simplest nail art look polished.
Here’s what to do:
- Remove old polish completely.
- Gently shape your nails with a file.
- Push back cuticles (no cutting needed).
- Apply a clear base coat to protect your nails.
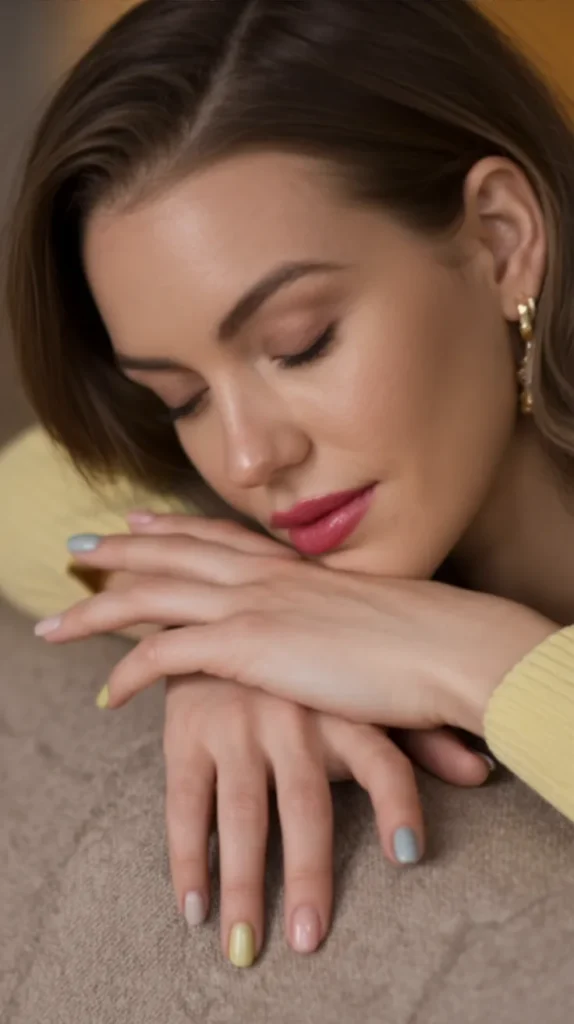
Stick with neutral or light colors at first. Soft pinks, milky whites, and pale beige shades are forgiving and make mistakes less noticeable.
Tip: Let each layer dry fully. Rushing is the fastest way to smudges.
Easy Dot Designs (Perfect for Beginners)
Dots are the easiest nail art trick in the book—and they always look cute.
You can make dots using:
- A bobby pin
- A toothpick
- The tip of a makeup brush
Dip your tool lightly into polish and tap gently onto the nail.
Popular dot ideas:
- One dot at the base of each nail
- Evenly spaced dots across the nail
- Tiny dots paired with a neutral base
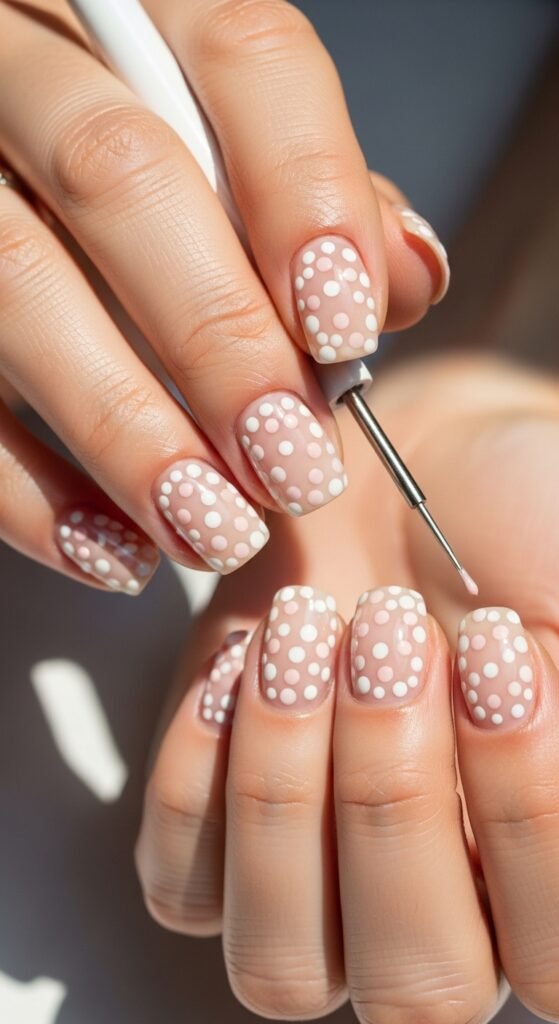
Keep your color palette simple. Two colors are more than enough.
Minimal Line Art That Looks Chic
Straight lines sound intimidating—but they don’t have to be perfect. Slight imperfections actually add charm.
Ways to create lines:
- Striping tape (great for clean edges)
- A thin nail brush
- A toothpick for short strokes
Try these ideas:
- One vertical line down the center
- Thin diagonal lines on accent nails
- Minimal French tips with a twist
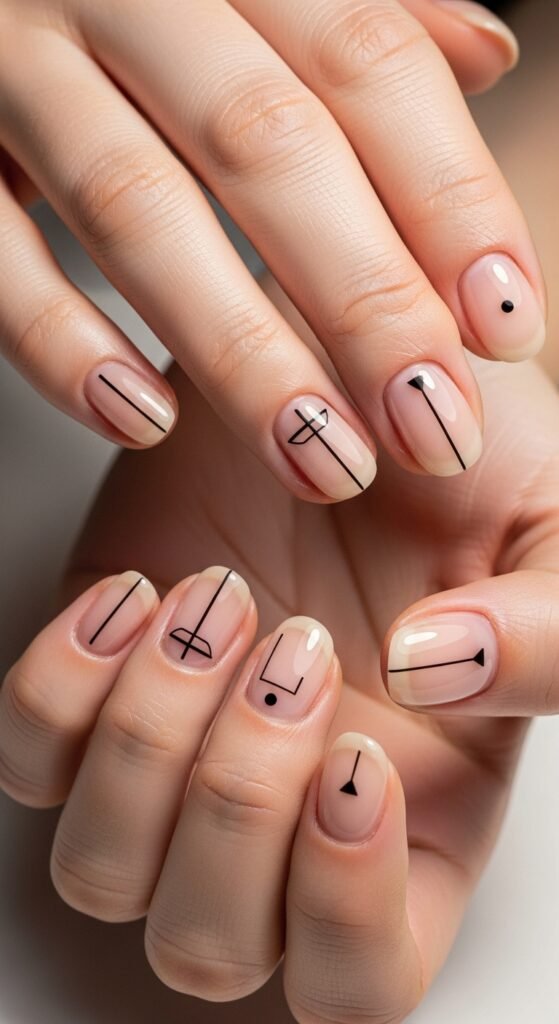
Pro tip: Rest your painting hand on a table to steady it.
Play With Color Blocking (No Precision Needed)
Color blocking is bold, fun, and surprisingly easy. You don’t need perfect symmetry for this style to work.
How to do it:
- Paint your base color and let it dry.
- Add blocks of a second color using tape or freehand.
- Seal with a glossy top coat.
Great color combos:
- Neutral base + soft pastel
- Beige + muted blue
- Cream + sage green
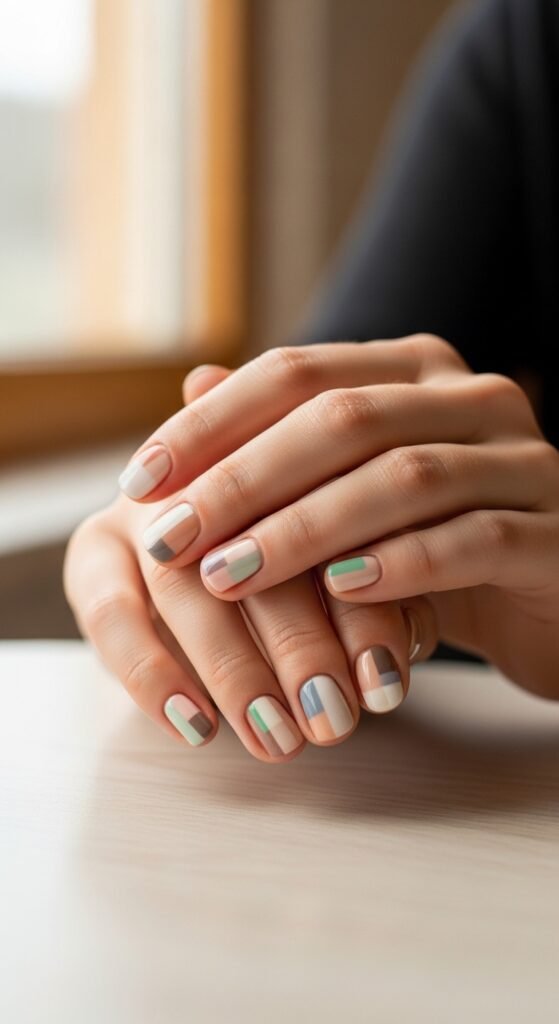
This style works especially well on short nails.
Use Stickers and Decals for Instant Art
If painting still feels tricky, stickers are your best friend. They give you instant nail art with almost no effort.
How to apply them:
- Place sticker on dry polish.
- Press down gently.
- Seal with a clear top coat.
Look for:
- Tiny stars
- Floral outlines
- Minimal symbols
Keep the rest of the nail simple so the sticker stands out.
Quick Marble Effect (Beginner Version)
You don’t need water bowls or complex techniques for a marble look.
Try this instead:
- Paint a light base color.
- Add two tiny drops of different polish colors.
- Use a toothpick to gently swirl.
Don’t overmix. A few soft swirls look more natural.

Every nail will look slightly different—and that’s the beauty of it.
Finish Strong With a Top Coat
A good top coat:
- Smooths out mistakes
- Adds shine
- Helps designs last longer
Apply it gently to avoid dragging your design. One slow, even stroke works best.
Bonus tip: Reapply a thin layer of top coat after two days to refresh the look.
Common Beginner Mistakes (And How to Avoid Them)
A few things to watch out for:
- Using too much polish on tools
- Not letting layers dry
- Trying too many designs at once
Keep it simple. One design per hand is plenty.
Final Thoughts
Easy nail art isn’t about perfection—it’s about having fun and experimenting. Start small. Try one new idea at a time. You’ll be surprised how quickly your confidence grows.
Save this guide for later, grab your polish, and give one design a try tonight

Leave a Reply